
I spent most of yesterday replying to the 500 emails I had an catching up with my blog reading, then I went upstairs and finished my entry for the Zakka Style Sew Along week 9, just in the nick of time! Before I show and tell though, go on over and enter this giveaway at Crafty Ady's, she's giving away one of her beautiful hand made journals, well worth it. I'd much rather you didn't as I want to win, but I promised Ady I'd tell you about it...
So, on with the bag making. Once again I'm joining in with the Zakka Style Sew Along, you can find the link up here and this week's host, Sara at Sew Sweetness here. You have to see her bag, it's gorgeous.

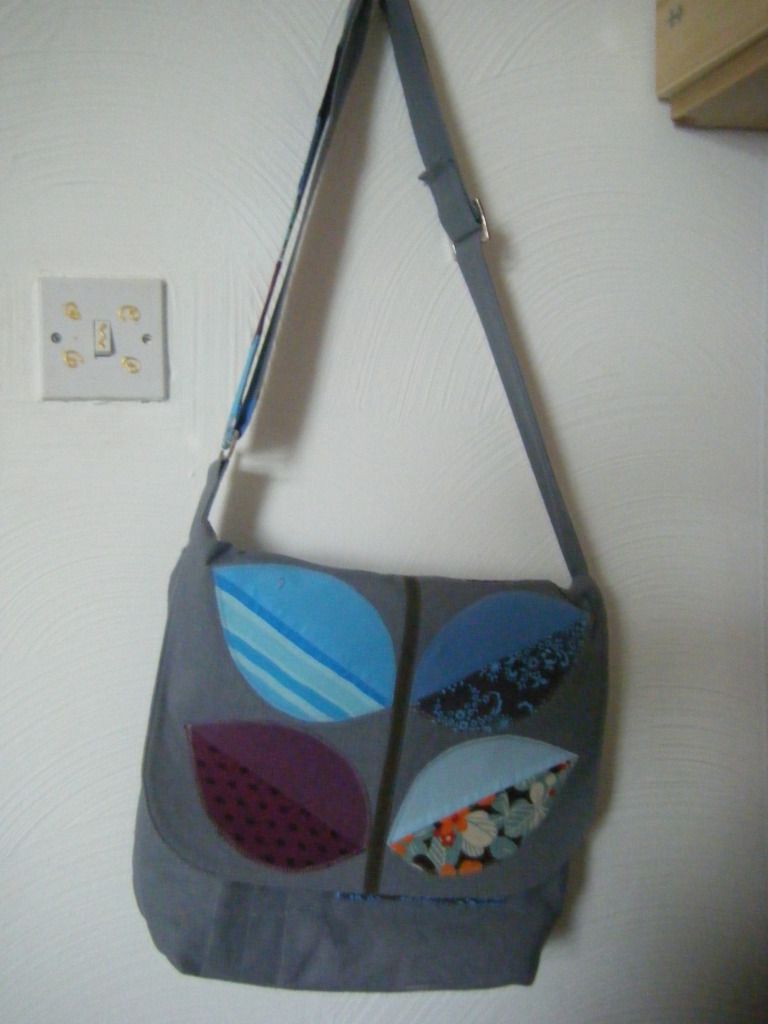
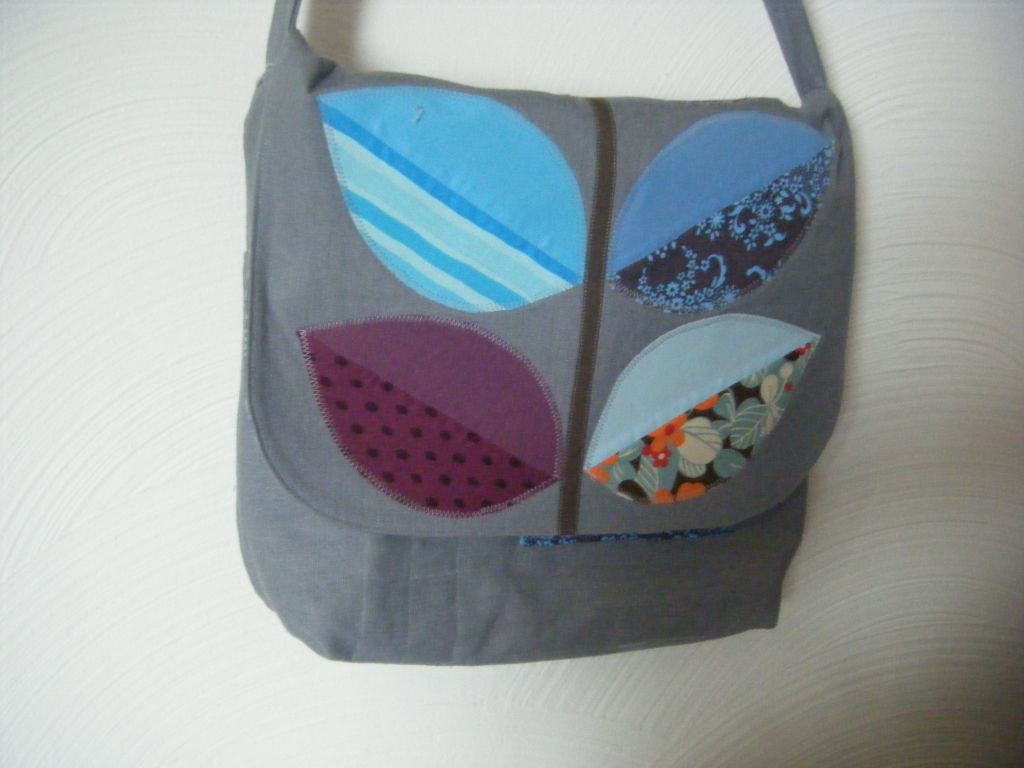
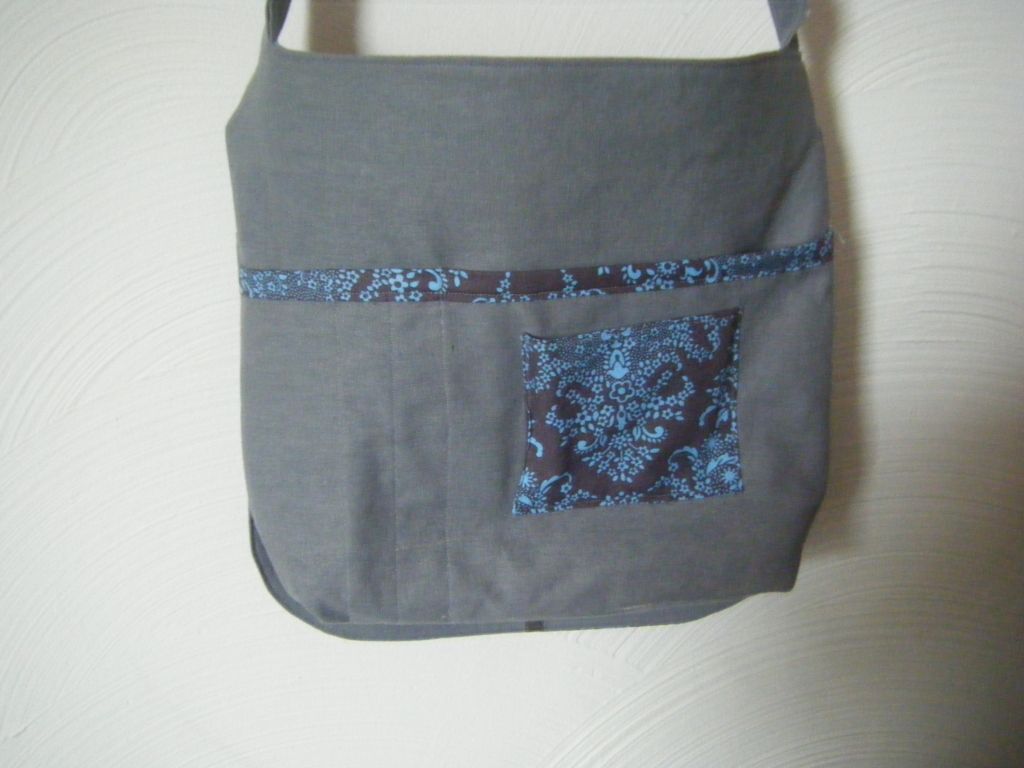
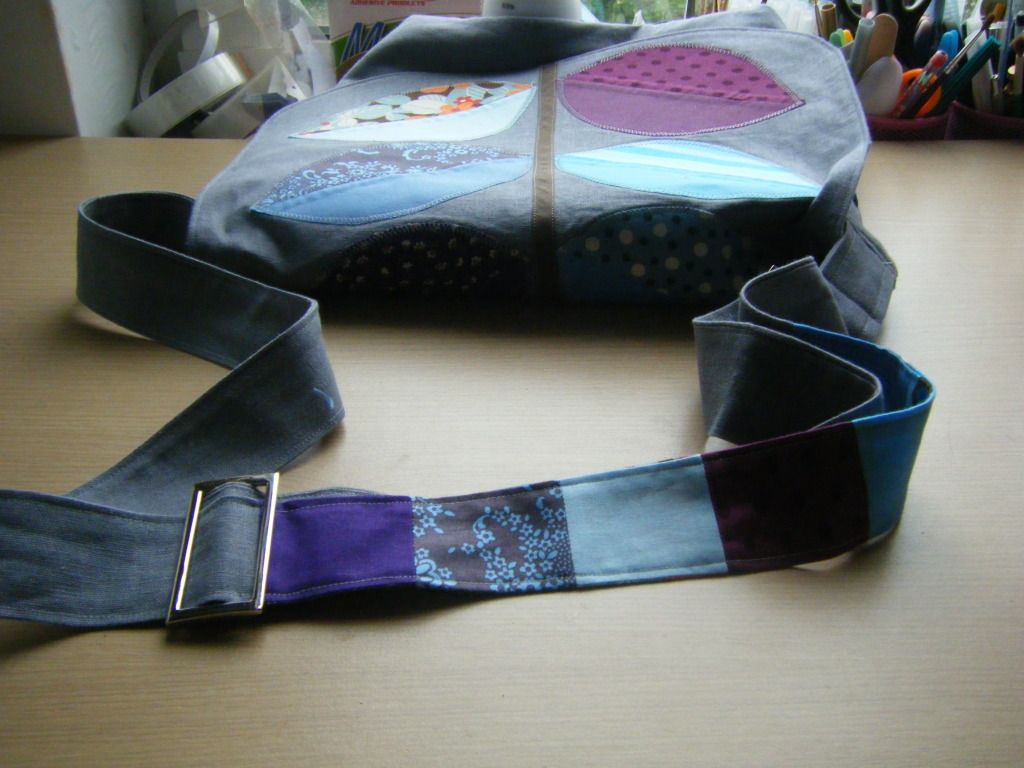
And here is mine. I've seen that some people changed the applique to the front, but I kept it as in the book as I liked it. I chose pairs of fabrics, one solid, one patterned for each leaf. I had a bit of a mishap at this stage. I'd used Heat and Bond on the back of the leaves, I bought it as the shop didn't have any Bondaweb... big mistake. When sewing round the leaves, I noticed that the machine kept skipping stitches. After 2 leaves, I finally realised why. There was a lump of glue on the needle. I unpicked the leaves, peeled off the glue and started again. I had to stop about every 10 stitches to clean the needle. Appliqueing the leaves took FOREVER!
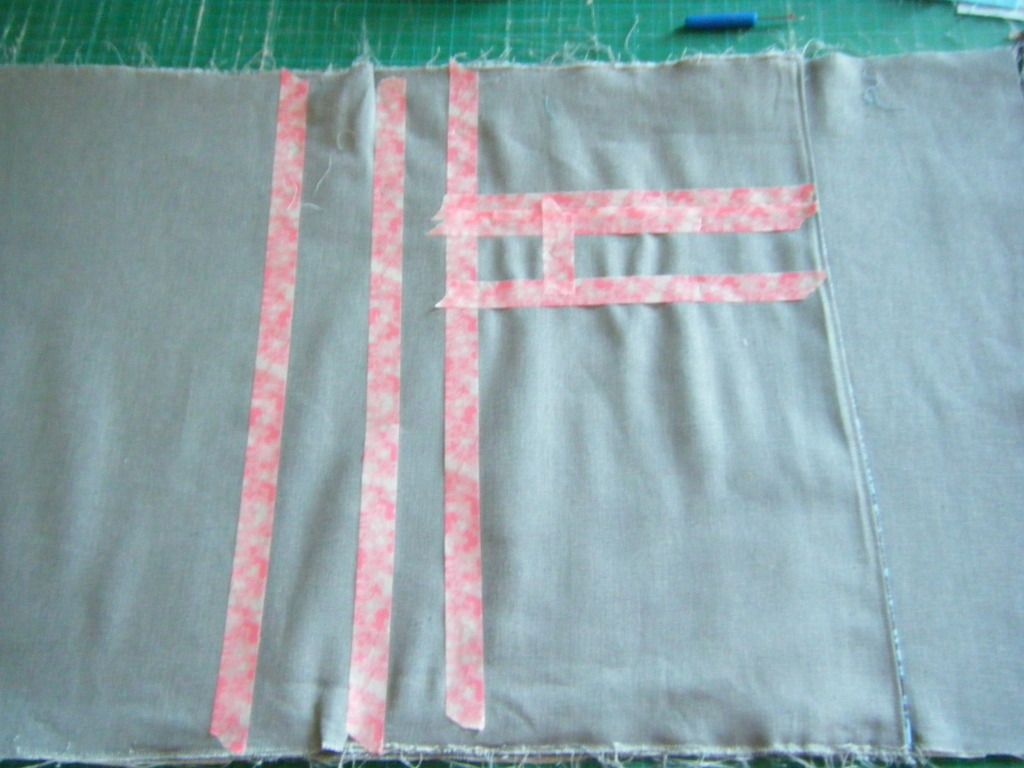
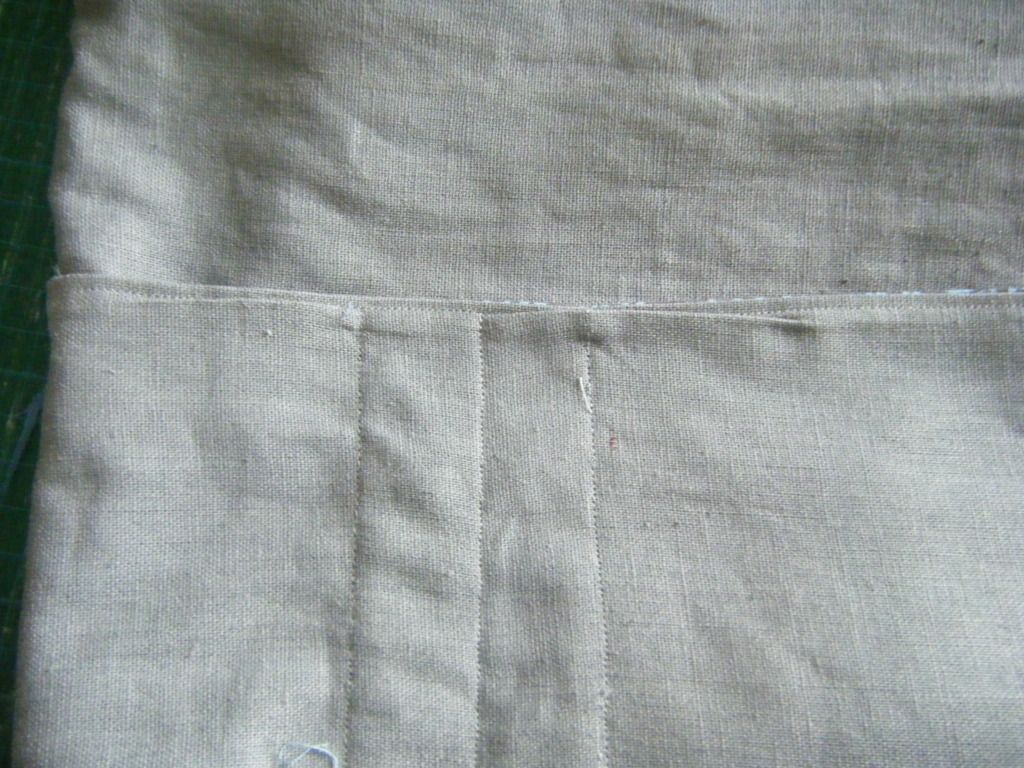
One of the first instructions was to sew the pocket piece for the front and back. Not wanting to use my fade-away pen as I knew I'd want to iron the piece, I used washi tape. It works quite well!
I'm not entirely sure what happened, but the material kind of gathered as I sewed. This little baby ended up on the front. See the tucks? I had to fix it. Unfortunately I didn't really notice until I'd sewn the bag shell up, but I decided I couldn't live with it and so I unpicked the sides half way down, unpicked the rows of stitching you see, and bound the top with the lining fabric. I just wish I'd done it before I sewed the sides of the bag up!
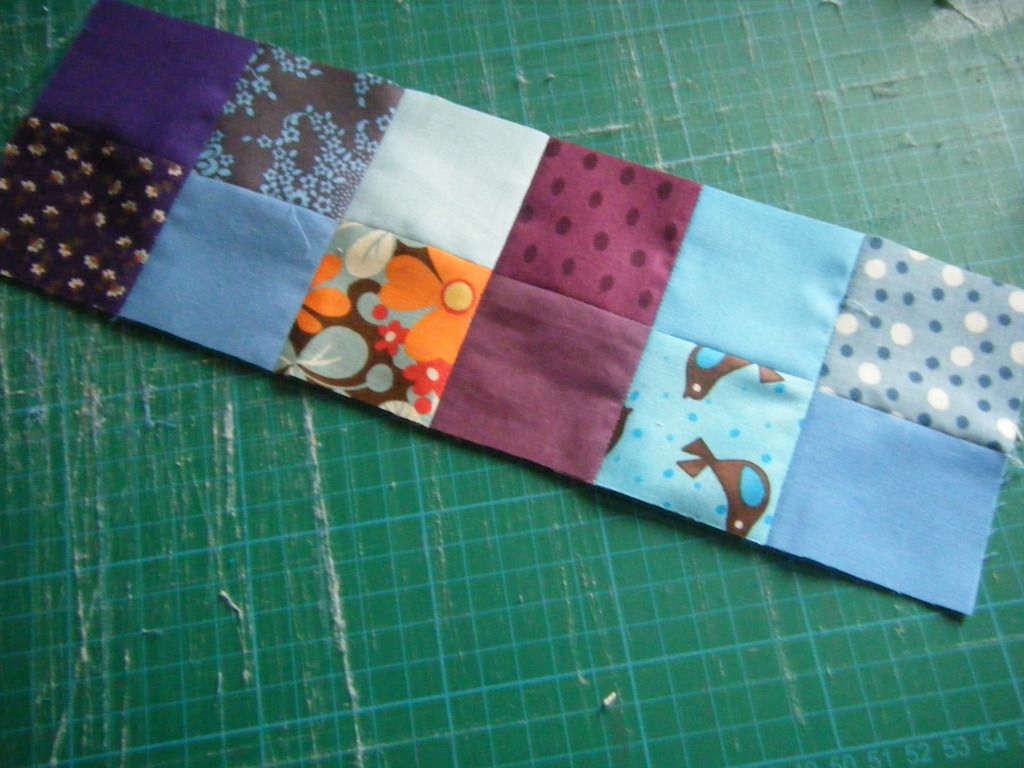
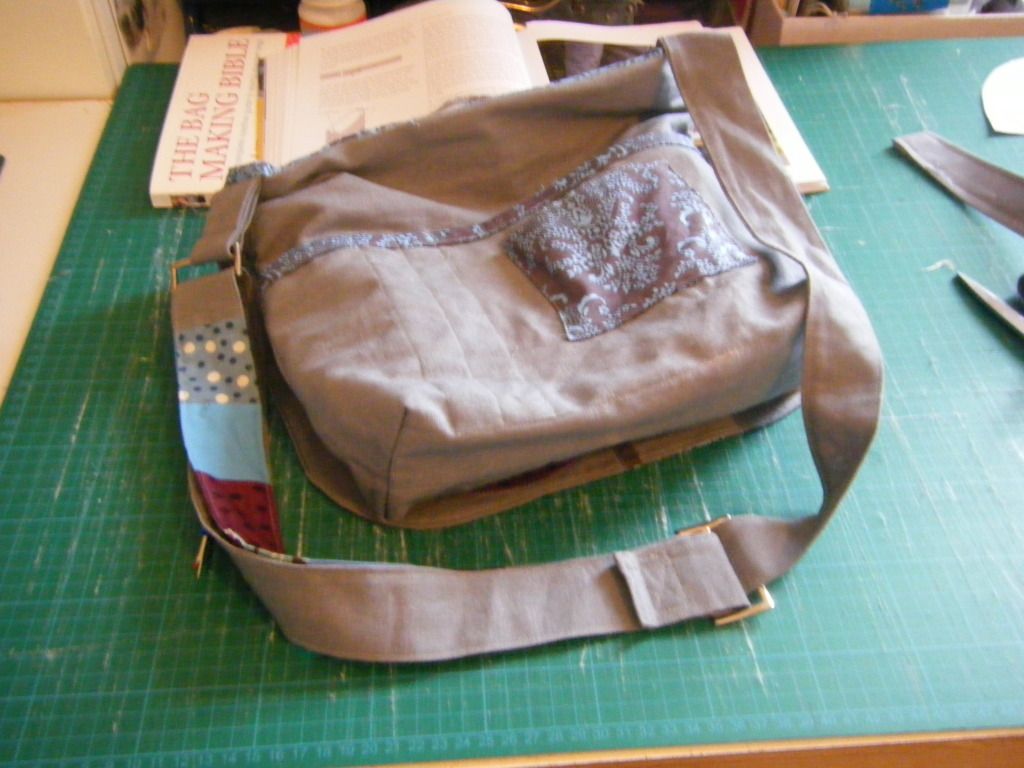
I didn't have a piece of linen long enough for the strap, so I added a piece of patchwork to the middle of a couple of strips of linen. I didn't think it through properly and you only see one of columns of patchwork at a time!
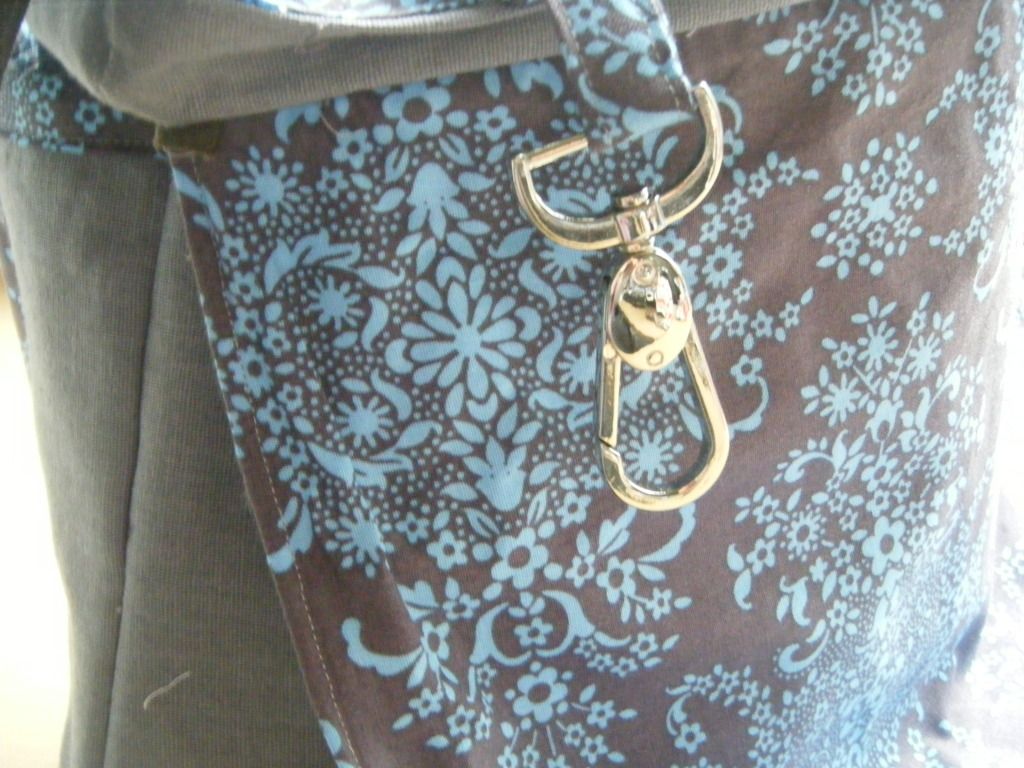
I hate the method in the book for making a strap, folding the sides in, then folding it in half, it looks so messy as you can see in the photo below. This was the little strap that attaches the D ring to the bag (and which, looking at the photo below the one below, I see I made the wrong size, oops!) and I tried the book method. Hate it. I also made two for some reason. I could have sworn it said to in the book, but probably not.

Instead, I did the right sides together, stitch, turn method for my strap, much better. I then sewed it to the bag, sewed the lining and shell togther, turned it out... spot the mistake? Yep, it's upside down!
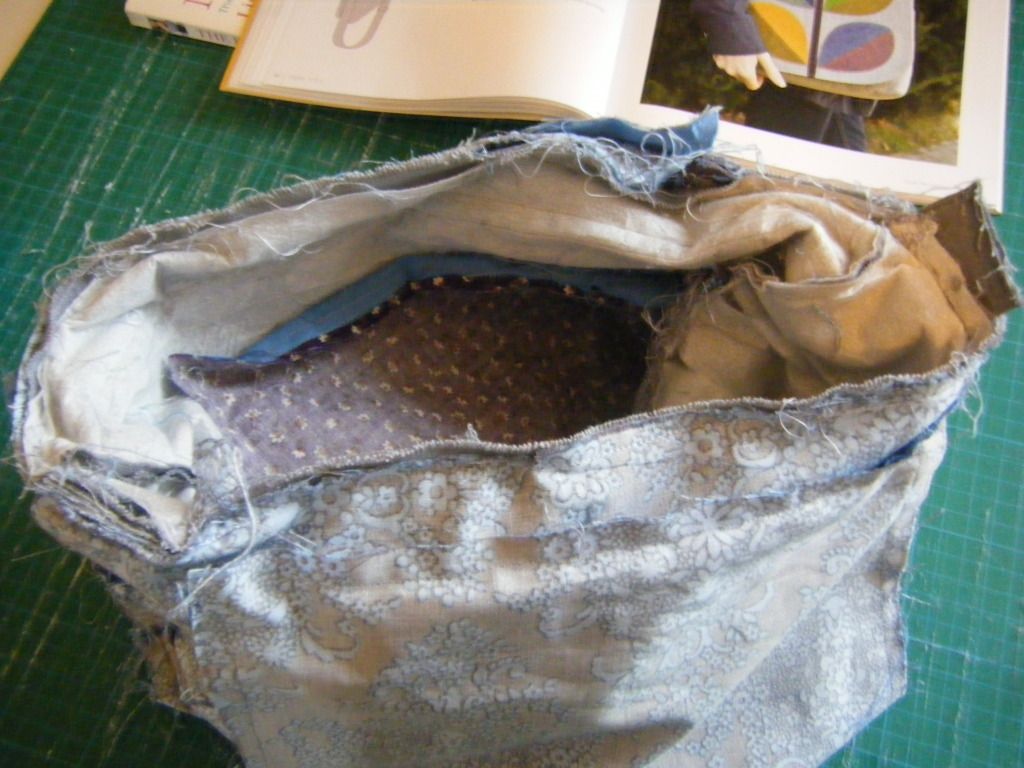
Much unpicking later (and a lot of unpicking happened during the making of this bag... this is the state of not only the linen, but also the Amy Butler fabric I used for the lining.
But, I persevered and finished. Yep, the flap is bigger than the actual bag. Nope, no idea how that happened.
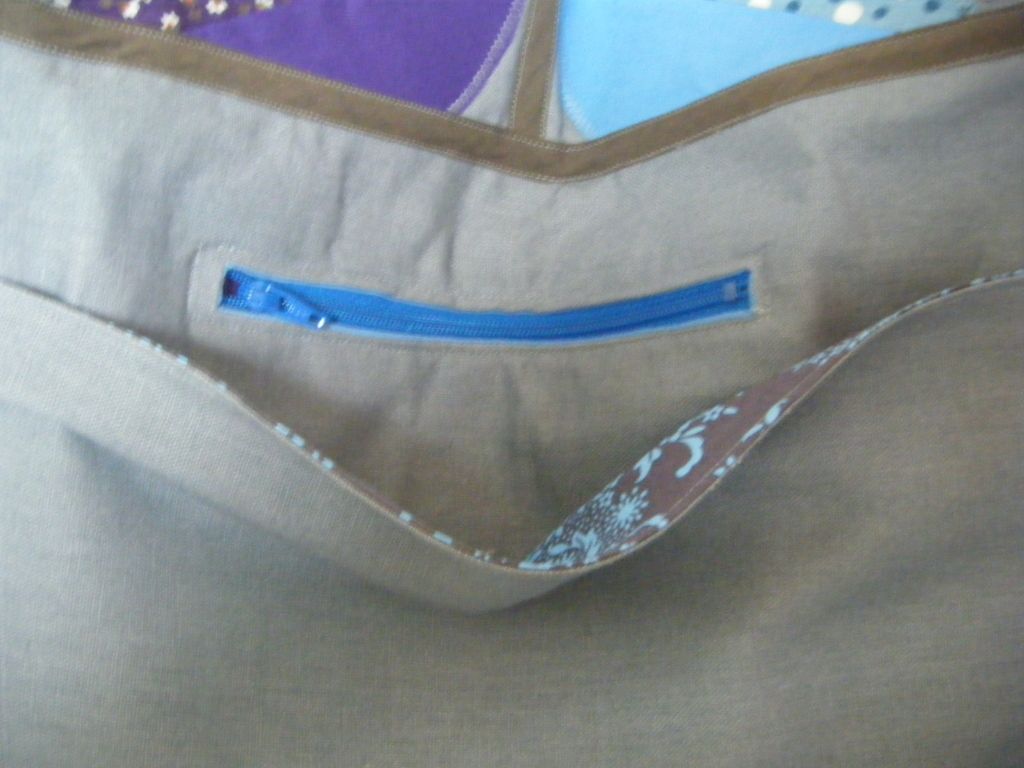
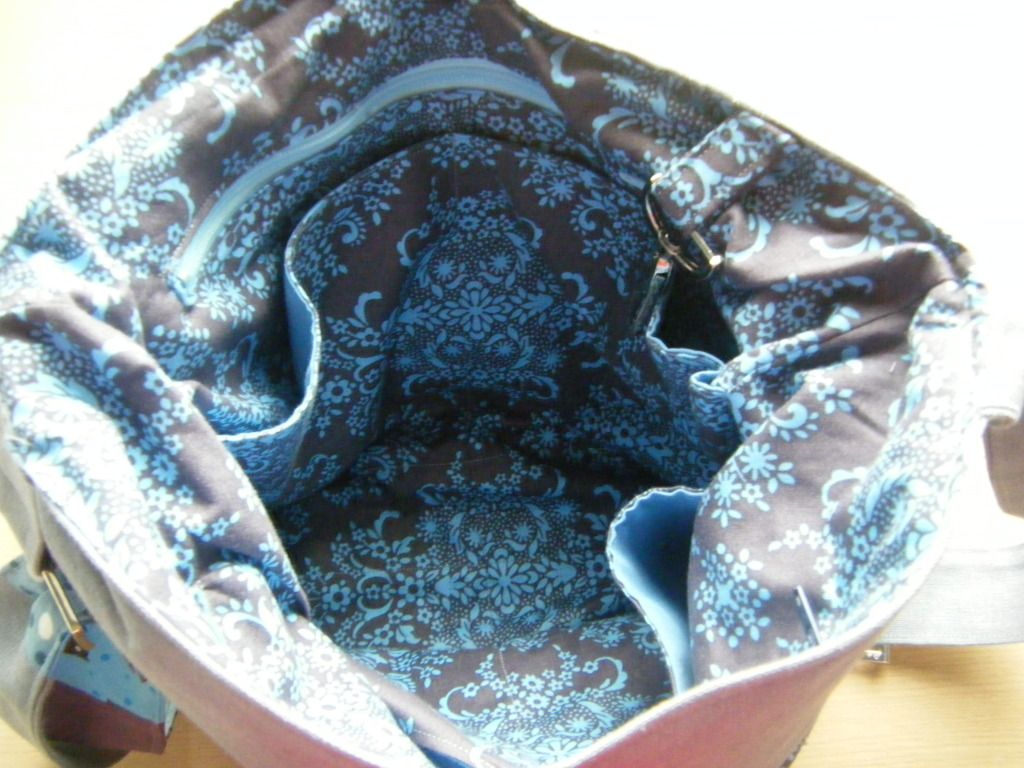
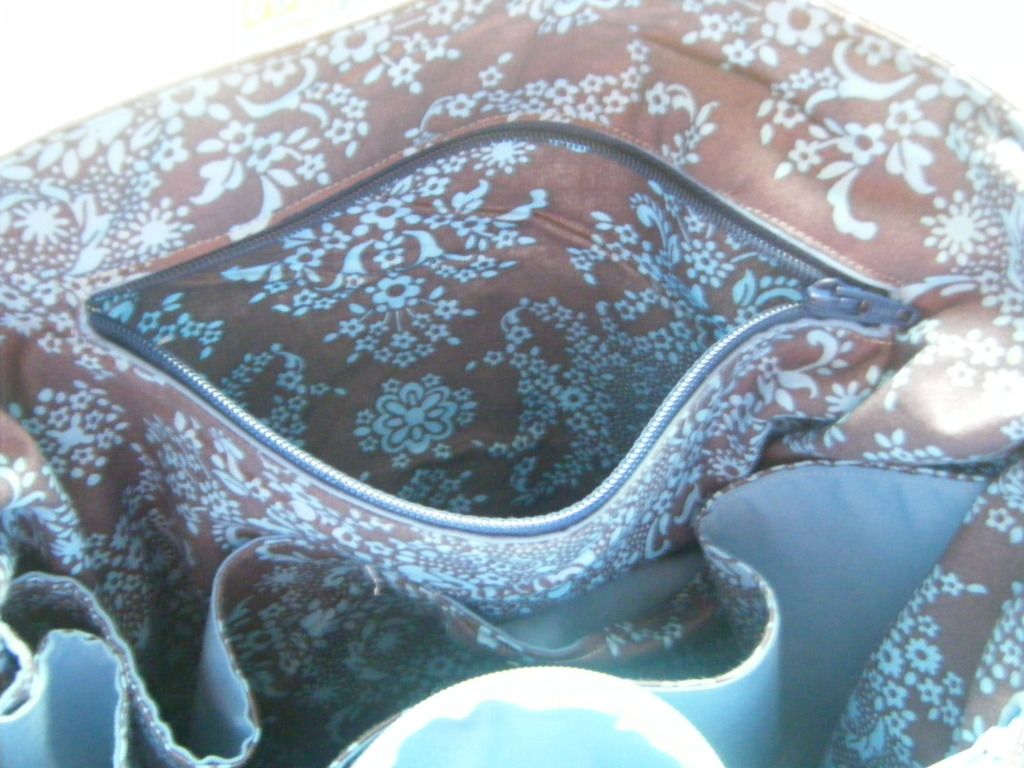
I didn't help myself much with this either. I'd sewn both lining and shell up (but not together) when I decided I liked this bag and was going to keep it, not gift it as I'd originally thought. However, it didn't suit my needs. So I added a zip pocket to the back, just below the open pocket.
Lined with one of the leaf fabrics.

Here's the binding on the front outer pocket, and the small mobile pocket I added too. If I'm using this bag in summer, I might not be wearing my coat (though I might well be in this country) and so need a pocket for my phone.
I also added zip pockets to the lining, both sides and the key holder you see there. Where?
There!
Both inside pockets are different sizes depending on the size of zip I had available. They're lined with the leaf fabrics again.

This one is lined with the lining fabric. I used Lisa Lam's pocket technique for all three pockets, you can find the technique in The Book Making Bible, which is a must if you like making bags.
Strap sewn on correctly... I like the flash of colour on the strap, I just wish I'd done smaller squares!
So, I started the bag last Sunday, did a bit on Monday night, a bit more on Friday night and finished it yesterday. I really do wish I'd planned ahead!

I was planning on linking this up to the Purse Palooza, but it says the bag has to be made after the 4th June, I thought it was just in June. Ah well. Go and join in if you're making any bags, there's great prizes.
Also, don't forget about my competition, it also has prizes! I've had 2 entries already, the links to the entries can be found in the comments on the Competition page, you can find out more here.
Have a lovely bank holiday weekend fellow Brits, and Sandra, make sure you rest up this 4-day weekend, you've got a hectic 3-day weekend ahead...
19 comments:
That is very cool Wendy, I LOVE the patchwork on the handle - and all those zip pockets! The front with the leaves is awesome. Well done!
I love your work! You did a great job! And thanks also for the giveaway link & I have entered!
I salute your perseverance - well done!
I like it so much when you go into the details when you make something - it is very educational. And I think it is absolutely okay to 'hate' a technique from a book and tell it on your blog:-)
Way to go on sticking with it! I had some trouble on mine with the boxed corners. I was sure I was reading the instructions correctly by measuring down from the point 3". I cut a bit too quickly, because the bag really is too "boxy" and wide. I like that you added zippers. I will do that the next time.
great bag.... as usual demonstrated with great humour.... enjoy your long weekend...
Hugz
Love all the pockets, Wendy and the finished bag looks great, despite all the unpicking you had to do...
I really like that bag, Wendy. It's really nice. Makes me wish I could sew, but I'm hopeless at it!!!
What a fantastic bag! I love it. :-)
Thanks for sharing the process with us, wendy. It is a lovely bag. Good job! The little touches inside and the flash of colour on the strap are what make this bag special for me. Thank you also for the mention. x
This bag is great!!!
Your bag is great - I like your fabrics and your changes! Sadly this is the first Zakka project that I wanted to do but didn't get finished - oops! I need to get this one done and then get working on the next one!
Nice job Wendy! I have the book, but so far only Sandra has made stuff from it! Good on you for doing the strap the way it made the most sense. As we know from sad experience, not all books are created equal in the eyes of crafters.
Love the leaves!
Really beautiful bag! Looks like there were quite a few steps, very impressive work! The patchwork was a really cute touch. :)
Very pretty! Love the fabrics and those pockets!
oh, it looks fabulous! i like the fabrics that you chose for the leaves, and particularly like how you've personalized the pattern with pockets. i understand that there usually isn't room in the pattern for all the extras, but i can't imagine going to the effort of making a purse and not adding a bunch of pockets!
Your bag is awesome! I just love the leaf pattern. Hope you will share with my Pink Hippo Party @ http://pinkapotamus.blogspot.com/2012/06/pink-hippo-party-82.html
I am your newest follower~
xoxo
Amie @ Pinkapotamus
We love bunnies here too.. we have 3 lovely ladies
You did a really good job on this bag. I love it. It's awesome!
Julie
jamscorner.blogspot.com
I love your project and will be featuring you tonight at my {DIY: Little Trendy Things} post on my blog. I’m also your newest follower, and will be delighted if you could join me on my blog as well. Have a wonderful day, Oksana @ OksanaPlusHobbies
Post a Comment