

It's the last week of the Zakka Style Sew Along people. I can see some of you sighing with relief - I'm sorry if I've been a bit one-topic recently! This isn't actually my post to be linked up to the Sew Along, this is a pre-post! I saw on the discussion group on Flickr that some people had made the boxes and didn't like the construction. I had a look, I didn't like the construction either. Far too much hand sewing... I knew there must be an easier way. So I made mine like a bag.
This post is for anyone yet to tackle the project, this might be an easier way to do it! I made one the same way as in the book too, I'll post about that next week and then link up. I'll also give you the links, I don't have them right now as they won't be posted until Monday.
This is a sort of tutorial, but without giving pattern details away as obviously this isn't my pattern. I really hope I'm not crossing any lines here - please let me know if you think I am.
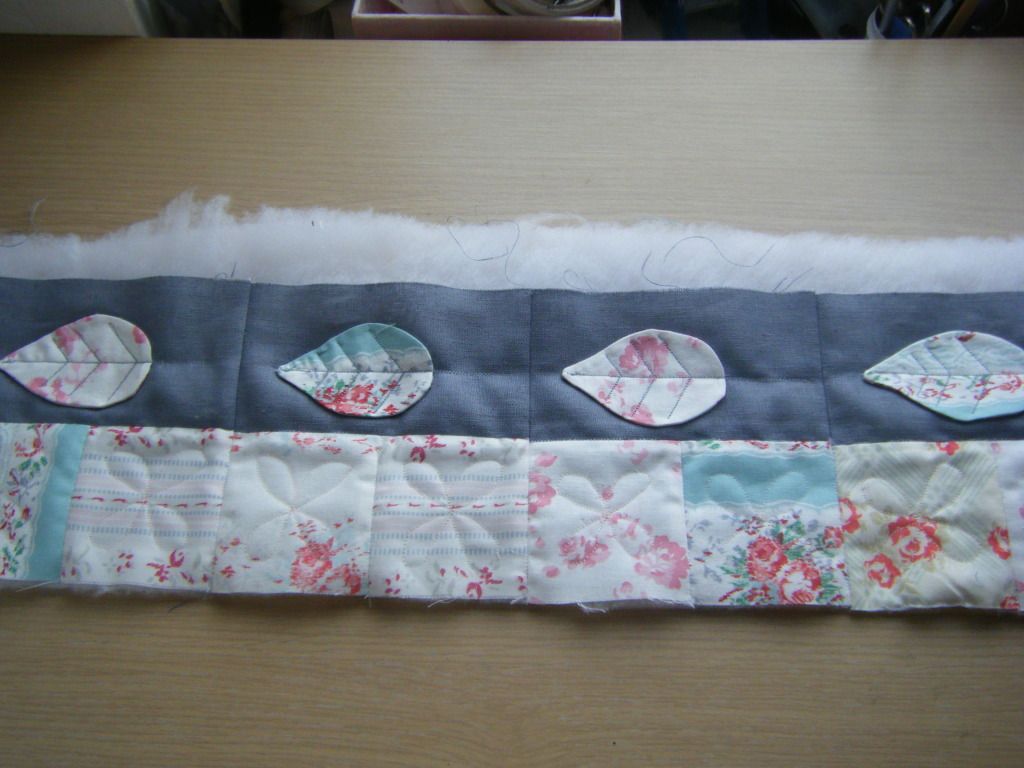
Follow the instructions in the book for the Block and Side Panel Assembly and Leaf Appliqué. You will then follow the instructions for Quilting and Appliqué with one difference. Do not follow steps 1-3. Start from step 4, laying the front panel on the batting. No back panel.
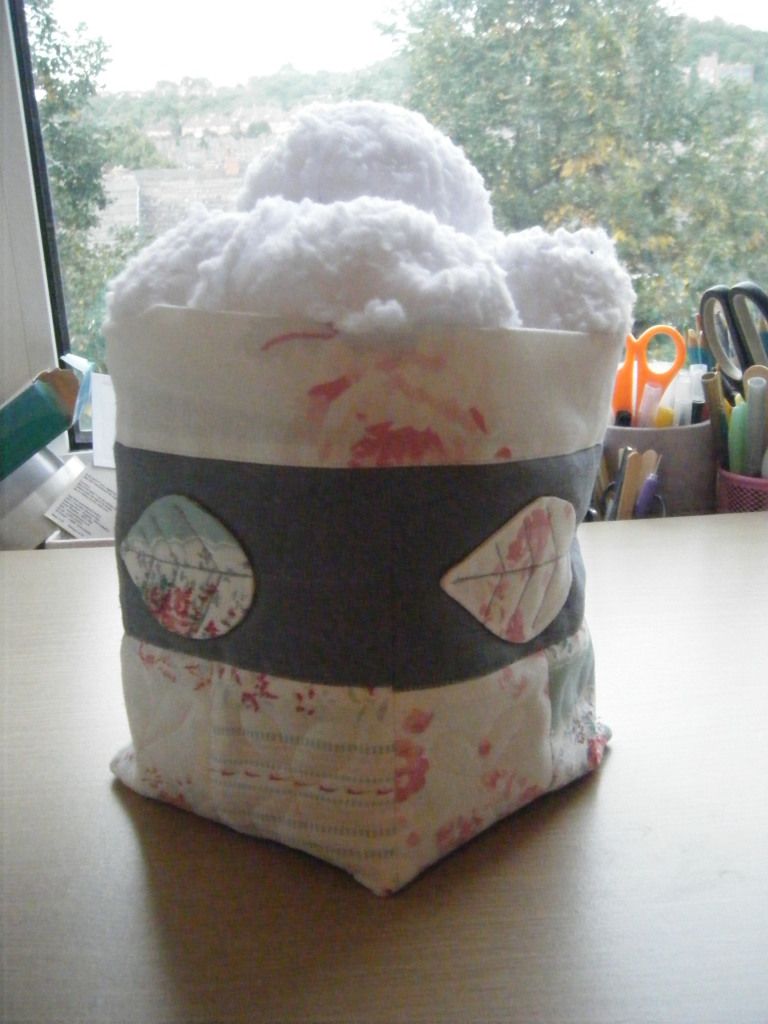
After I'd finished, I cut the batting to the same size as the front panel. Clearly I hadn't finished when I took this picture!
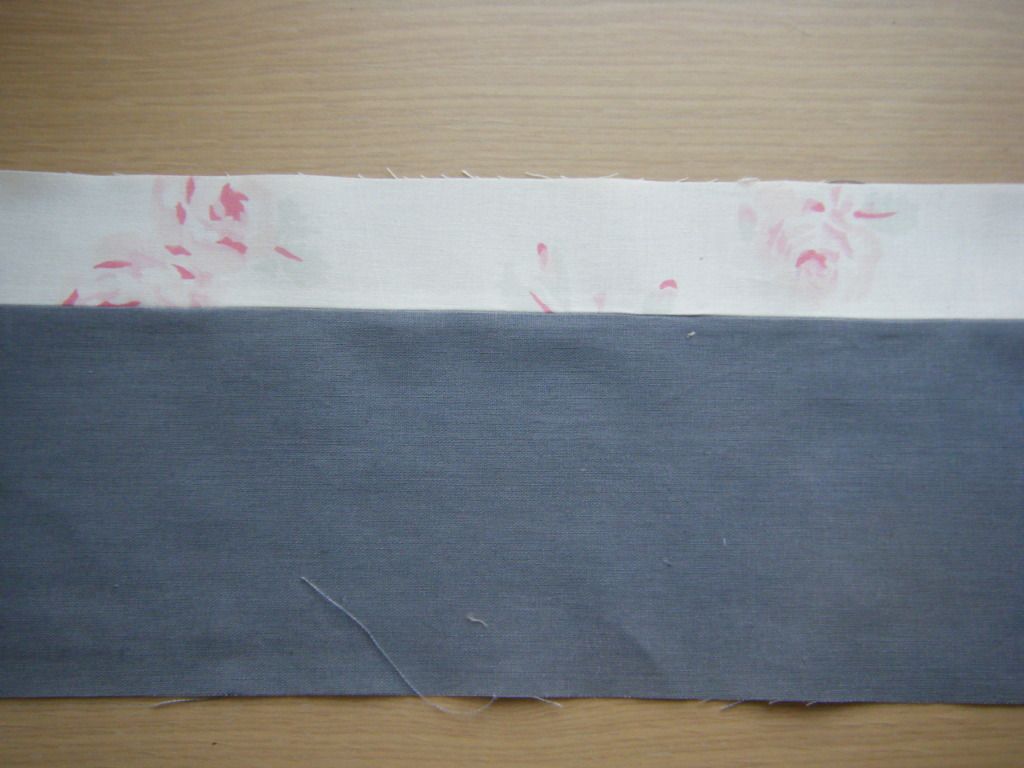
Cut your backing piece to the same size as your finished front panel. Cut out your bottom square as detailed in the book. I didn't actually bind the top of my box as suggested in the pattern, instead I sewed a 3" strip of cotton to the top of my back panel.
As you can see on my top picture, this creates a very wide "binding" at the top. You could use a much thinner strip to replicate real binding.
Take your front panel and one of your squares. Now, I omited the batting for the base of my box, and the quilting, but you could do that if you want. Quilt the design as you did for the front panel, without the back panel.
I drew a 1/4 inch square around my base as I'm not so good at judging distances by eye. If you are, you don't need to do this.
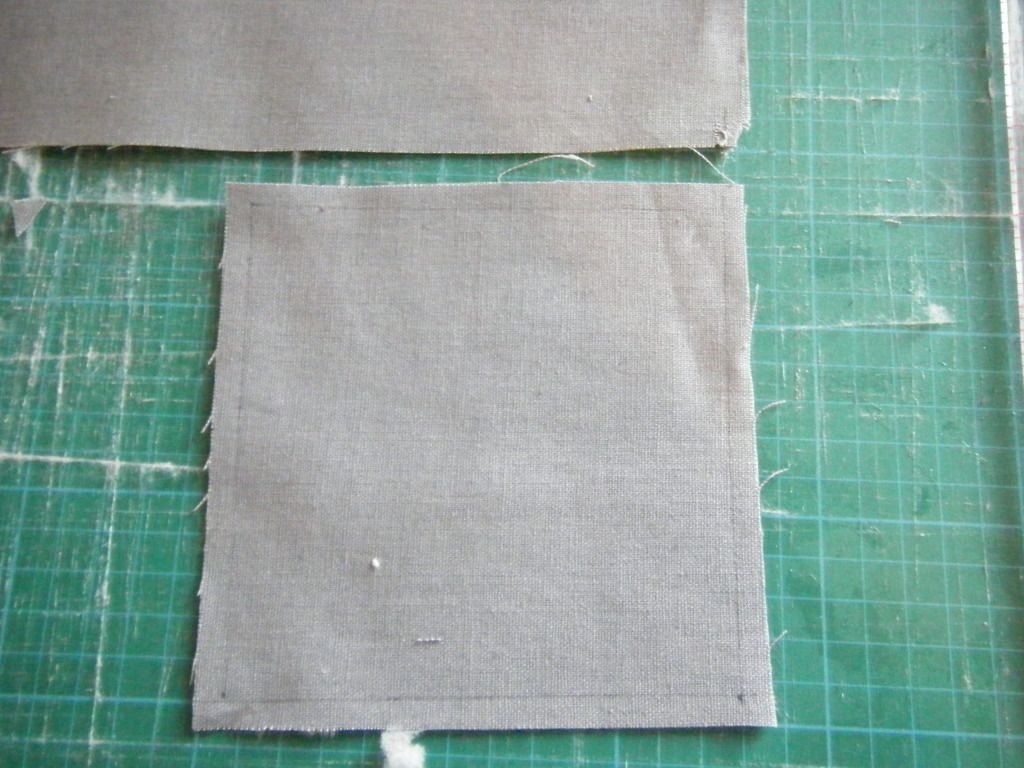
Now, lay your square on the bottom corner of your front panel, front panel right side up, linen square markings side / wrong side up. Align the right hand edge and bottom of both pieces. Start sewing 1/4 inch from the edge, sew until you get to 1/4 inch from the first corner. Stop with your needle down, lift the presser foot and pivot until the second side of the square matches the edge of the front panel. Continue all the way round. It should look like this:
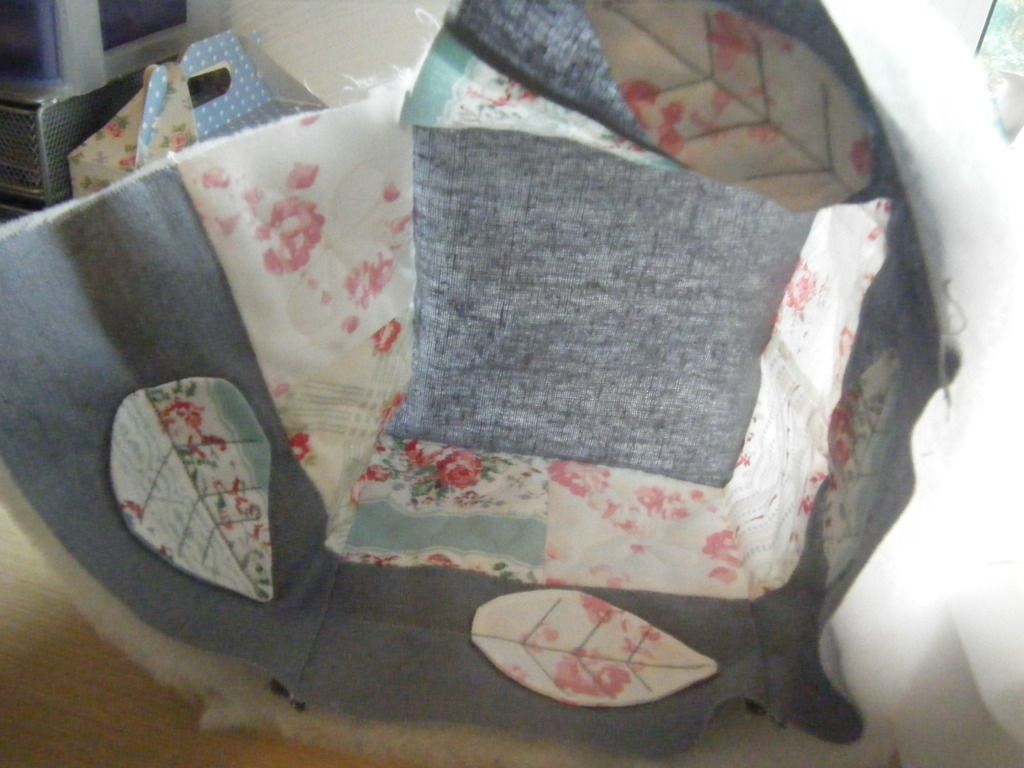
And from the back:

Sew up the two edges of the box with a 1/4 inch seam. Clip the corners and turn right side out. Do the same thing for the lining. Stuff the lining inside the shell, right sides together.

Line up those top edges. If you added the "faux binding", you need to align the top edges, not worrying that the shell will be floating inside the lining.
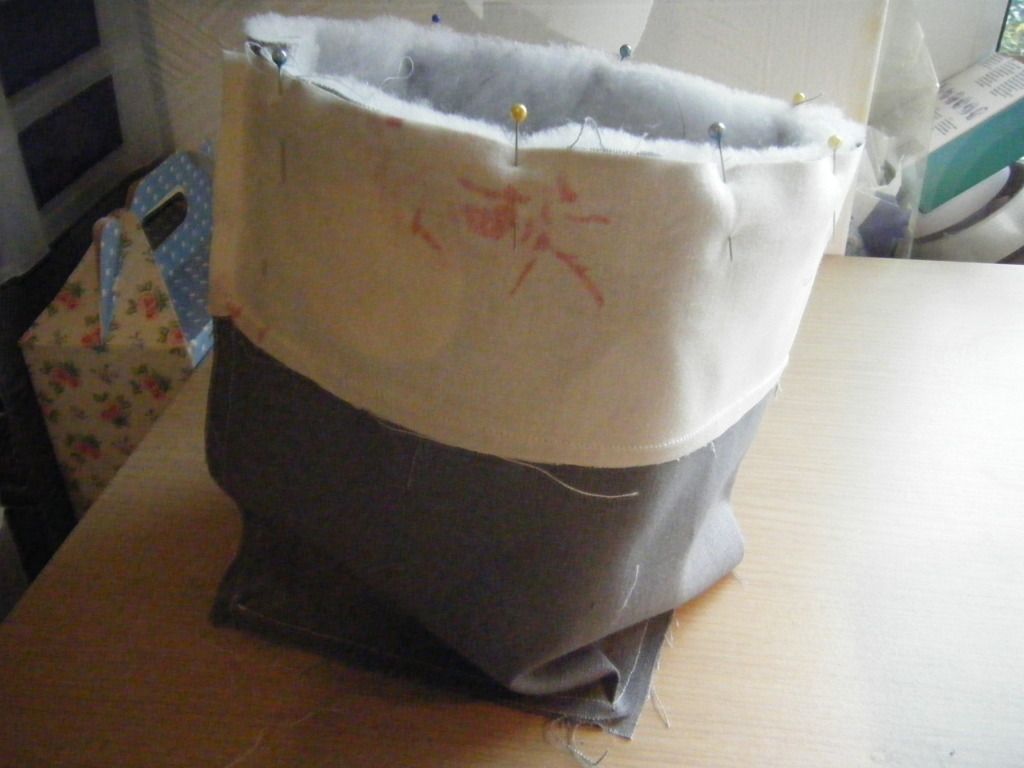
Sew all around with a 1/4 inch seam, leaving a turning gap. Turn through. It'll look like this:
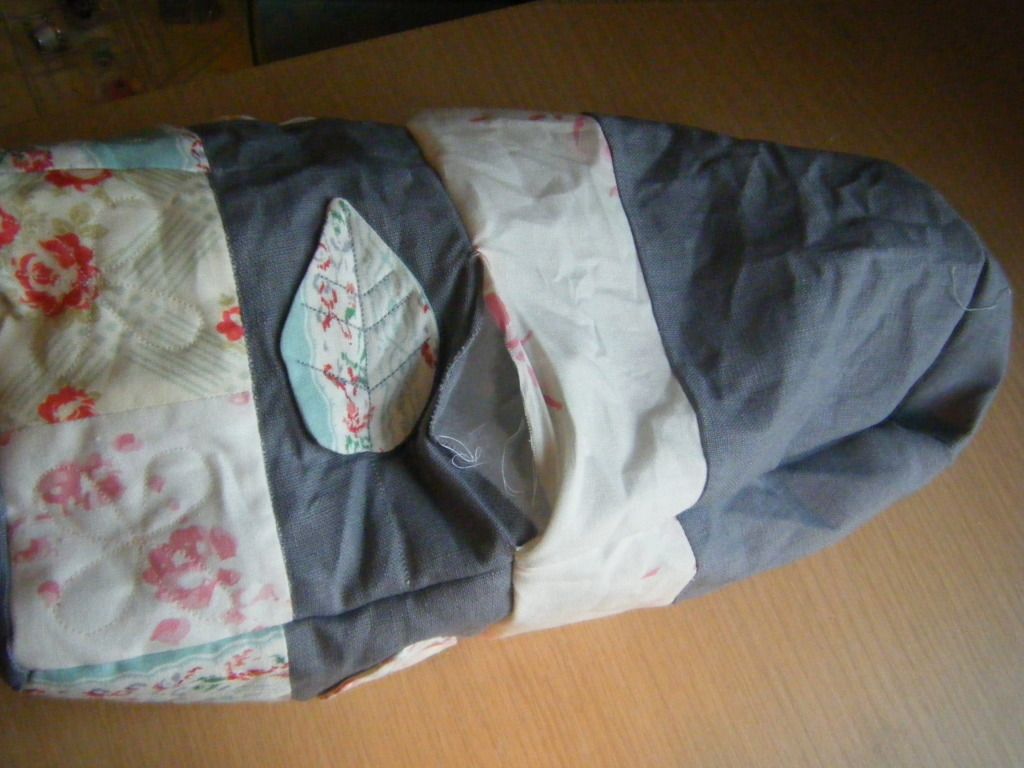
Now push out the corners of the shell and then stuff the lining inside the shell, matching the corners. Press the top. Machine top-stitch very close to the join in "faux binding" and the shell to close that turning gap and hold the lining in place.
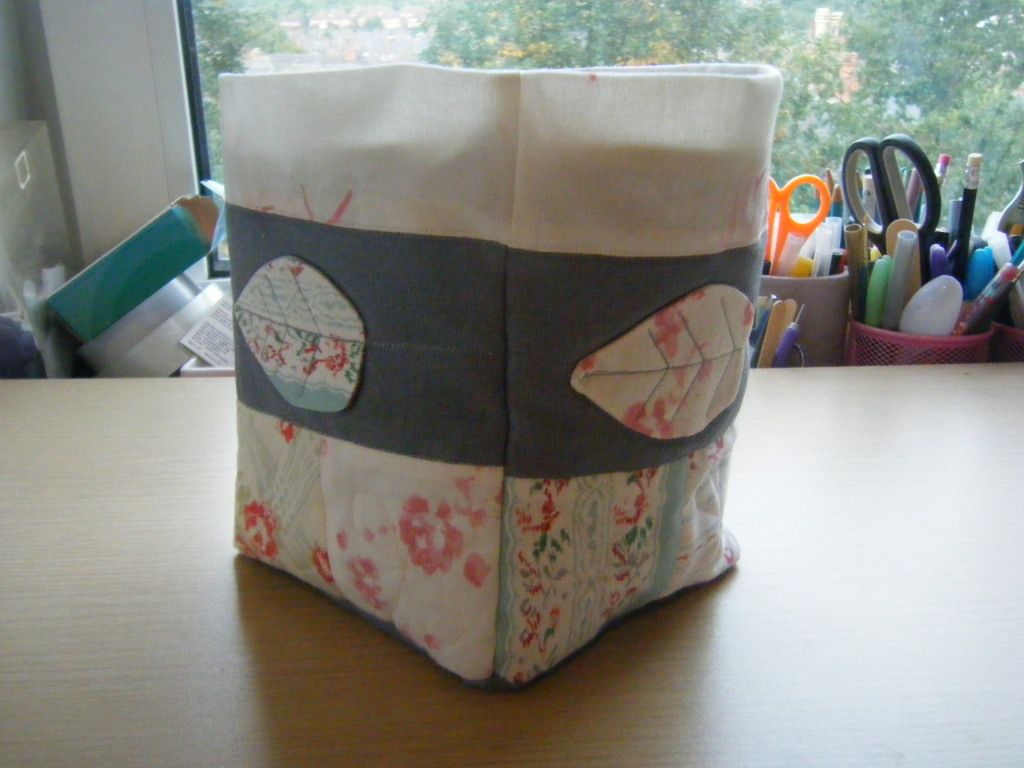
Ta dah!
Now, clearly my method means that the inside isn't quilted.
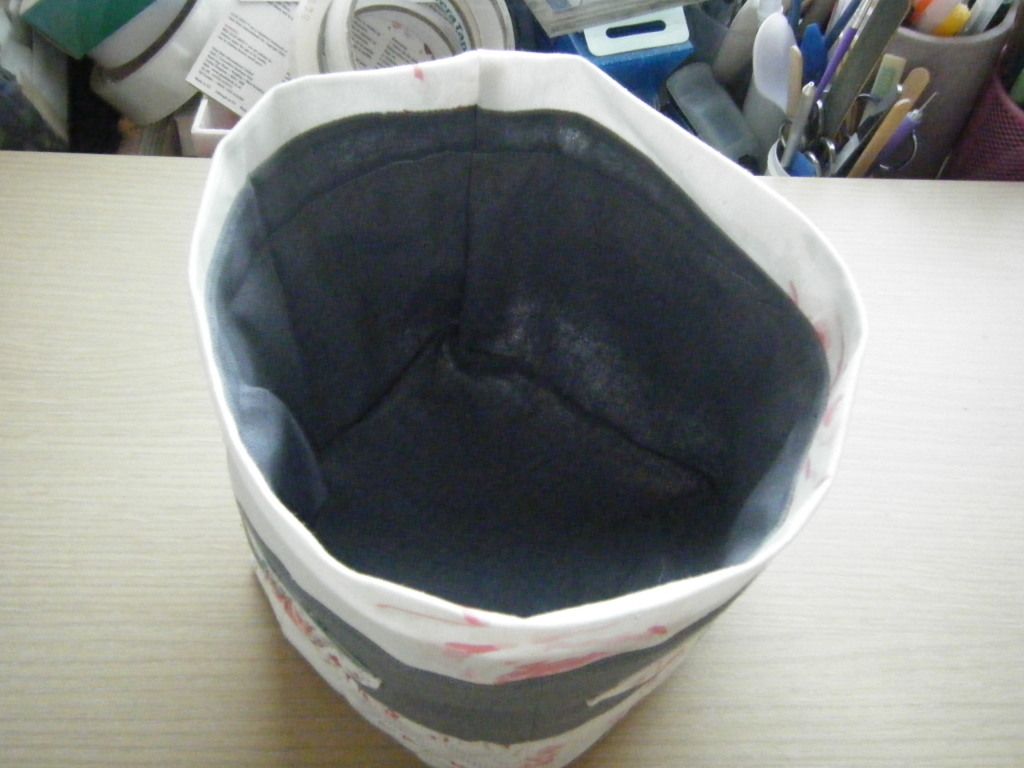
That's fine by me. If you do want the inside to be quilted, don't do the quilting at the beginning, construct the box with my instructions and those in the book as above, then hand quilt. Simple?
So what do you think?
10 comments:
LOL now I'm going to have to pull out the book and see how they did it! I rarely follow the instructions in books (which doesn't pay off ALL the time, but that's a story for another day!) - I tend to like doing things my own way!
simple? thats no the word i would use, oh queen of the sewing machine lol mine would defiantly not look like that afterwards :)
The end result is great but it does look tricky.
I love it! But WAY past my capabilities, even if i were to hand stitch since I have no idea how my sewing machine works. lol
You are brilliant, my dear, this is wonderful! I don't even have the book but your way sounds very easy.
simplesmente sensacional...
This has turned out well. I often find there is a simpler way to put things together, or rather, an easier for me way.
This sounds like a much more straightforward method than the one given. Doubt I will get round to these this week, but when I do I will be doing it this way! Life is too short to quilt the inside of a box!
Thanks for trying out my pattern Wendy! This was the first method I tried when constructing the boxes. Although it is simpler, I preferred the crisper edges and more square shape when the sides were quilted beforehand. This is the Japanese method of constructing quilted bags & baskets :o) Hugs & Happy Sewing, Laurraine
PS I love your fabrics!
Post a Comment