Showing posts with label binding. Show all posts

Friday, 26 December 2014

It's finally finished!

After being on my A Lovely Year of Finishes list for about 4 months running, and after being in the  2014 FAL for at least 2 quarters, I've finally finished my Mackintoshesque Art Deco inspired wall hanging!

My FAL goal setting post is here and my ALYOF goal setting post is here.


Kerry persuaded me that the best way to finish it was with faced binding.  She sent me the link to this tutorial by OP Quilt which worked really well.  OK, it's not perfect, but I was working with the edge of a 1/4" bias binding rather than a whole quilt.  As you can see it's not perfectly flat at the edges.


But, quite frankly, I don't care!  I also don't care that the back is an absolute mess.


I am very happy with the way the front looks and that's all that matters.  Now I just need to get this baby on the wall.  How the hell do I hang it up?!?


Finish Along 2014  My Button


Related Posts
reverse applique
bias binding on
the quilting

Wednesday, 13 March 2013

A place for tea

I suppose I was always bound to talk about tea at some point, after all I AM English.  Personally, I don't drink tea.  I used to, buckets of the stuff.  When I lived in Poland I'd work 14 hour days and we never had any milk at the school so I'd drink my tea black during the day.  It got to the point where I found tea with milk disgusting, I still do.  One day, about 4 and a half years ago, just before I started working at my current job and a little after I'd met Mr CA, I started drinking coffee instead.  Just like that.  Now I'm a coffee addict - I know, I know, coffee + migraines = bad news, I mainly drink decaff, just two cups or regular coffee a day and the rest decaff.

Anyway, I'm pretty sure I'm not supposed to be wittering on about coffee?  Oh yes, tea!

So, Mother's Day 2012.  About 2 weeks before the event, I started making 2 tea wallets/caddies/holders from Australian Homespun Vol. 12 No. 4, designed by Jenny of Elefantz.  I thought that one of these with a nice mug would be a great gift for the mums.  I got as far as the binding, tried to attach it by machine as I was running out of time, failed completely and so they languished on my WIP pile, featuring as number #13 on my humongous list.

Tea wallets, languish no more!

 
I made the same wallet in two different fabric combinations and changed the embroidery a little.  I'd bought the tea in advance and so knew what I had and made a few changes to suit the recipients - the bottom row is for fruit teas and I missed out Earl Grey on my mum's as I know she hates it (who wouldn't, it smells like Dettol, who wants to drink Dettol?)
 
 
All I had to do to finish them off was hand sew the binding.  I managed to completely cock it up.  Check out that appalling corner! 
 

And that one!  Seriously, rubbish.  To be honest, I'm not sure what I was doing when I machine attached the first half, the corners were... weird.  I did what I could.


This one was for my mum and there are a couple of things I'm not happy with (besides the binding) - the appliquéd flowers blend in too much and are hard to see, and the ties - there should have been two sets of ties! 


There's a close up of the appliqué in case you didn't believe it was there!  You can also see one of the disastrous corners from the other side. 


My mum's was made from Amy Butler fabric, can't remember what this one for Mr CA's mum is called, I think it had Dream in the title...


We have the same old binding-corner issues going off here too, and the lack of the second tie...


But the appliqué stands out a lot better.


See?


If I'm honest, I've completely run out of things to say about these tea wallets but seem to have loaded a lot of photos.  Make your own commentry for these photos...


I have to say, tied up, they don't work very well.  I picked up one of them and all the tea fell out... ah well, mums don't mind these things!  I didn't go to see my mother in law on Mother's Day as I was too ill, but she rang me and I told her Mr CA had made it.

Don't think she believed me.

Tuesday, 3 July 2012

Zakka Style Sew Along week 13 - Patchwork Potholders

I know, I know, I'm late.  I did manage to upload the picture of my finished potholders to Flickr to enter the giveaway, I just didn't have time to blog.  I didn't win the giveaway, but my potholder was featured!  Go and have a look!


The link up post is here, it's too late to link up, but you can see the other entries.  I don't think I'm going to join in with week 14 - the bottle holder, but if you want to, the link up is here, and this week's host is here.

So, back to my patchwork potholder.  I'd been reading that some people were finding the binding tricky, so I was a little worried.  I armed myself with the tutorial downloaded from Retro Mama's blog.  She's an amazing pattern designer, the cute little bunnies and elephant I made were from her patterns.

Oh, I'm getting distracted again, where were we?  Oh yes, potholder!  I decided to make a rainbow.  7 strips were required so that fit perfectly, I left off the linen strip.  I cut the pieces from the leftovers from the Robert Kaufman jelly roll I bought ages ago (I used it to make these wedding placemats).


Then I jabbed it with pins and began quilting.  I think I read somewhere that you should always quilt in the same direction.  So I did.


Hmm.  Maybe I'd read that you should quilt in different directions each time...  Anyone?


I quilted lines randomly spaced.  I'm not over the moon with it.  My quilting is rubbish, I can't sew in a straight line and my sewing machine was being an arse.  I'm not sure you can see from these pictures but the stitches are not neat.


I matched the thread for each section to the fabric.  Want to see the back?


What a mess!  The binding, on the other hand, was simple!  I didn't struggle with it at all.  Now, I'm not saying it's perfect, or even that it looks good, but it's on there!


The instructions told us to bind the back of the pockets with the linen too, but I went for one of the colour strips.


I'm not overly happy with this project and I don't think I'd make it again, mainly because it seems a bit useless.  I don't think potholders are particularly British.  We tend to use oven gloves, either double or single mitts.  I've never even seen a potholder in real life, let alone used one and I'm not sure how to use it!


Don't forget to enter my Something Old, Something New competition.  The deadline is 31st July and there is a prize!


something old something new button

Monday, 12 December 2011

table runner

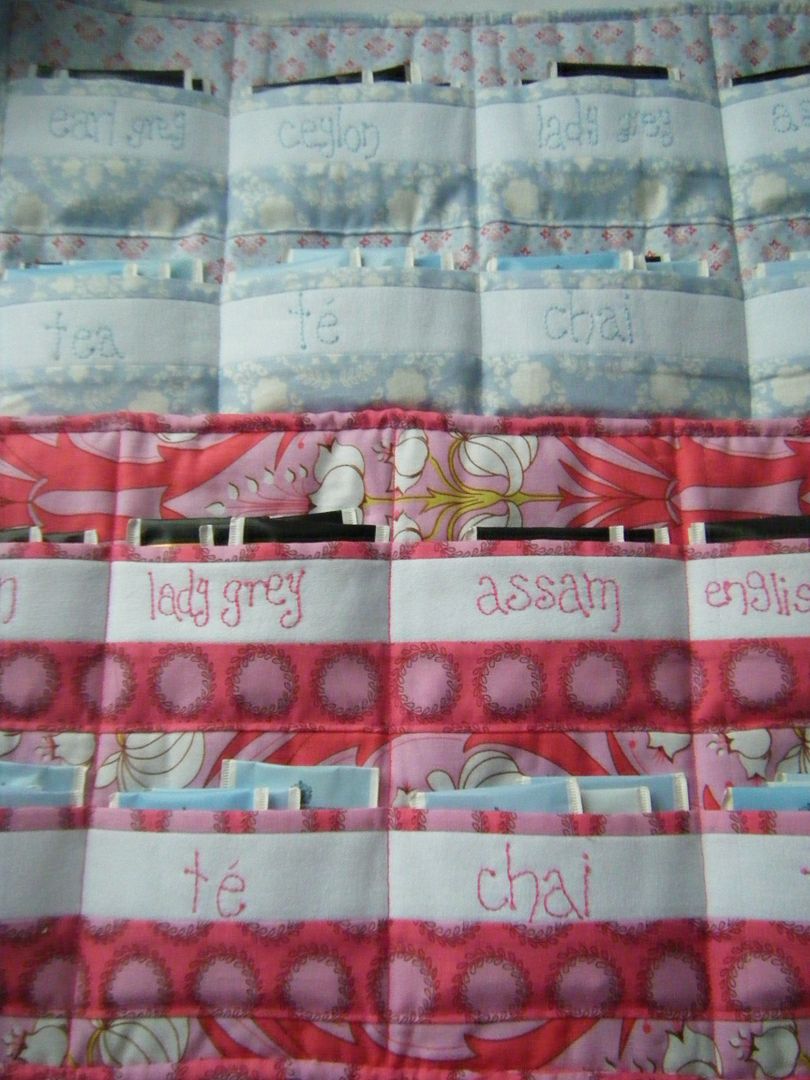
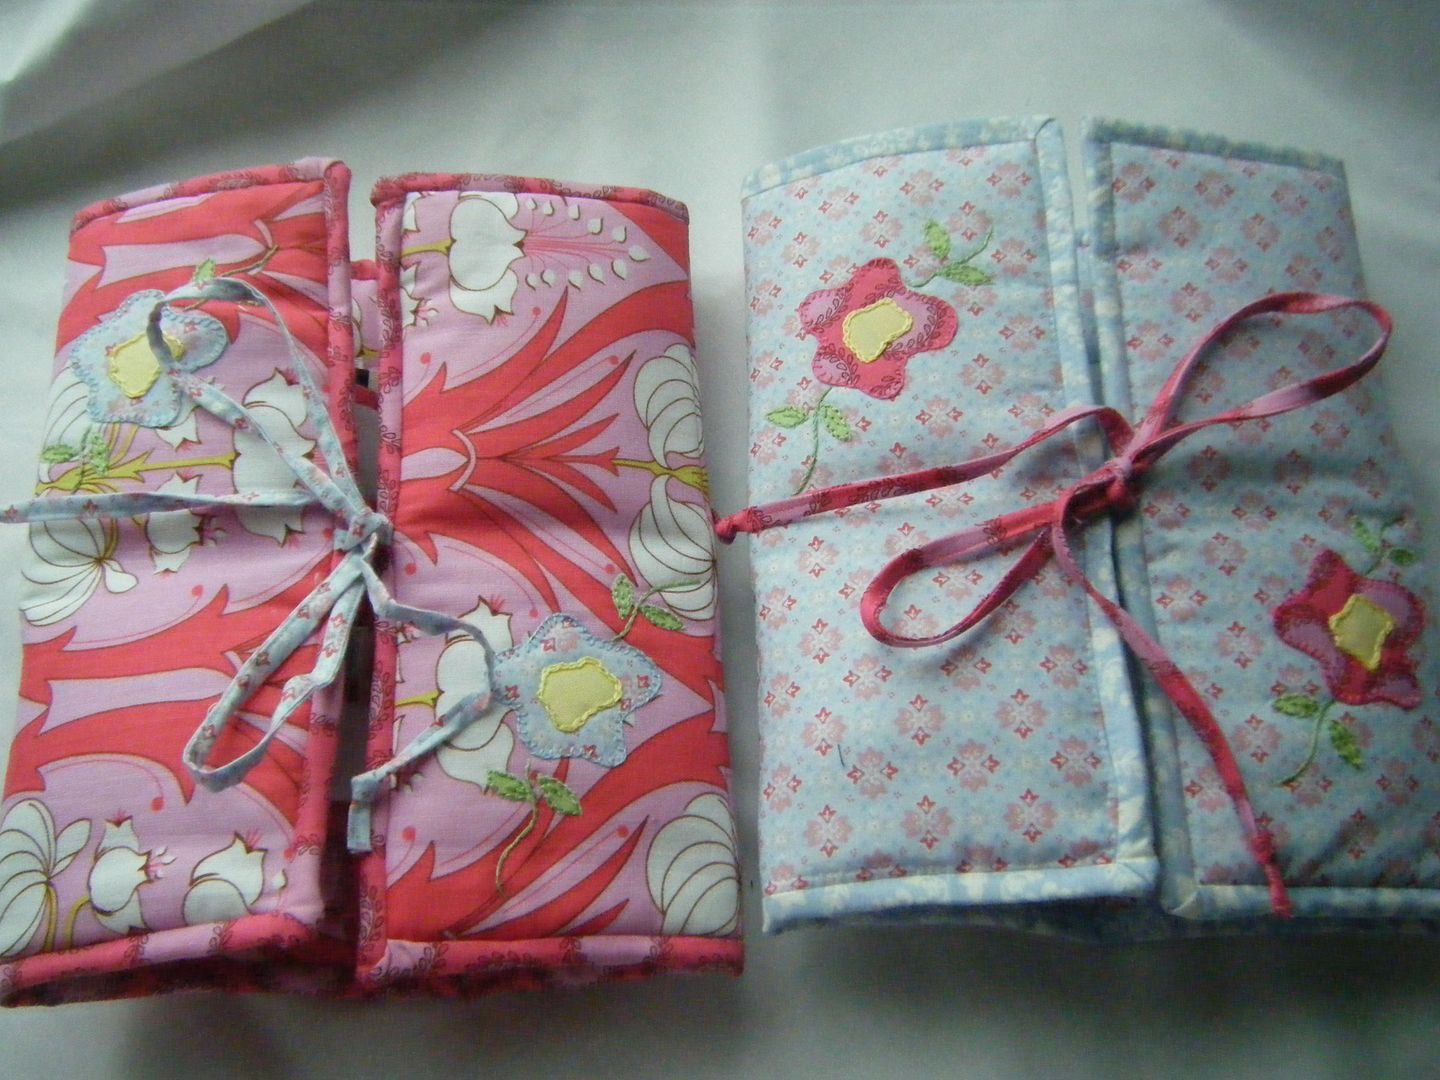
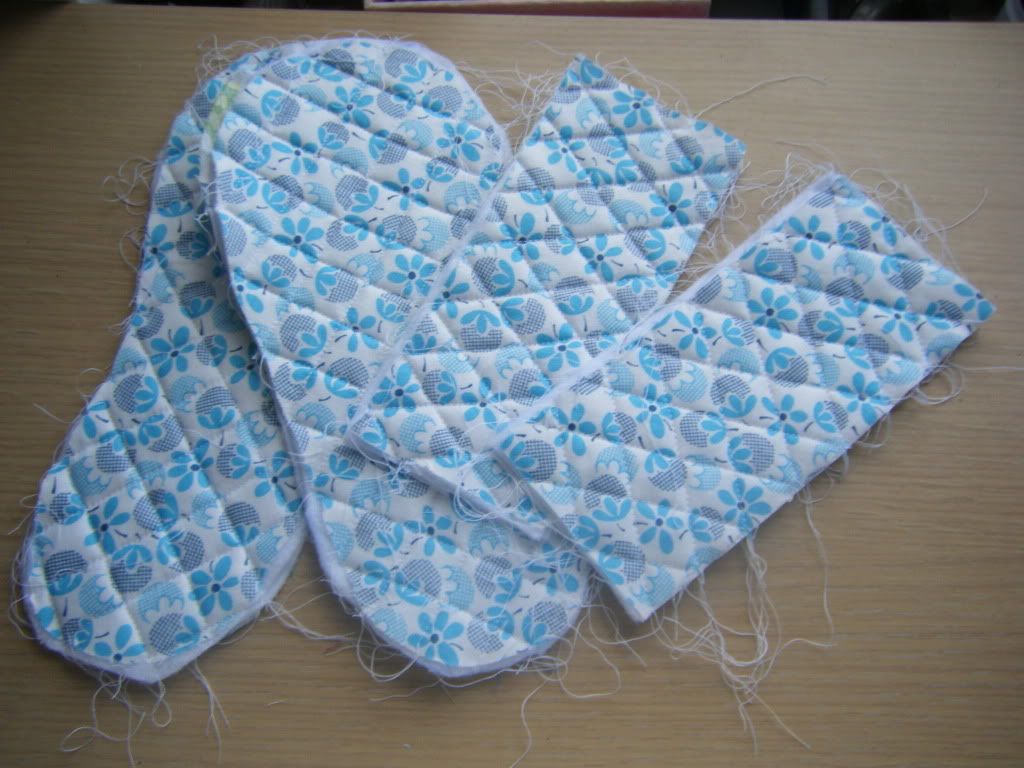
Well, I have had a shit day.  Excuse my language but it was shit.  I'm using that as my excuse for the rubbish title to this post.  Ah well, call a bucket a bucket and all that.  This post is about a table runner.  Mind you, with Sew, Mama, Sew's giveaway week going on, I doubt anyone will read it anyway!  Oh, and ladies, I know I've gone silent on you but I'm behind with blog reading and emails, I'm speeding through the reading but not commenting much, I do apologise.


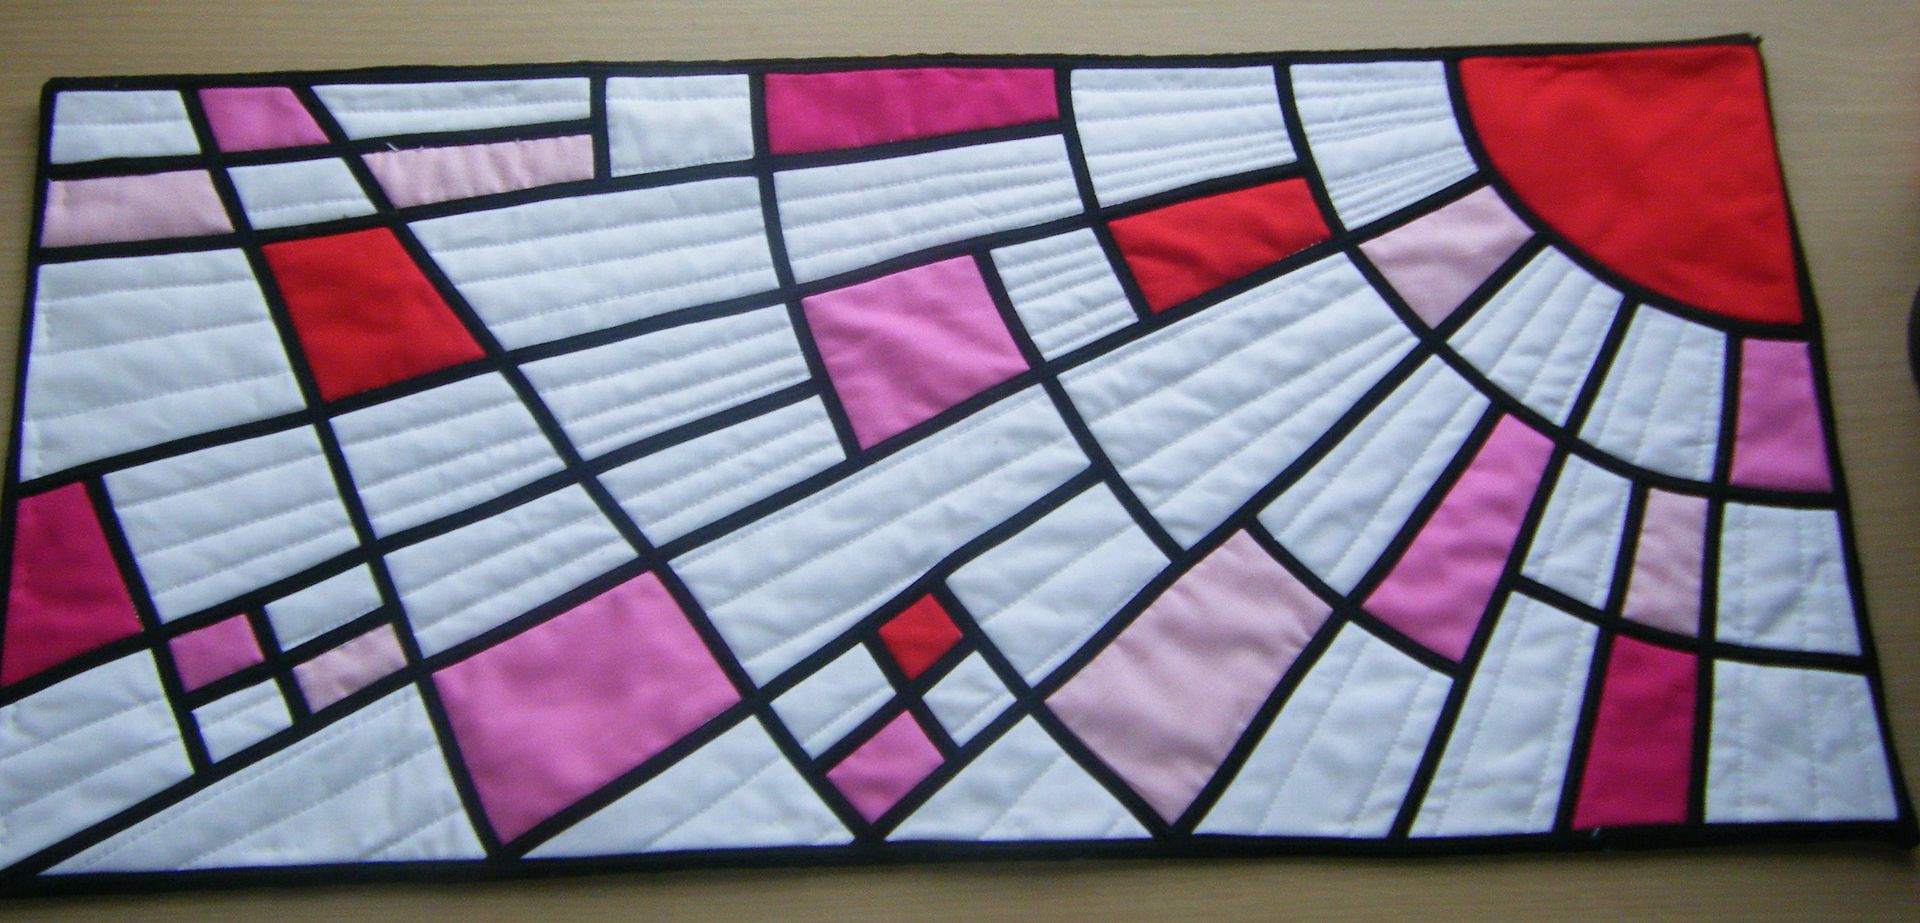
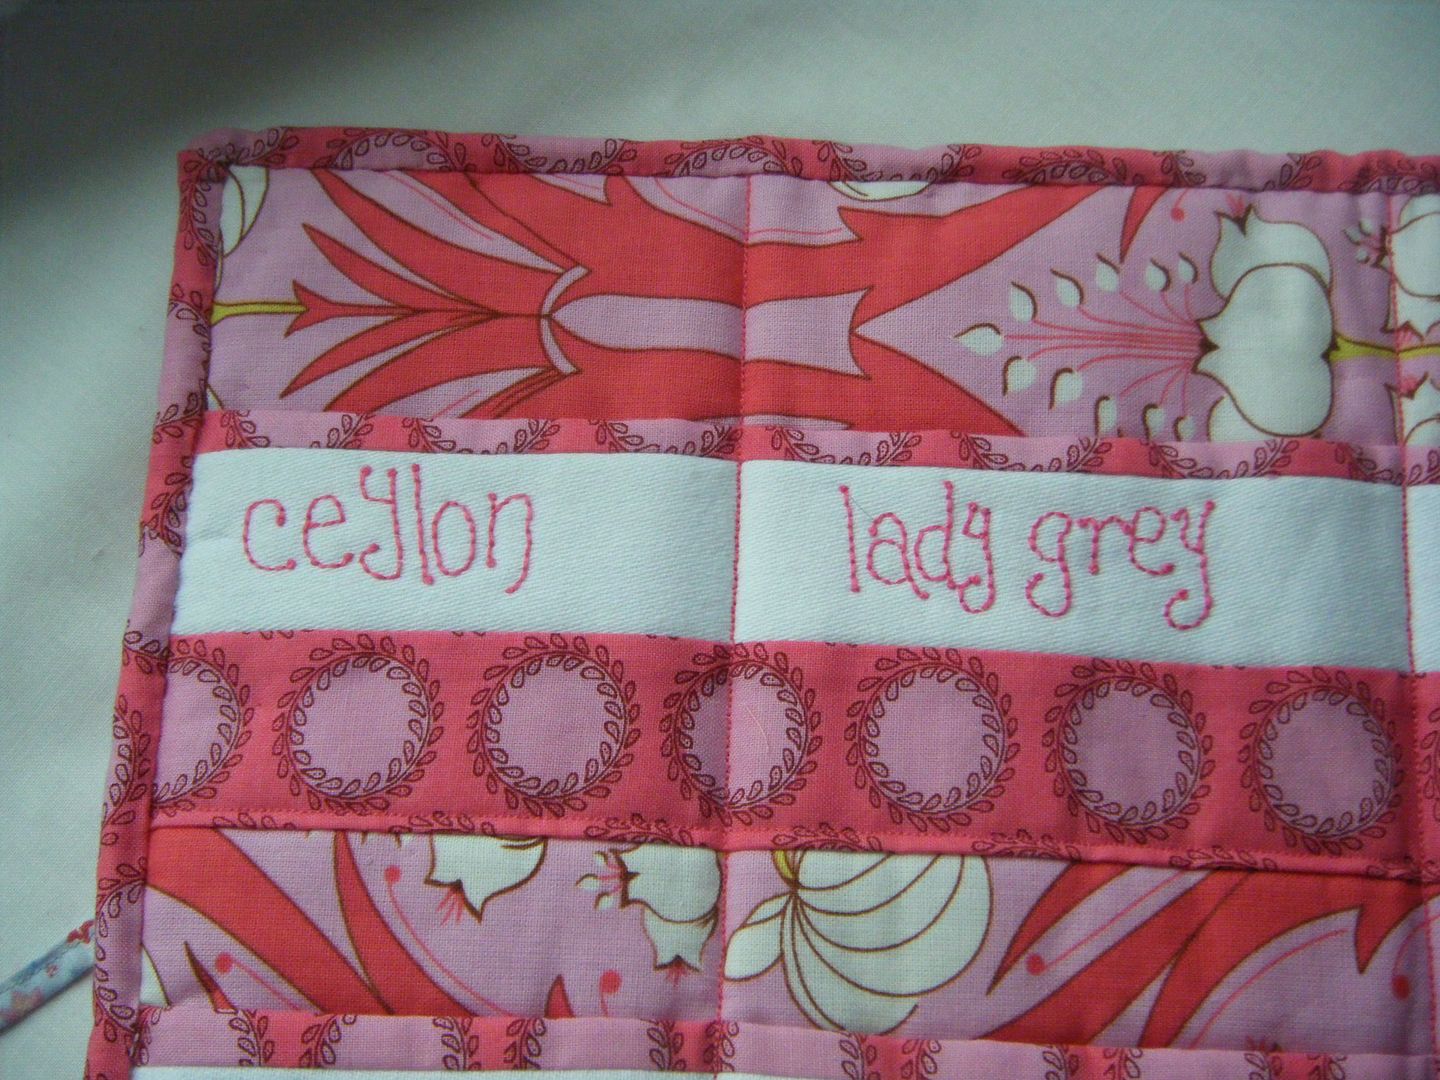
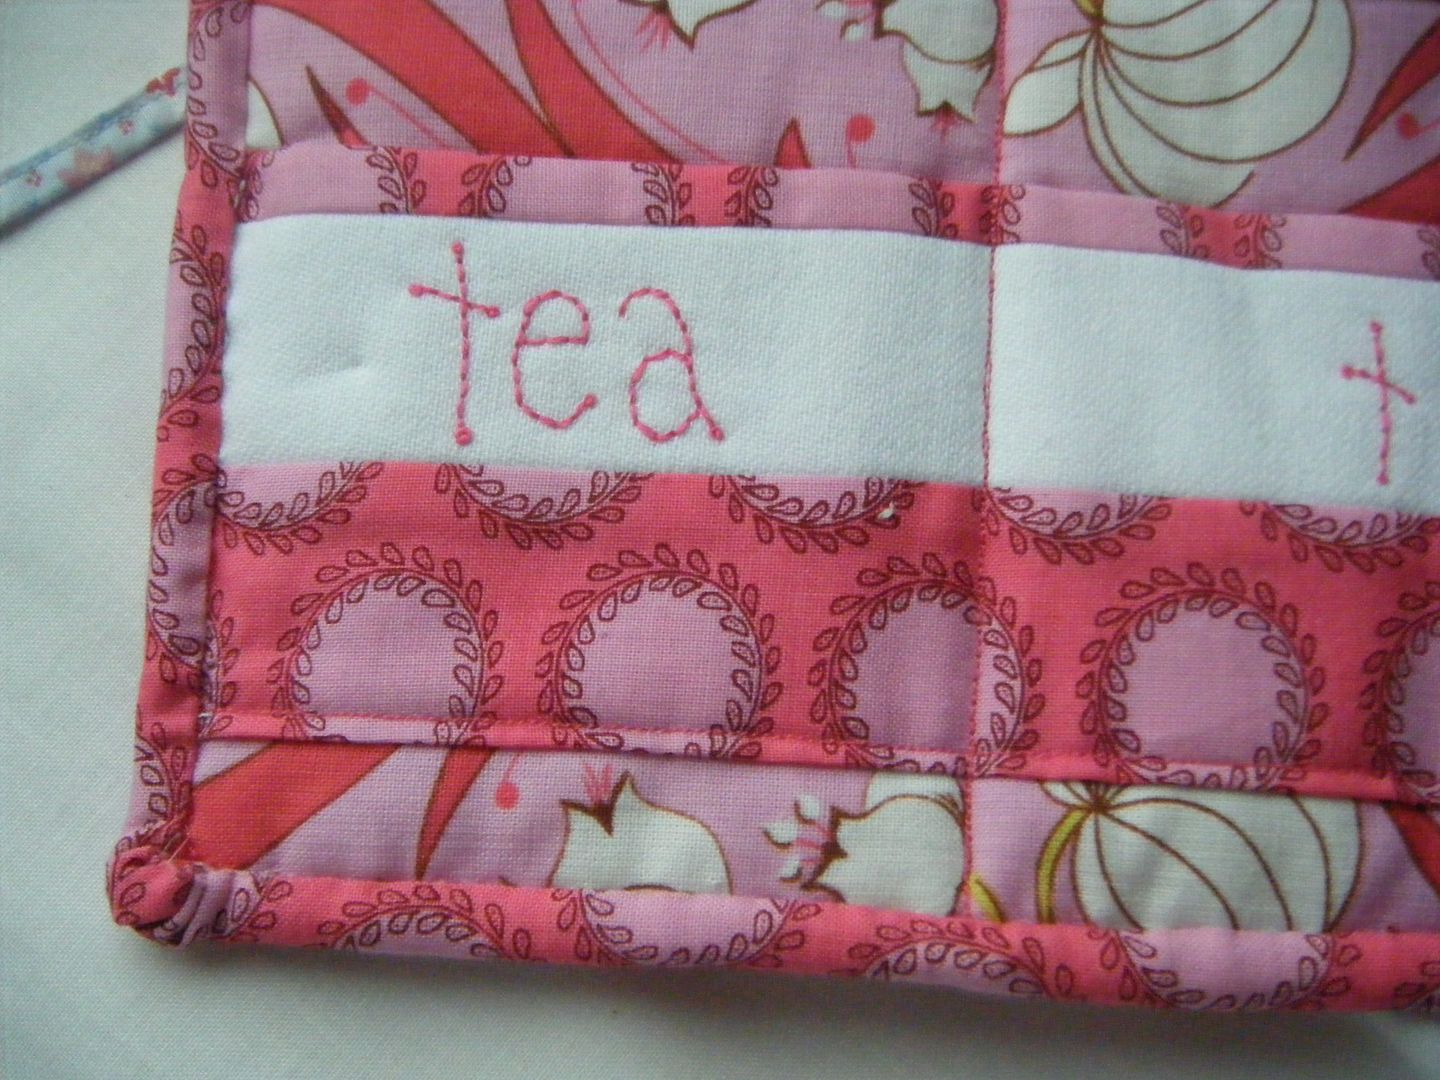
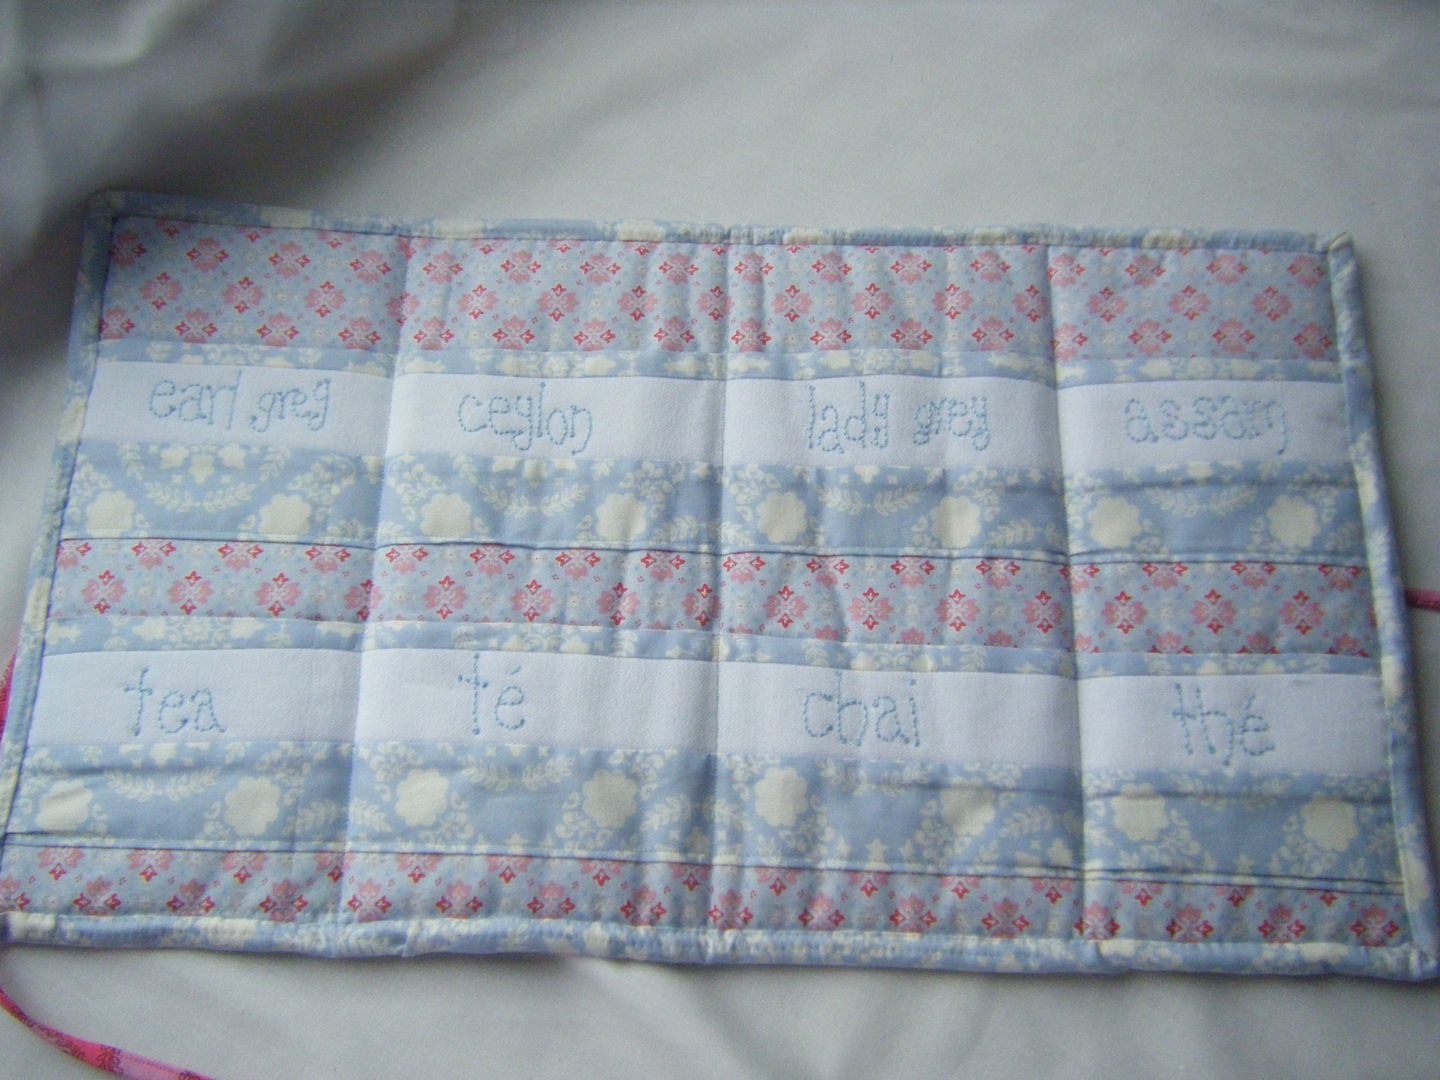
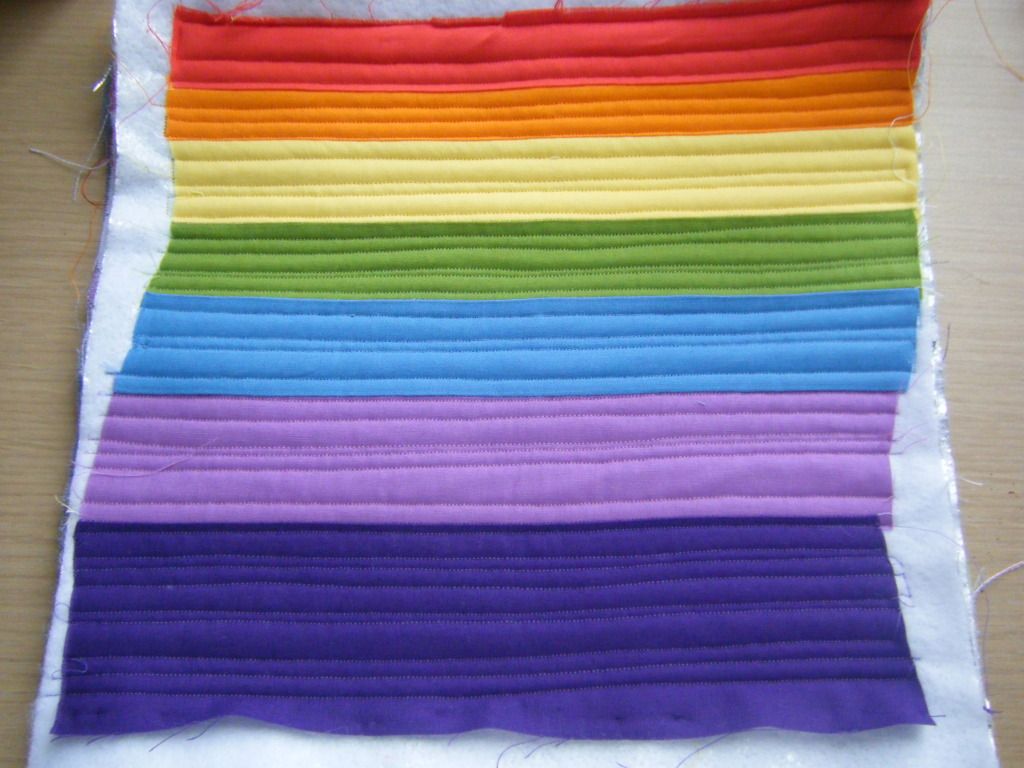
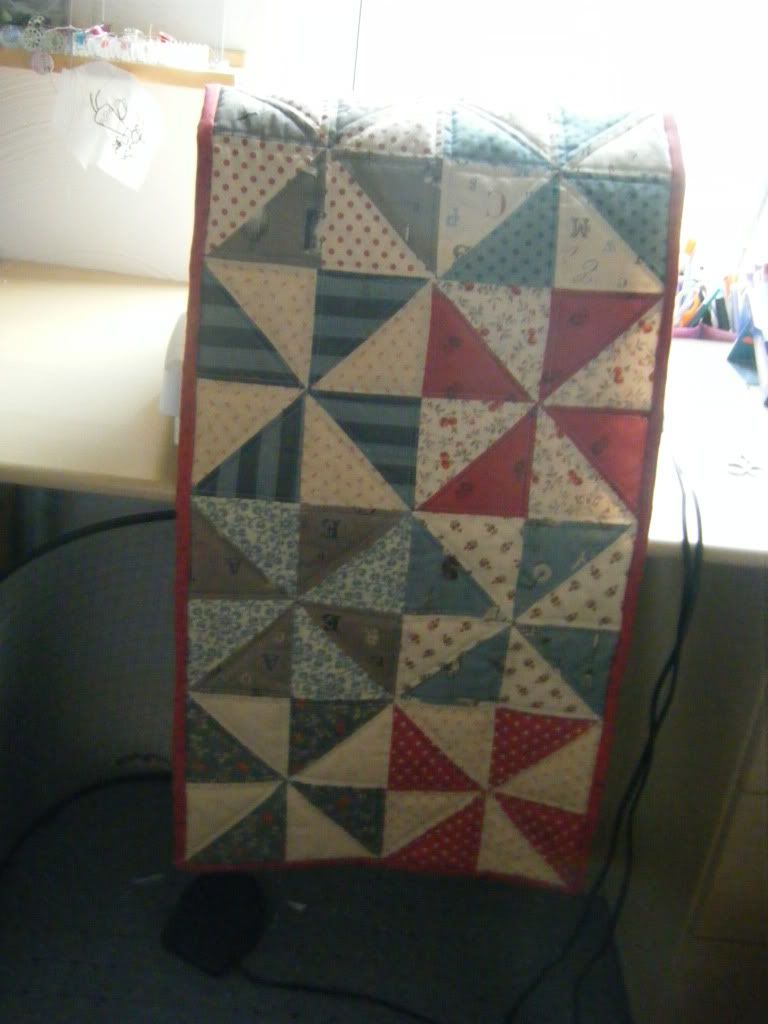
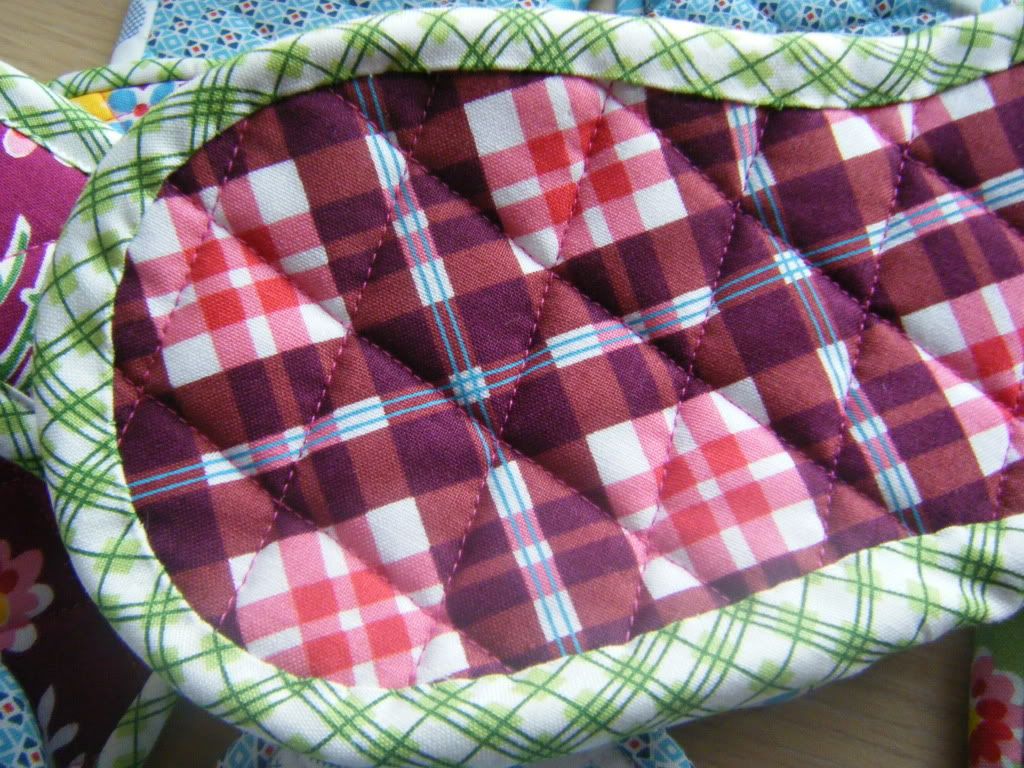
Can anyone guess what this is?  Oh, I told you in the title didn't I?  And then again above.  No prizes for guessing then.  I pieced this Petit Ecole table runner months ago but it sat there in the corner of my craft room, waiting.  Last weekend I knew the time had come for me to quilt it.  I was scared.


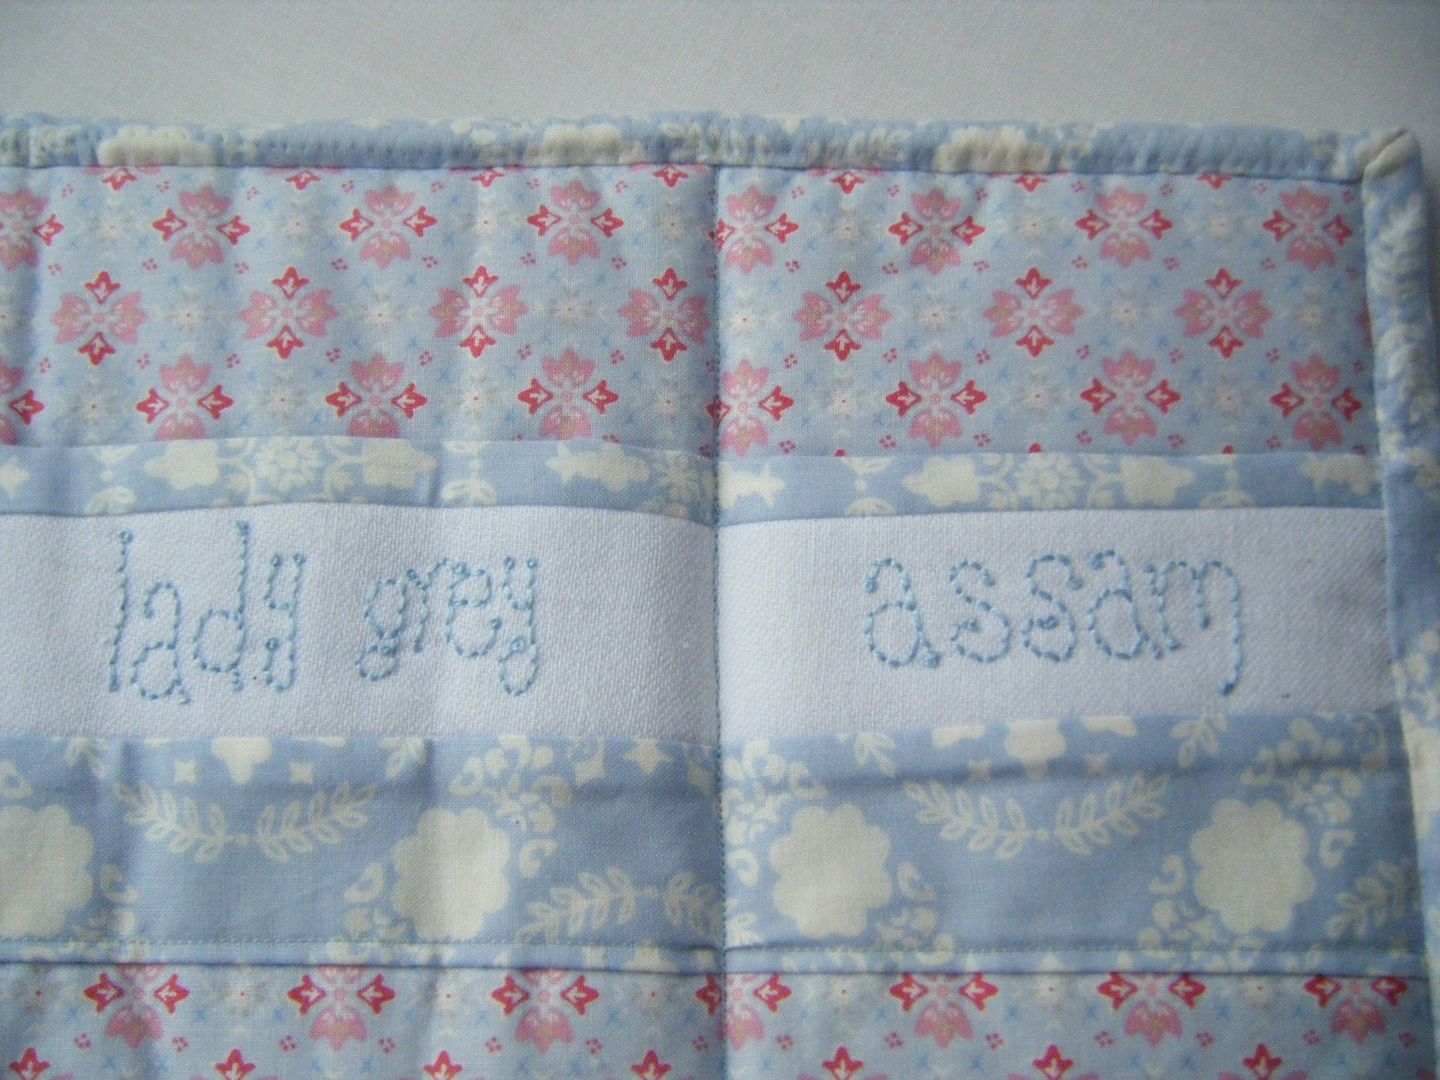
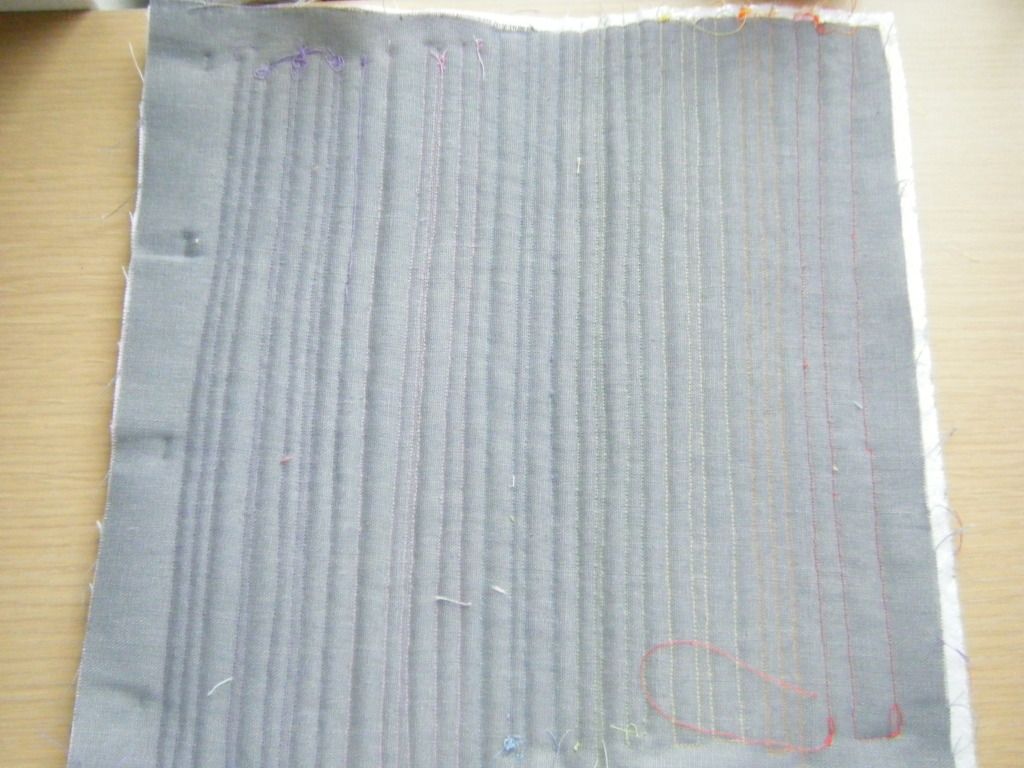
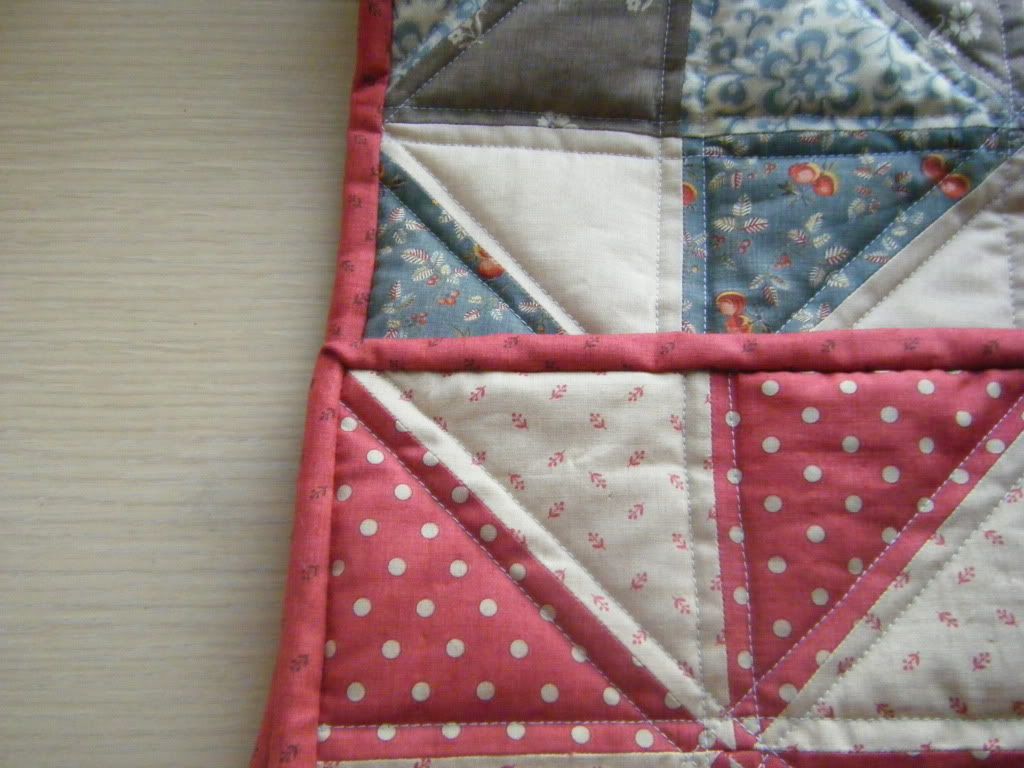
I had to piece a back too as I didn't have a piece of fabric long enough with this being about 60inches long.  So I pieced the back, did the world's most rubbishest basting.  Took the pins out and basted again, marginally better.  And I quilted.  I did straight lines about a quarter of an inch to either side of the straight seams.  I say about a quarter of an inch as my piecing was truly rubbish.  I didn't think it looked finished so I quilted along the triangles too.


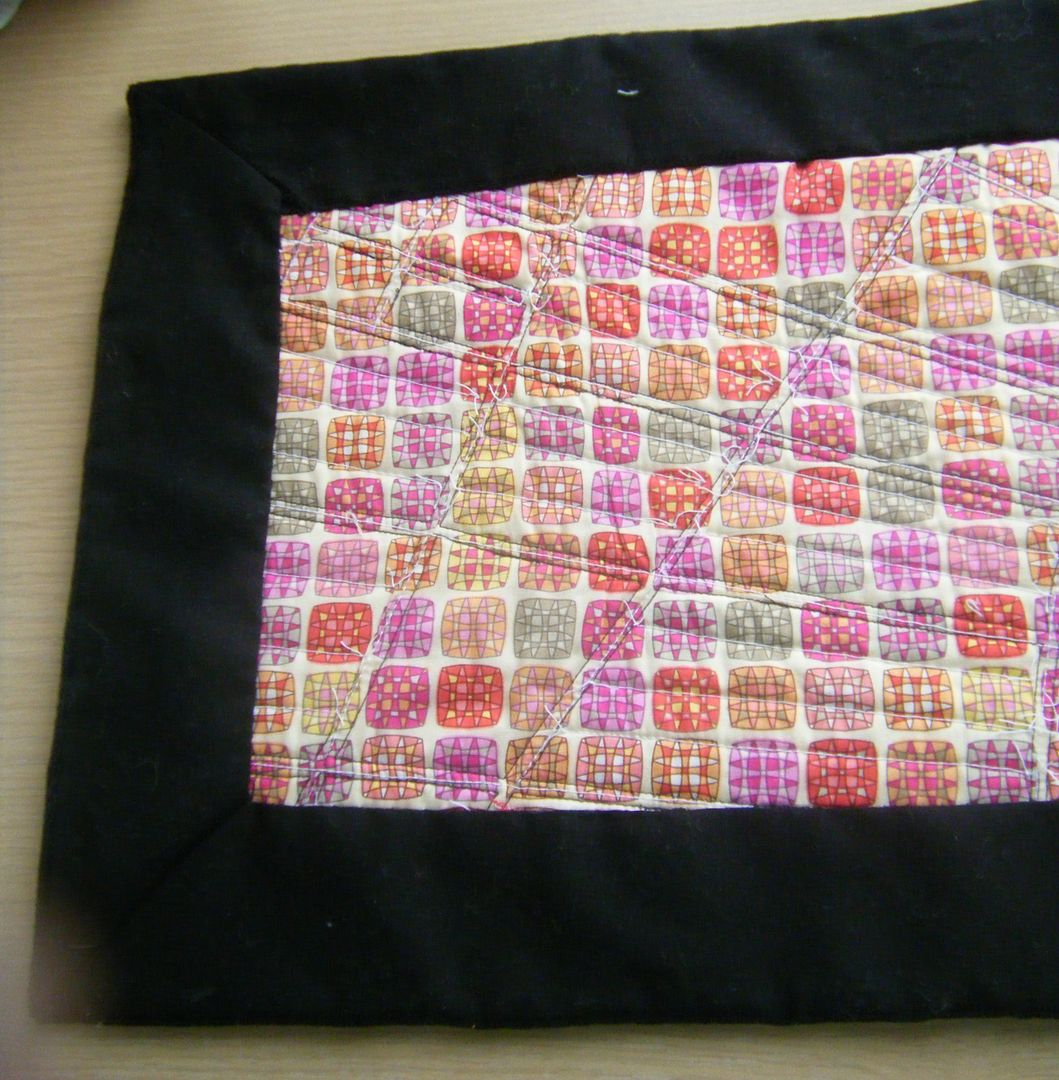
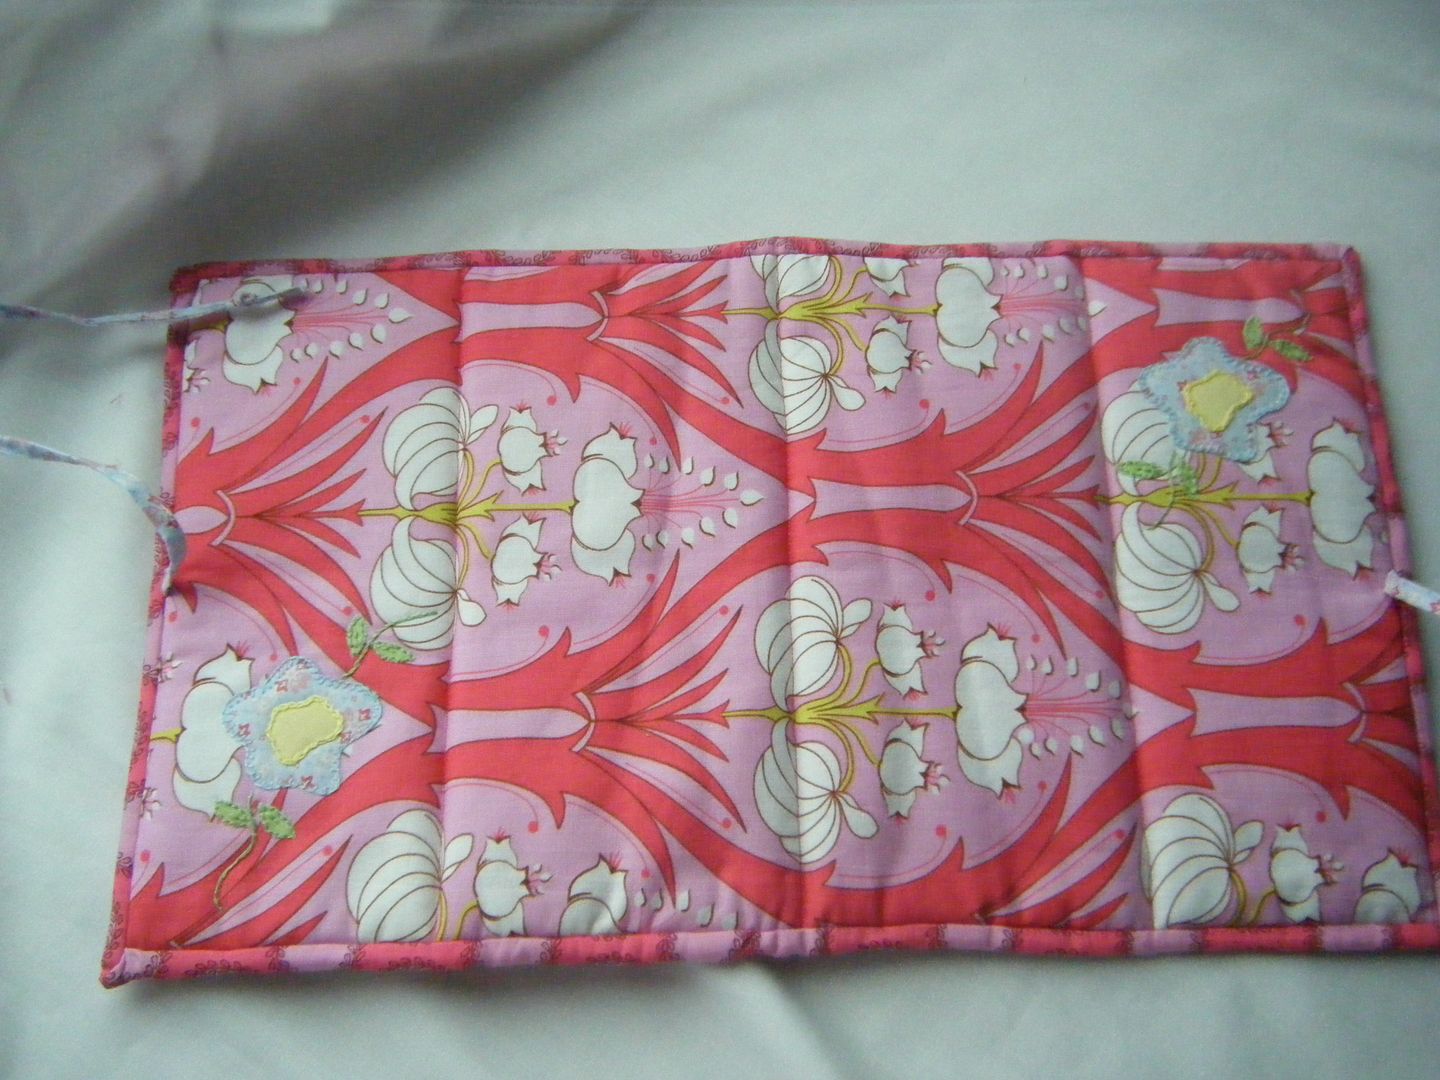
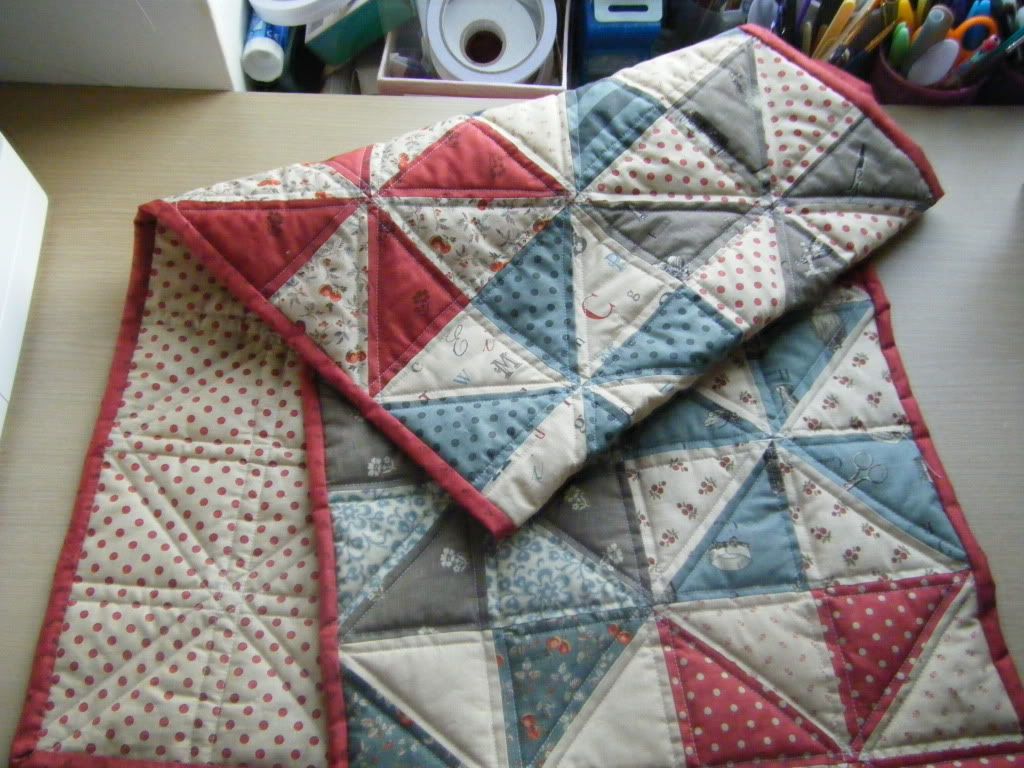
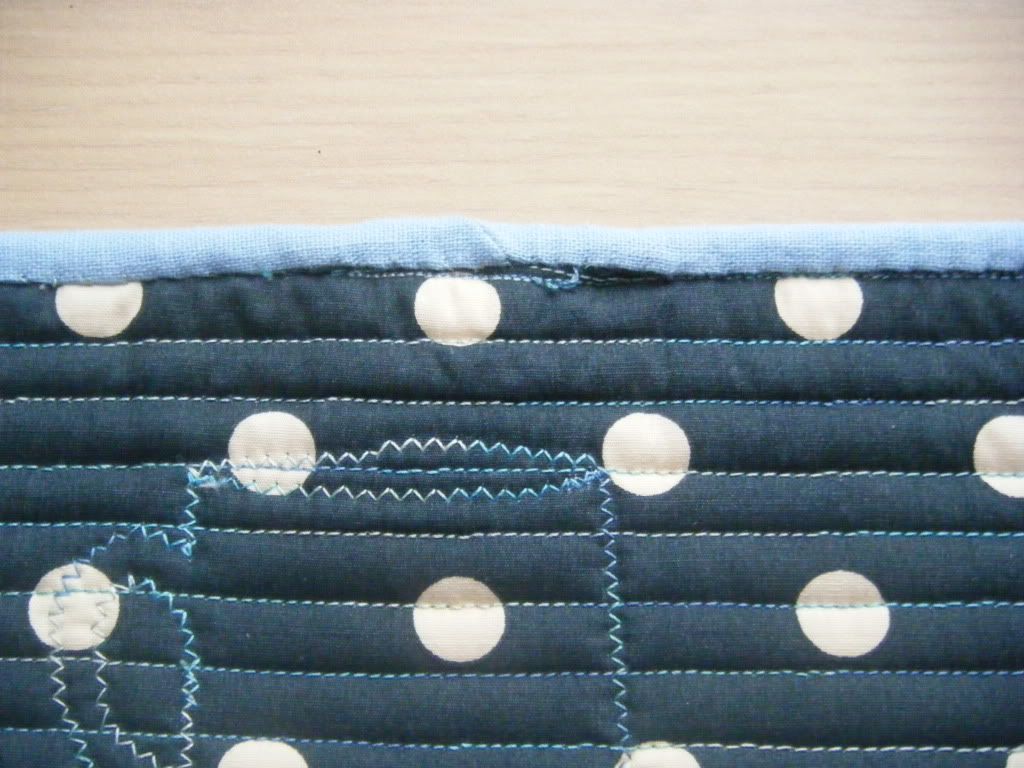
That's the back in case you didn't guess.  You know what?  I bloody love it!  Rubbish points and mismatched seams and wonky quilting and all.


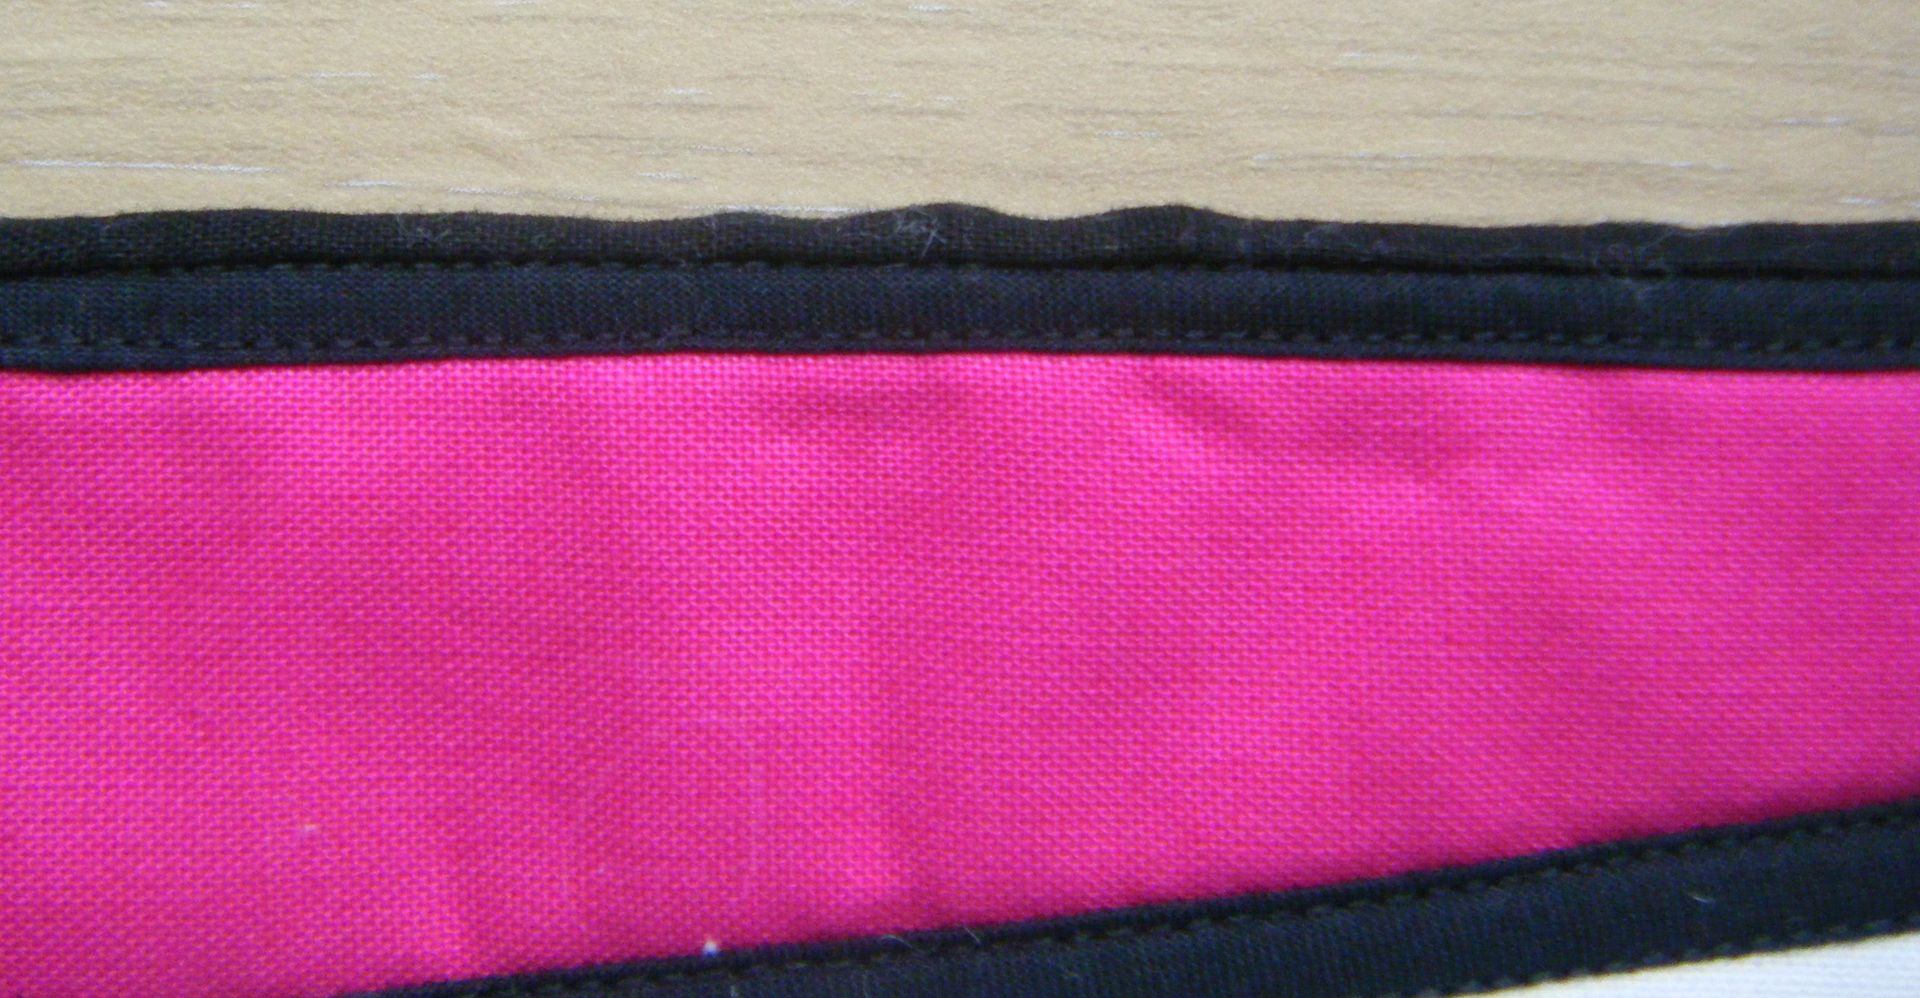
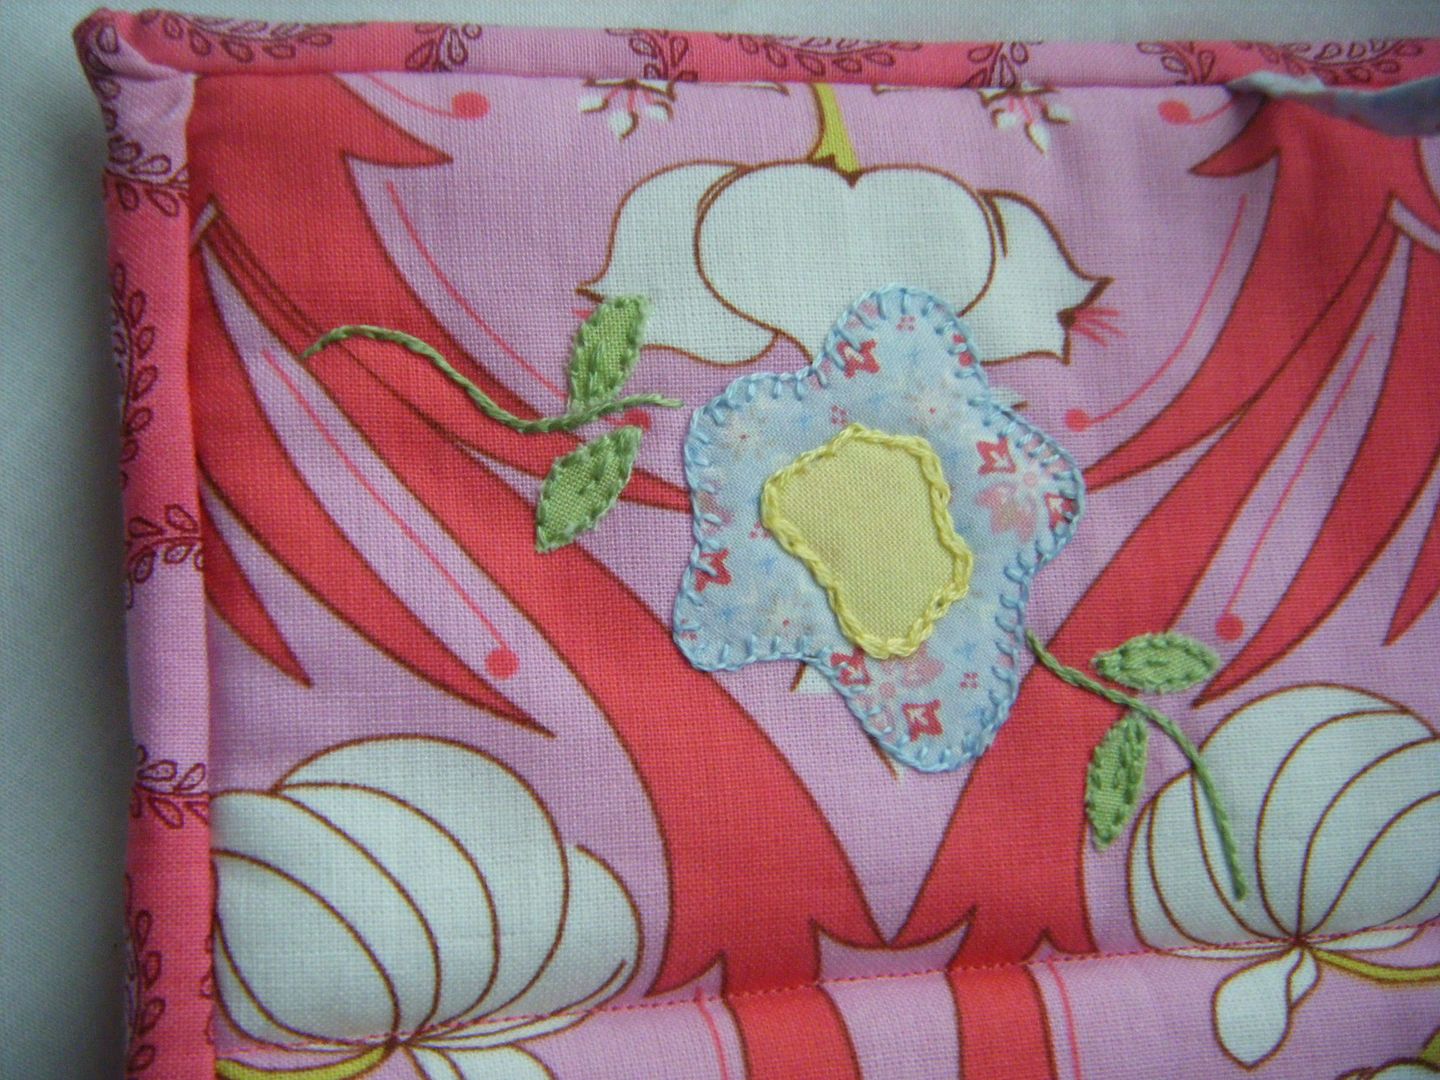
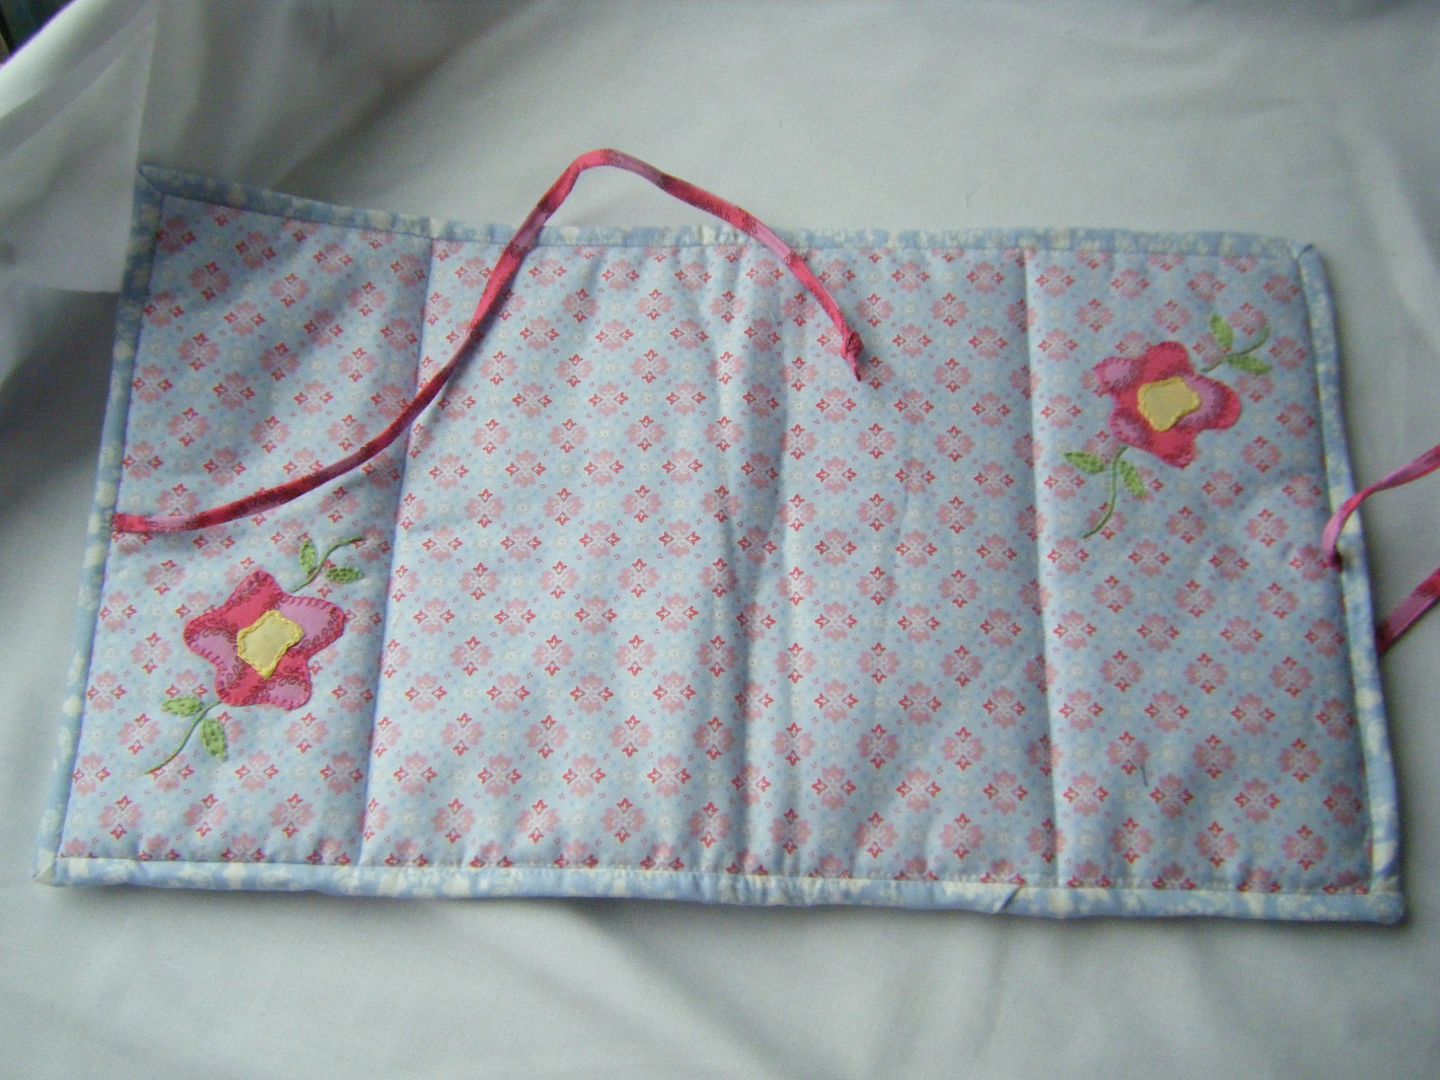
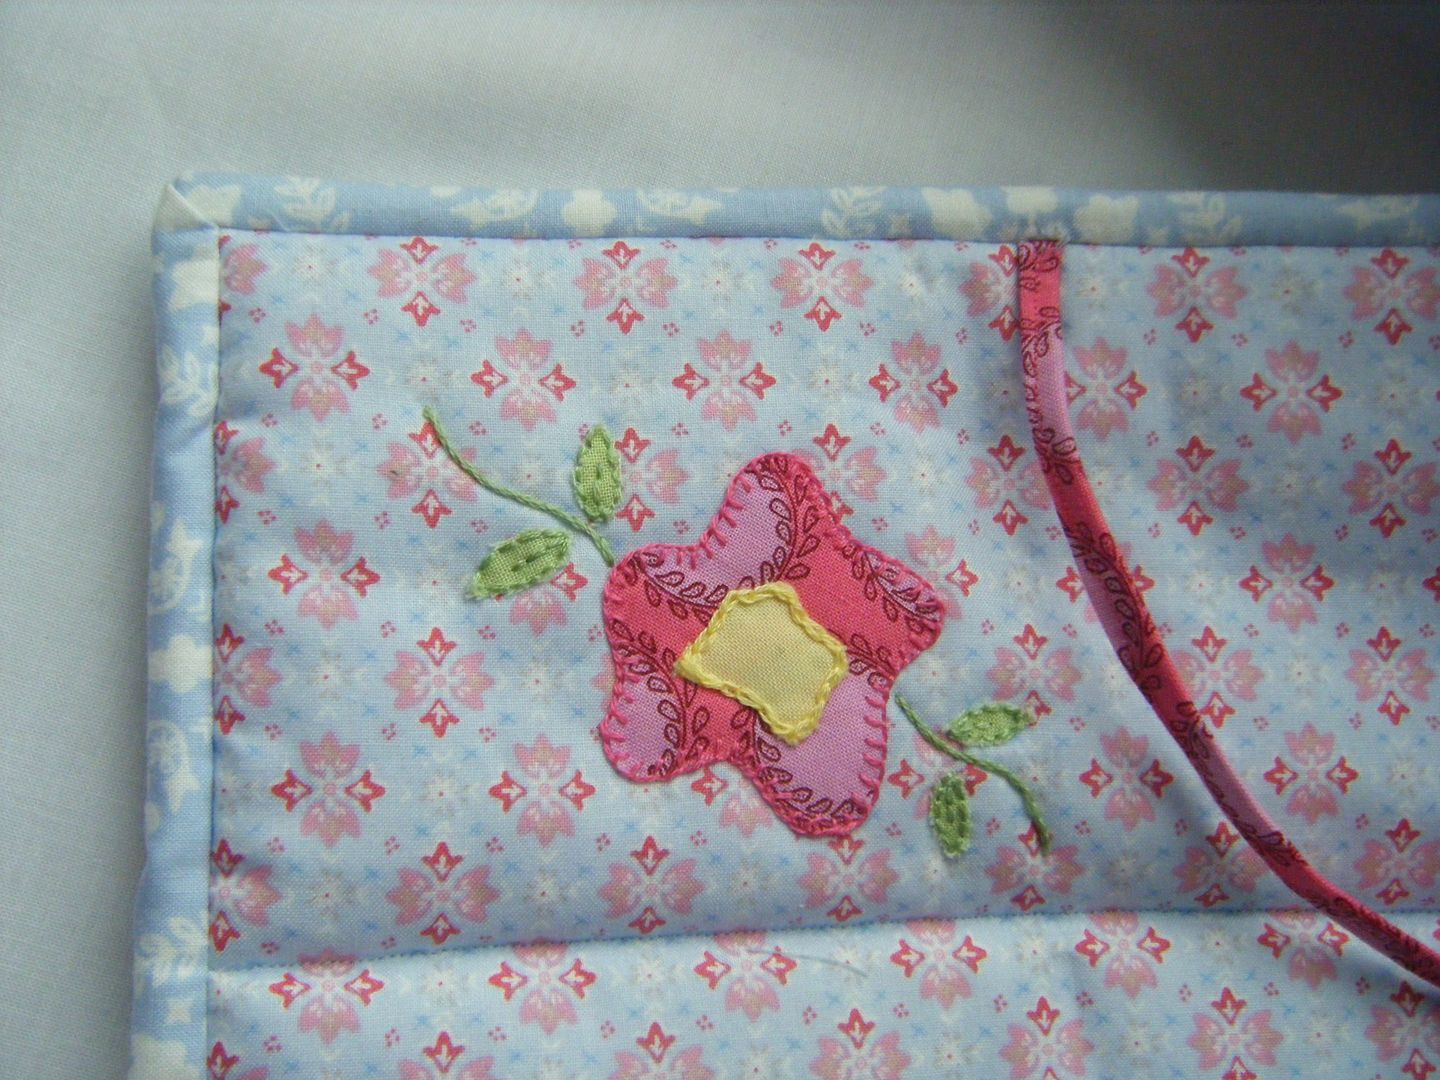
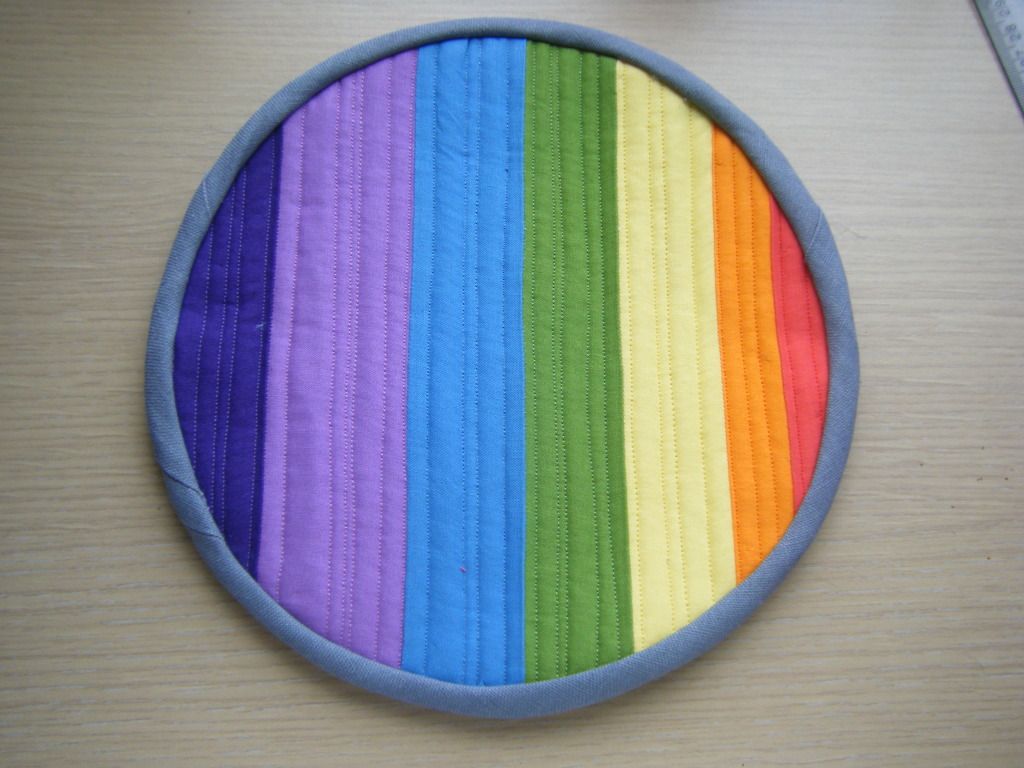
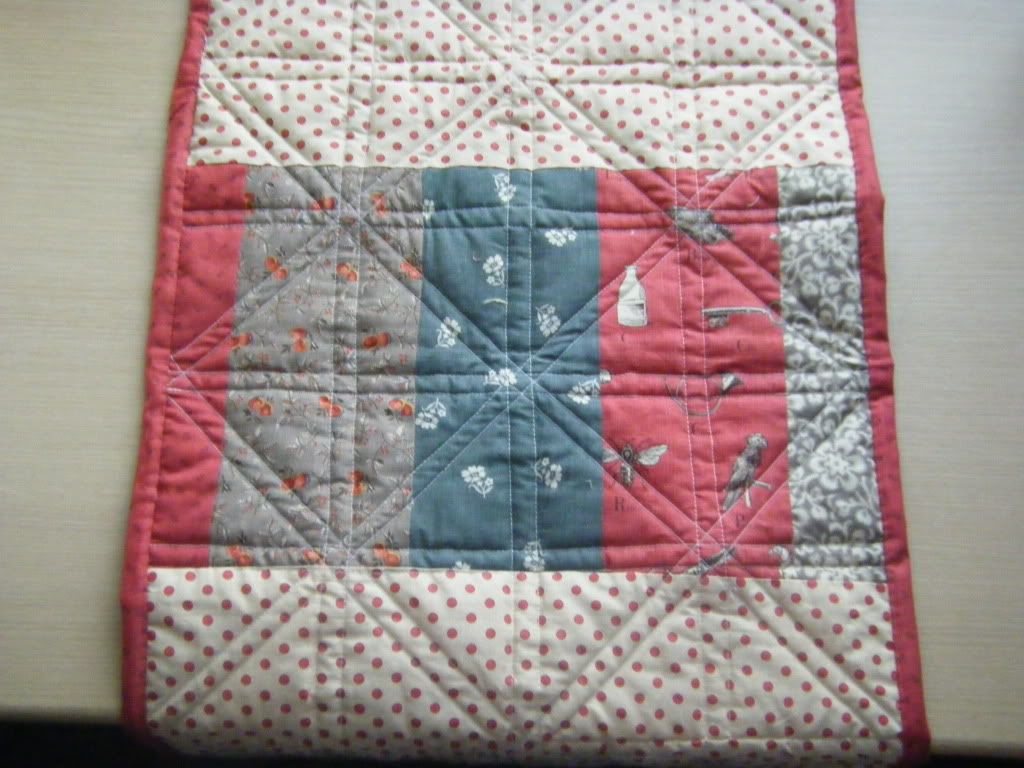
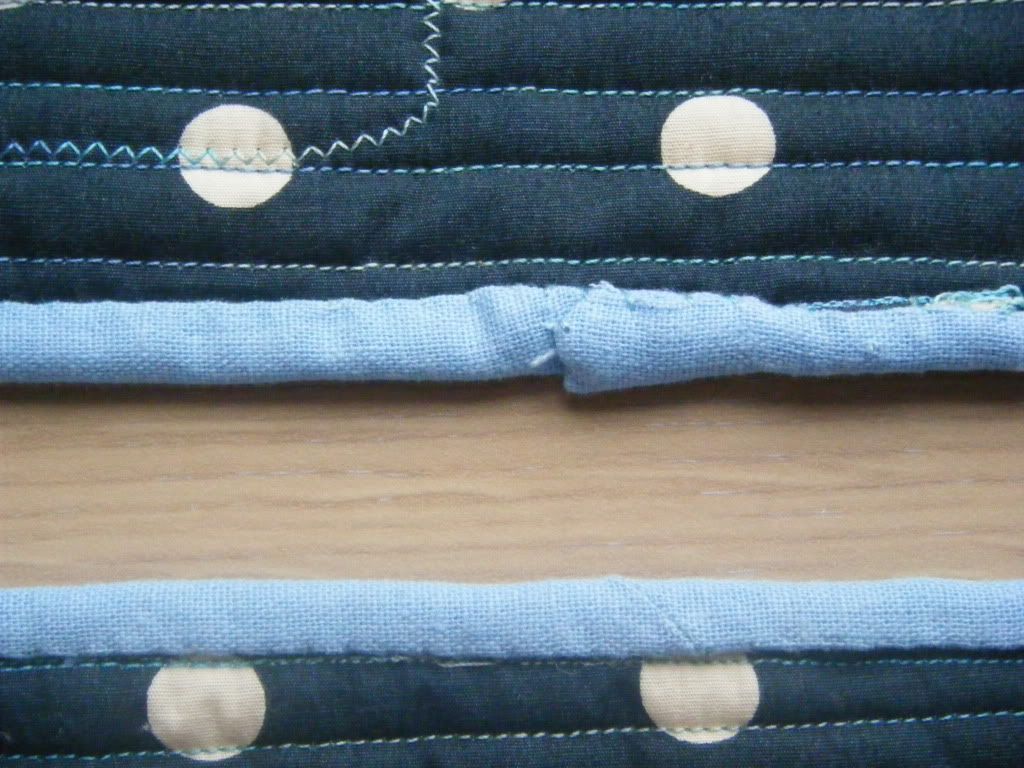
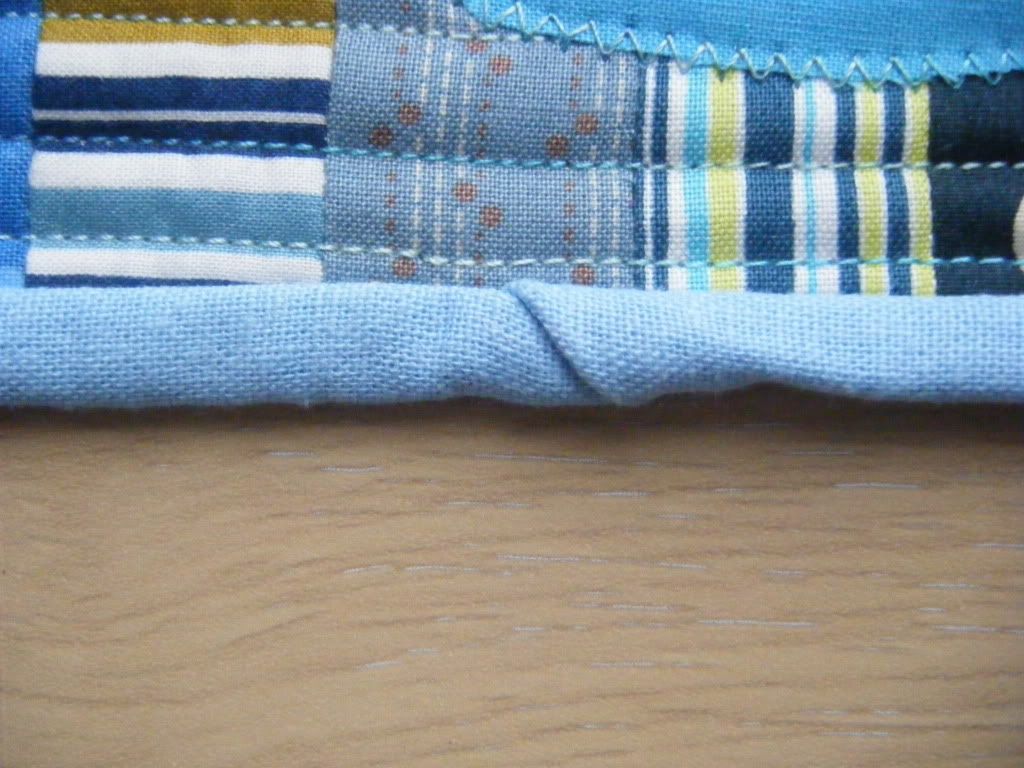
But you know what's not rubbish?  My binding!!  I sewed it on the front by machine, then hand sewed it to the back and I'm really proud of it, it looks great!


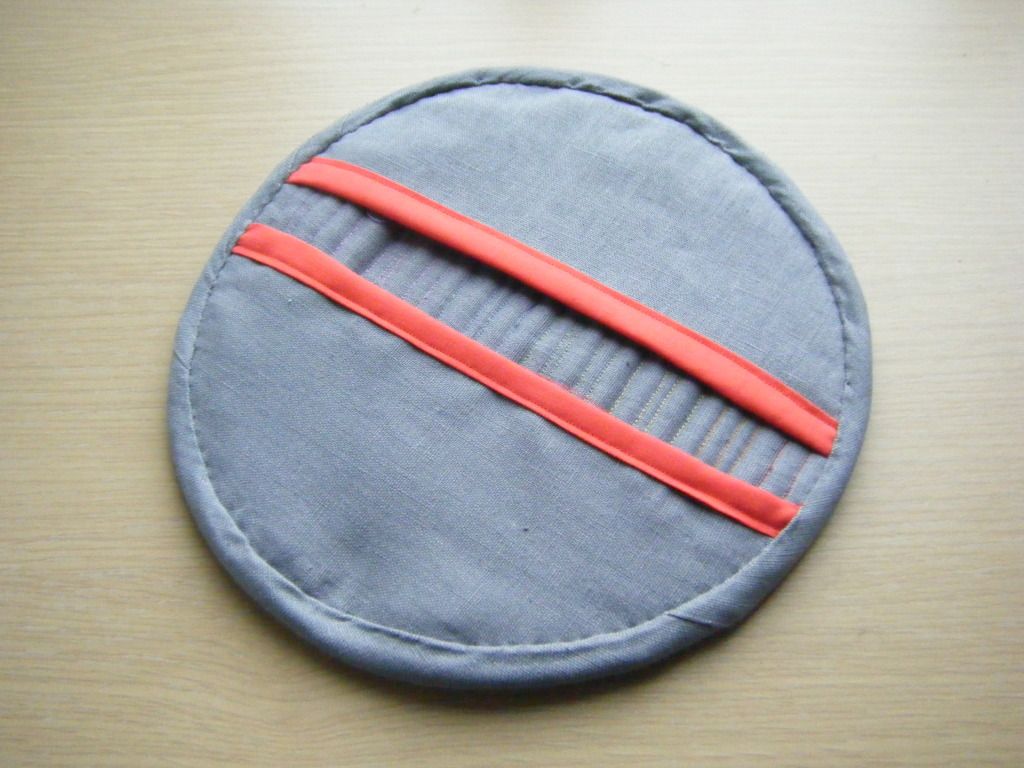
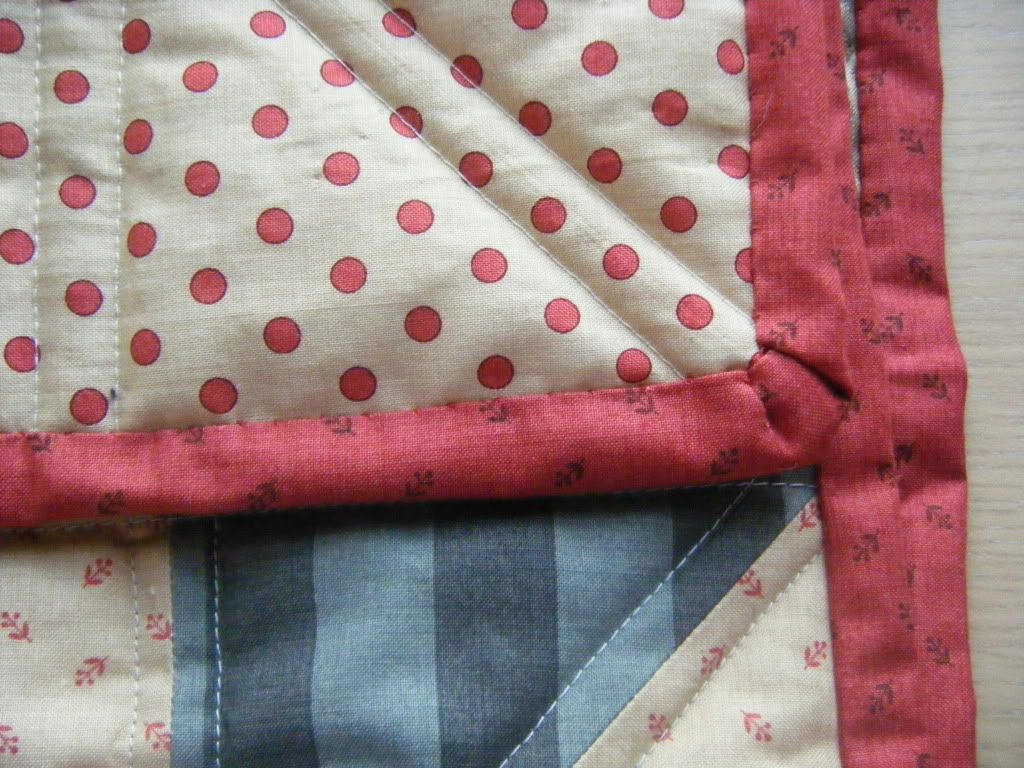
The corners not so much, I did struggle with hand sewing them on the back, but who's going to examine the corners of my binding?  Well OK, any passing members of the local quilting guild might, but I don't think my brother gets many of them in his kitchen.


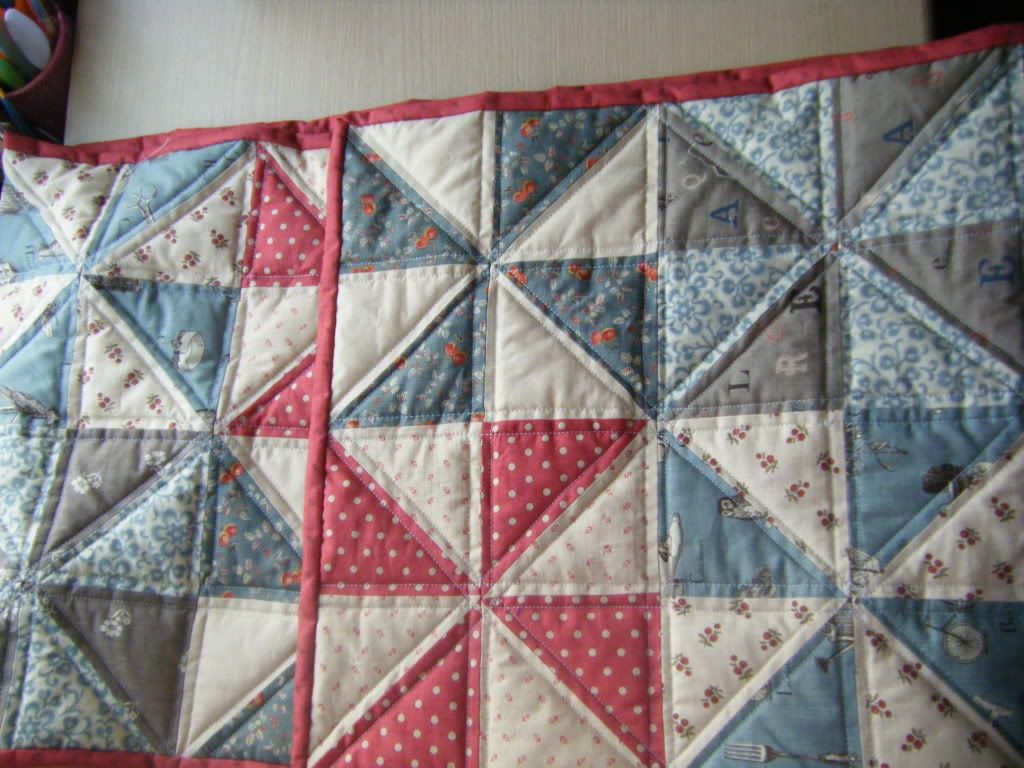
See what I mean about the corners?  It does look pretty good though, doesn't it?  I know, I know, that quilting in the bottom right of the photo above is probably making you want to cry, but me, I bloody love it!


Thursday, 8 December 2011

Spa Kit part 1 - the nemesis is faced!

Oh yes, I've made slippers!  You may recall that this isn't my first attempt at slippers, but in the past it didn't go well...  This time I made slippers for the Spa Kits I'm making for Christmas, so I needed 6 pairs... it's a good job it went well!  I used this excellent tutorial to make Spa Slippers.


It involved large amounts of binding - my other nemesis.  The bits that go across your foot needed binding by machine, I did find this tricky.  Above is the top view, below is the underneaths.

Not too bad, but not perfect either!  As these bits are hidden, I can live with it.  Next came large amounts of quilting.


Actually, that's a blatent lie.  If you look at the photo above, you can see that they were quilted before being bound.  I can't be bothered to try and change the order of the photos though as Blogger doesn't like that so you'll just have to suspend reality for a moment!  These were quilted at 1 inch intervals.  It took forever.  The other 5 pairs have much wider gaps between the quilting, maybe 2 inches, perhaps a little less.  I didn't take any photos of that for some reason.


Here's the first 5 slippers with the machine binding bit done, awaiting my hand sewing attention.  I folded the binding in half and sewed both raw edges to the edge of the slipper, to hand sew I tucked it round to the back and slip stitched.  I haven't done it this way before but it seemed to work really well!  I know, I know, you've all been doing it for years, but when it comes to quilting, I'm remarkably slow!

My machine had a bit of a strop at this point, so I left it and picked it up last weekend.  I only needed to clean the machine out, as I'd suspected but had been too tired to do.  I got down to some hand sewing...


Ta dah!  I'm really chuffed with them.  They're all in the DS quilt range that was sold in Joann's and that the lovely Wee Pixie obtained for me.  I've used up all but a couple of scraps of the 12 fat quarters I had! 


I think these are my favourites.  But I can't keep them.
I have a confession to make.  I really, really enjoyed hand sewing this binding.  I've always thought that quilters who said they love hand sewing binding were wierdos, well now I know that either I was wrong, or I'm a wierdo too!


 I'm making matching eye masks.  I've done all the machine sewings, so now I get to sit and hand bind them!  That's after I hand bind the table runner... oh yes, I've been busy!  I'm still crap at quilting though...

Wednesday, 9 November 2011

The world's worst ever binding

I promised you a couple of day's ago that I'd show you the world's worst binding.  Well here it is!  As another present for those unlucky dad's, I thought a mug rug would be a good idea.  Hmm. 


I did some simple piecing, then appliqued a mug rather wonkily onto the front.  I quilted lines in it and was actually pretty pleased with the quilting, no snags or wobbly bits at all.


And then came the binding.  Mistake one was to choose the most horrible fabric ever.  I don't even know what it is, it's cotton but thicker and softer.  It's also very fray-ey.


Look how rubbish that is.  I sewed it on the front by machine, then hand sewed it onto the back.  Wow, am I crap at binding.


I mean, look at that.  How shit is that?


And that is even shitter.  Mistake two was not joining the ends correctly, just folding and sewing, creating a massive lump in the binding and resulting in me hacking away at the seam allowance.


Creating these unsightly lumps.


Mistake number 3?  Me attempting binding at all.  I really don't know what I'm doing.  There are a million tutorials out there and I've read every one, but they all focus on making the binding and sewing it into long strips.  I can do that bit!  No one goes into any detail about the next bit.  It's a case of "sew the binding on", then they tell you how to do the corners, which I can also do.  Not that it's obvious from these monstrosities.  

I did make one more presents for the dads.  They worked out a bit better, but I'm yet to package them and I'm bound to bugger that up! 

Monday, 7 November 2011

The world's second worst ever binding

Well have I got a treat for you today ladies!  Today you get to see the terrible job I made of two birthday presents, and you get to see the world's second worst ever binding.  Lucky ladies!

Men are notoriously difficult to make for, so when I saw this tutorial I decided to make one for my dad's birthday later this month, and my father-in-law's birthday early next month.  I spotted this tutorial ages and ages ago and got it into my head that I needed clear vinyl for the job.  After whinging about the lack of sewable vinyl in England, the lovely Sandra got in touch and offered me some of her friend Nancy's vinyl.  With Nancy's blessing of course!  I sent some Tilda charms in return and it led to a wonderful friendship with these too fantastic ladies, so I'm ever grateful to clear vinyl for that.  I'm not grateful to clear vinyl for anything else.

I started following the tutorial, but soon left it to one side and struck out on my own.  Why??  I have no idea.  If I'd followed the tutorial I might not have made such a hash off it.


I used some newspaper print linen and a dark green print for the lining.  I thought I'd have to fold the vinyl a little to make room in the pockets as it has no stretch. 


Oh dear.  That was a mistake.  The clear vinyl did not play nicely.  I used a leather needle, but I might have benefitted from putting on my non-slip foot before the last few stitches!  Sometimes I am just so dim.

Then came the binding.  Not fun.   Not neat.  Not well sewn at all.  A complete and utter bodge job.  Though not the worst binding ever, only the second worst binding ever.


See?


See?


Yuck.  I filled them up anyway, after wrestling with those damn poppers for half an hour.  I hate bloody poppers.  I put in some bits and bobs like ice scrappers, a torch, some mints, a demister... stuff you sometimes need in a car.


They'll have to do.  I doubt the dad's will even notice.


So why isn't this the worst binding ever, as clearly it's bloody rubbish?  Because I did some even worse binding after that!!  Stay tuned for that reveal.