Monday, 28 March 2016

Beads everywhere!!

Kheops beads are small triangular beads with two holes, one either side of the point.  The jury is out as to how to pronounce the word!  Back in February we went to a beadweaving class at The Bead Shop Nottingham to make a design called Kheops windmill.


I love to use colour so have very few neutral necklaces, other than silver pendents.  For this necklace I chose dark grey and light silver Kheops, silver size 11/0 seed beads and Scabacious green Swarovski crystals.  The colours in both these photos are really off!


It was quite a quick pattern to weave and I would have finished it in class if disaster hadn't struck.  I had a bead stopper on one end of the necklace, but not on the other.  I held it up to my neck to see if it needed to be longer or shorter and dropped the other strand.  Beads everywhere!!  I rescued the crystals and weaved it again.  This time I didn't drop it and put calottes on both ends.  Then I went to put it on and one of the calottes fell off.  Beads everywhere!!  I haven't had the heart to mend it yet...

Thursday, 24 March 2016

lino cutting and fabric printing

At the end of February I came down with a horrible chest infection.  I'm still withdrawing from my anti-depressants.  The withdrawal is causing me to clench my teeth so hard that my jaw is agony.  I thought at first it was toothache but the dentist told me it's not.  Along with other ailments like headaches, earaches, feeling sick and dizzy, I think the withdrawal symptoms have lowered my natural immunity and so I caught an infection and it was pretty bad.  I was off work for a week.  

On the second Saturday we had booked a craft class at Locally Produced for You and I was determined to go.  It was another great workshop, unfortunately we don't have any more booked there but I hope she runs some more soon as it's a great workshop space and a lovely shop.

This class was lino cutting and printing on fabric.  The tutor was Anna from Fabritzia Design.  I bought a lino cutting tool at one of the craft shows a few years ago but still hadn't tried it so I was eager to go to this class.


Because I was still a bit ill, I didn't have much creativity in me (I didn't do a single second of craft the whole time I was off work, I was so ill that all I could do was lie down and watch TV and even that hurt!), but sitting watching the others carve their lino, I finally got some inspiration.  My mum had a shopping bag with a kind of splodge pattern on it, that became the stamp on the left.  Then the one on the right just popped into my head.  


The fabric I printed on was actually blue though it comes across as white/grey in this picture.  I used silver ink, light blue ink and a lovely navy ink to stamp.


I left it to try for a week (or more!) and now I just have to iron it to set the ink and I can sew with it.  I'm thinking of making a cushion cover and adding some embroidery and beading.  For the time being it will just sit in my craft room with my other WIPs!

I really enjoyed carving the lino and if I could just get a little bit of free time, I could carve some more!

Thursday, 17 March 2016

Cloud with a silver lining

I'm getting towards the end of my first term of silversmithing and I haven't had much to show!  Piercing out shapes is quite quick, soldering is quite quick, but filing, sanding and polishing is not!

This is the second piece I've made.  I hammered a sheet of 1mm silver with the round end of a hammer to create a nice texture, then I pierced out a cloud shape.  I'm afraid my photos aren't great.  The top one shows the colours well, but the second one shows the texture which I just couldn't capture before.


Nor did I think to take a photo of the back! I've soldered a little arch on the back, the chain is threaded through the arch.  I drilled 3 holes at the bottom.  I then made my own headpins by heating the end of a piece of wire in a torch flame until it balled up.  I added a crystal and and wrap-looped them onto the cloud.


I am VERY proud of this piece and I'm pleased to say that I've had quite a few compliments whilst wearing it!

I'm currently working on a bracelet and hope to have that finished to show you soon.  I've signed up for the next term which begins in April.

Monday, 14 March 2016

Dichroic glass

Wonderful mum found a new craft class venue, between both of our houses in West Bridgford, Nottingham, a little town with great cafes for a coffee or afternoon tea after a day's workshop.  The classes are held in a beautiful little handmade shop - Locally Produced for You.  The tutor was Katherine from number8glass.

We went to a dichroic glass workshop.  I've worked with glass before, but not dichroic glass.  I'm not really sure what dichroic glass is, other than it's pretty, sparkly glass!


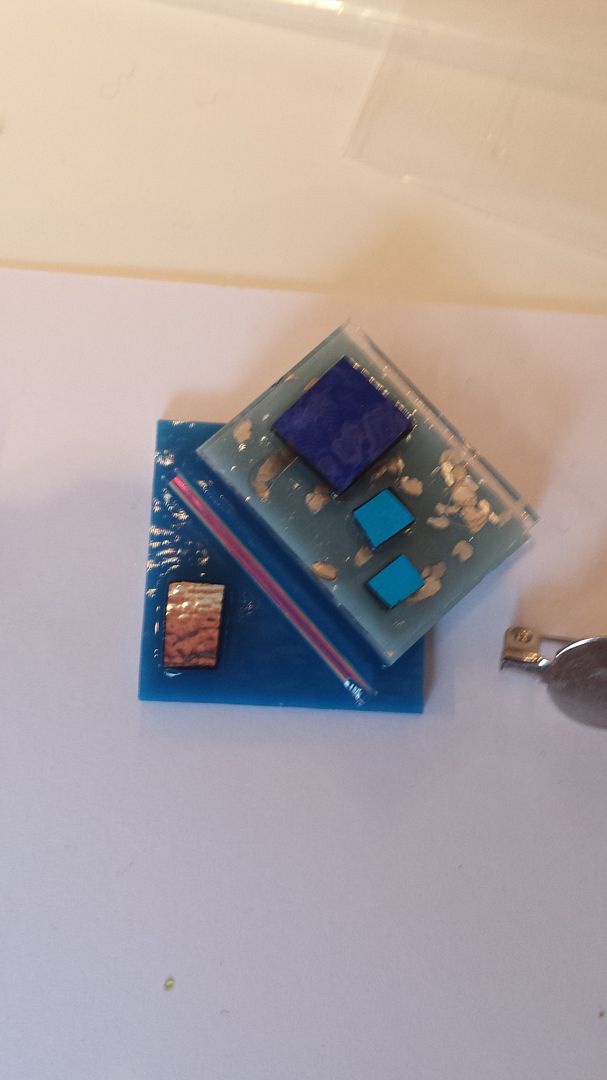
Above are the before photos.  The tutor had lots of squares and rectangles of glass.  She would then cut the dichroic pieces to the size and shape we wanted, or round the edges by nibbling at them with grozier pliers.  Once she found out I just to do glass work and have even made a stained glass window, she passed the cutting mat and cutter over and told me I had to cut my own!  I'm pleased to say I hadn't forgotten what to do.

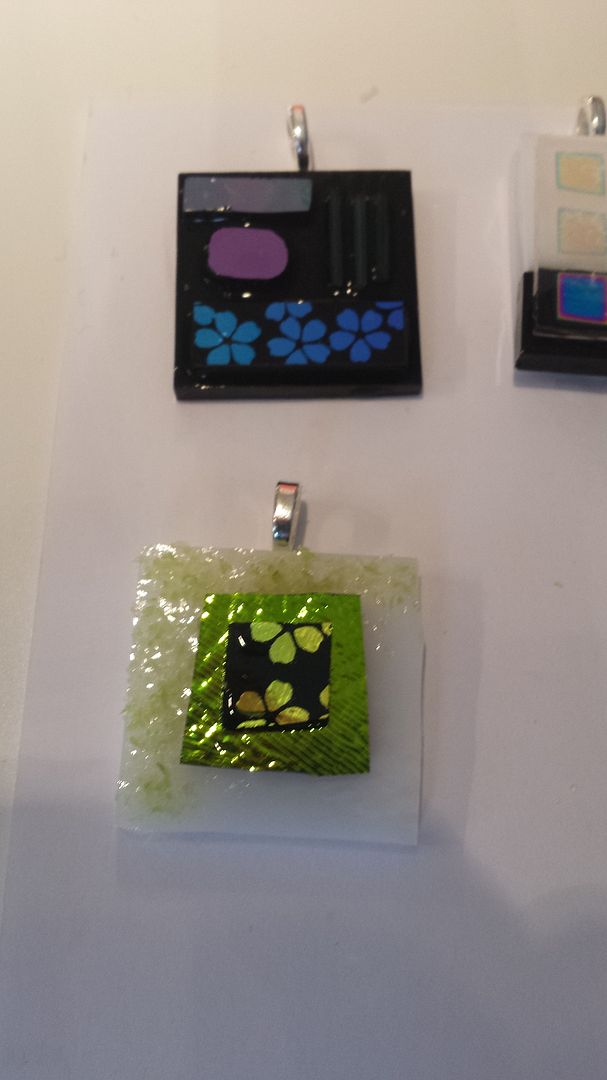
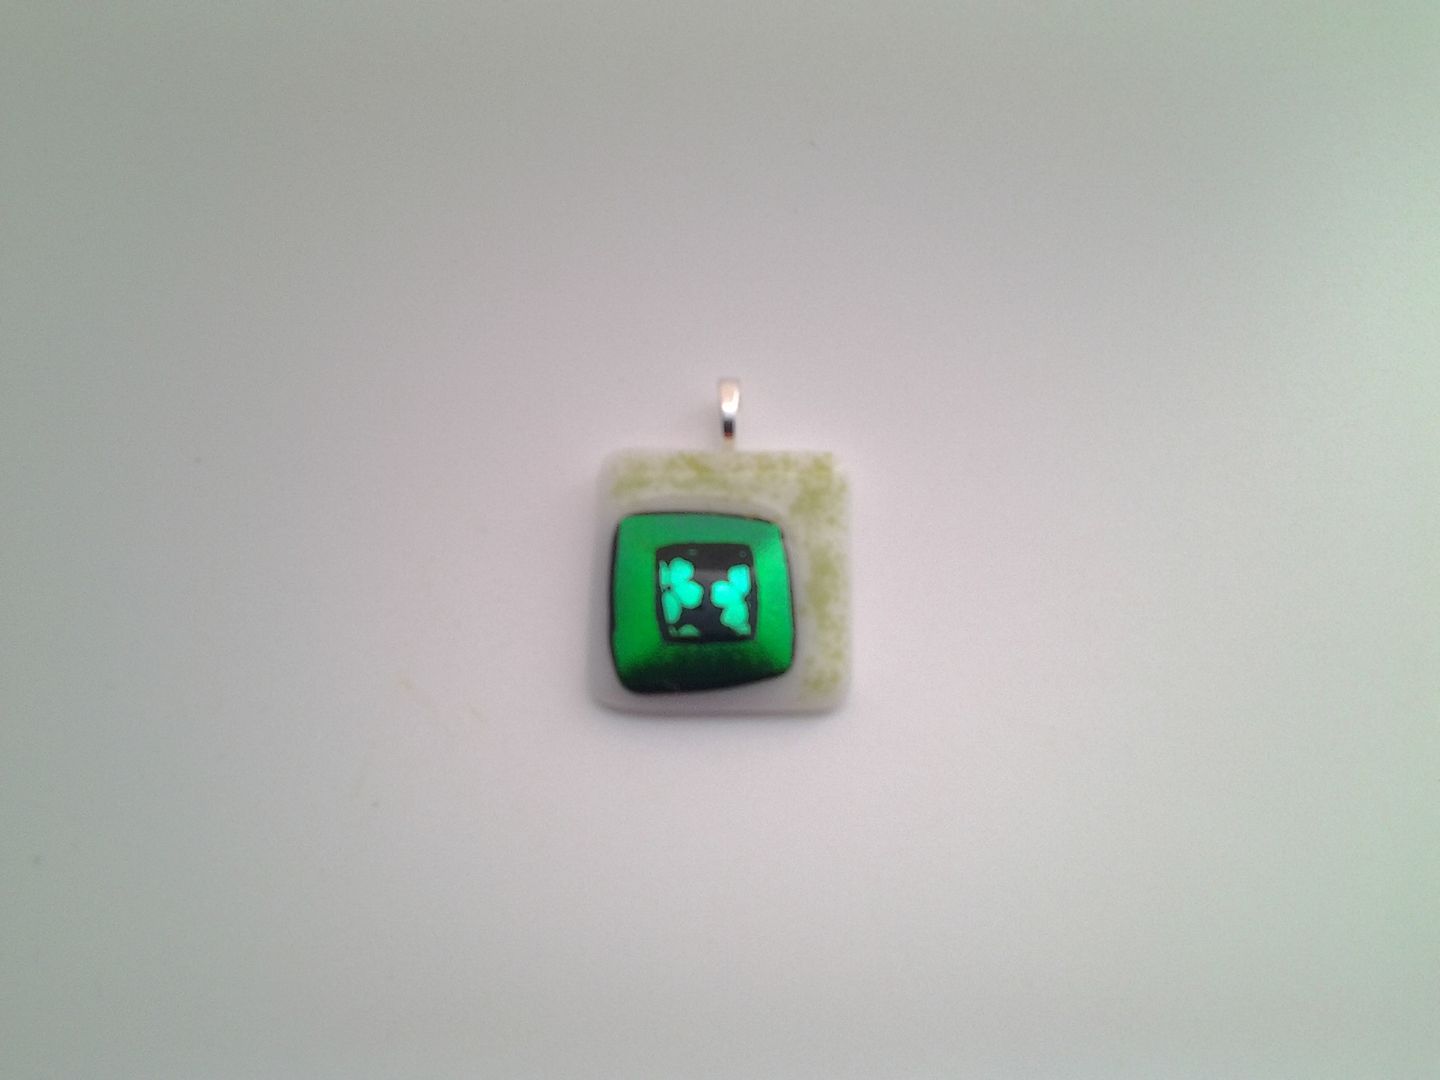
The top one is a square of black glass with three pieces of dichroic glass on top, and three glass rods on the top right.  The bottom one is a square of white glass with a square of green dichroic and a square of flowery dichroic, then I added some green frit on the left hand side.  


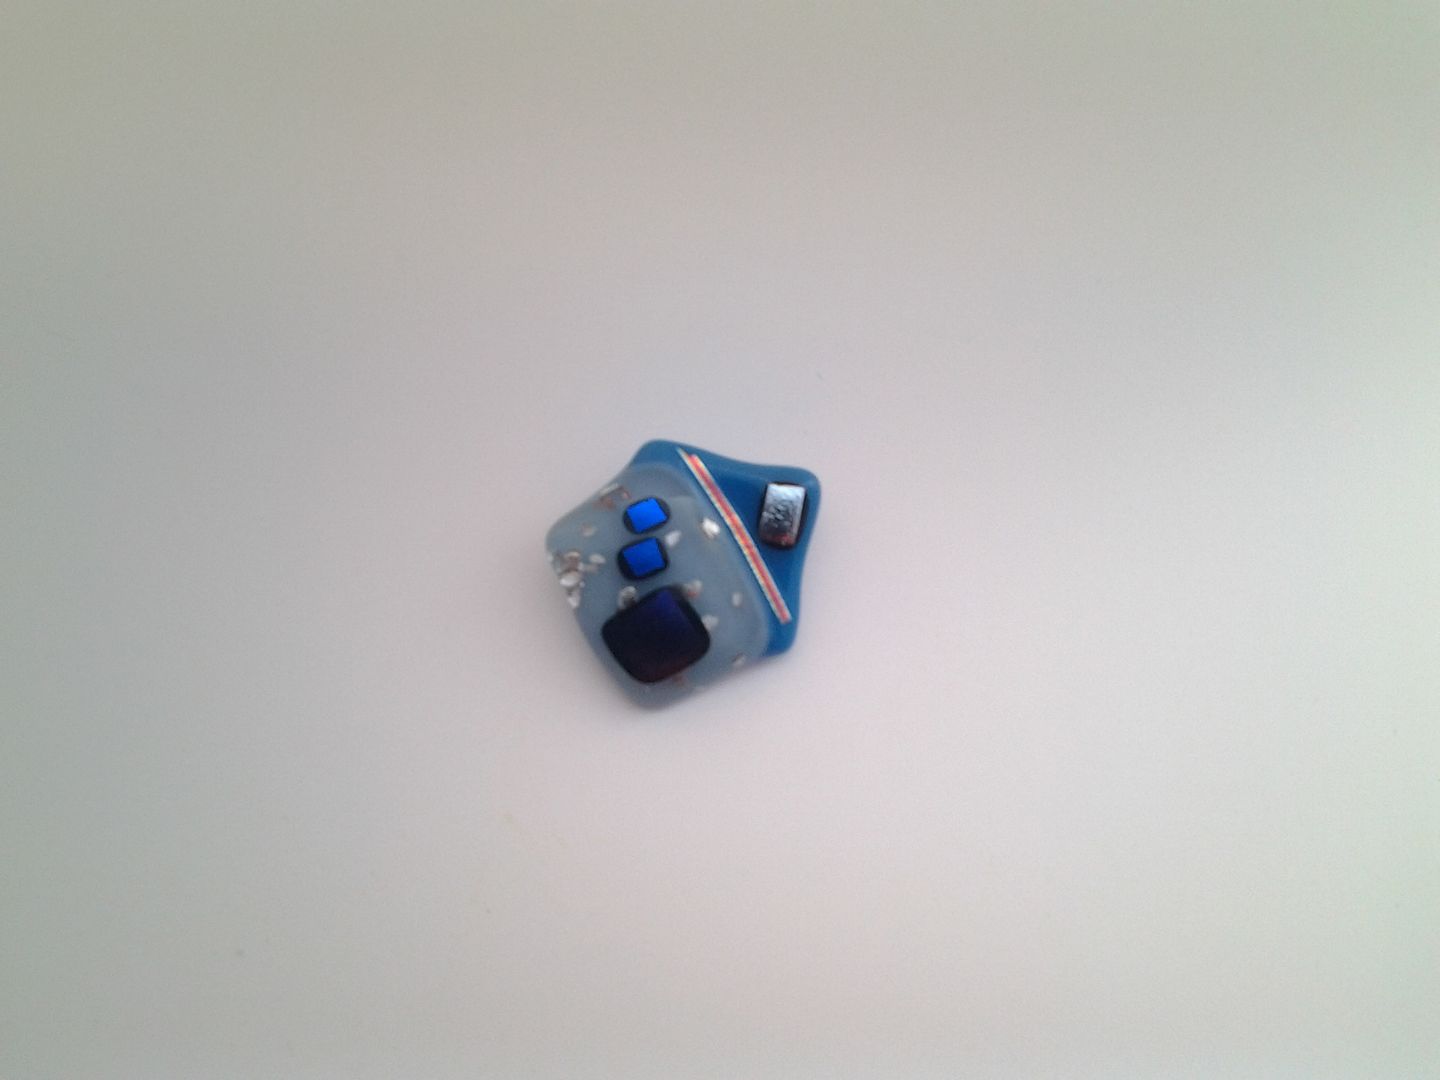
I love the black line around the green glass which is just what happens with this kind of glass.  Oh, I should probably say that the picture above and the one below show the two pieces after they'd been fired in the kiln.  The green frit didn't come out too well.


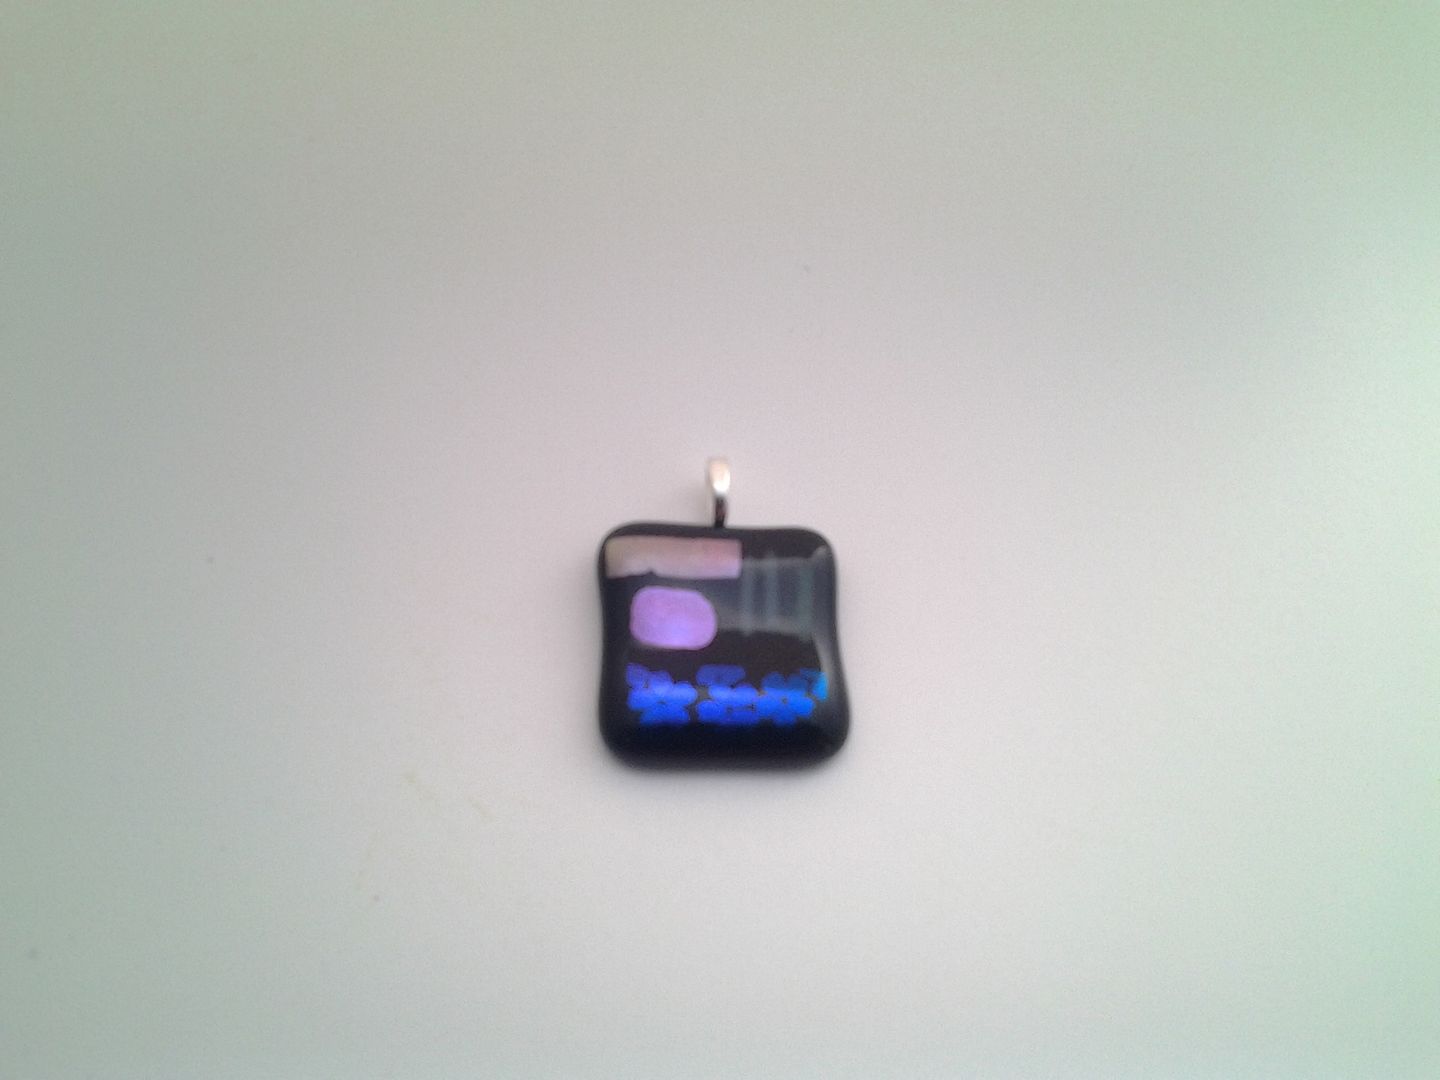
I really like this one, it's very rounded and tactile.  The photos don't really do them justice, they are so hard to capture due to the sparkle.


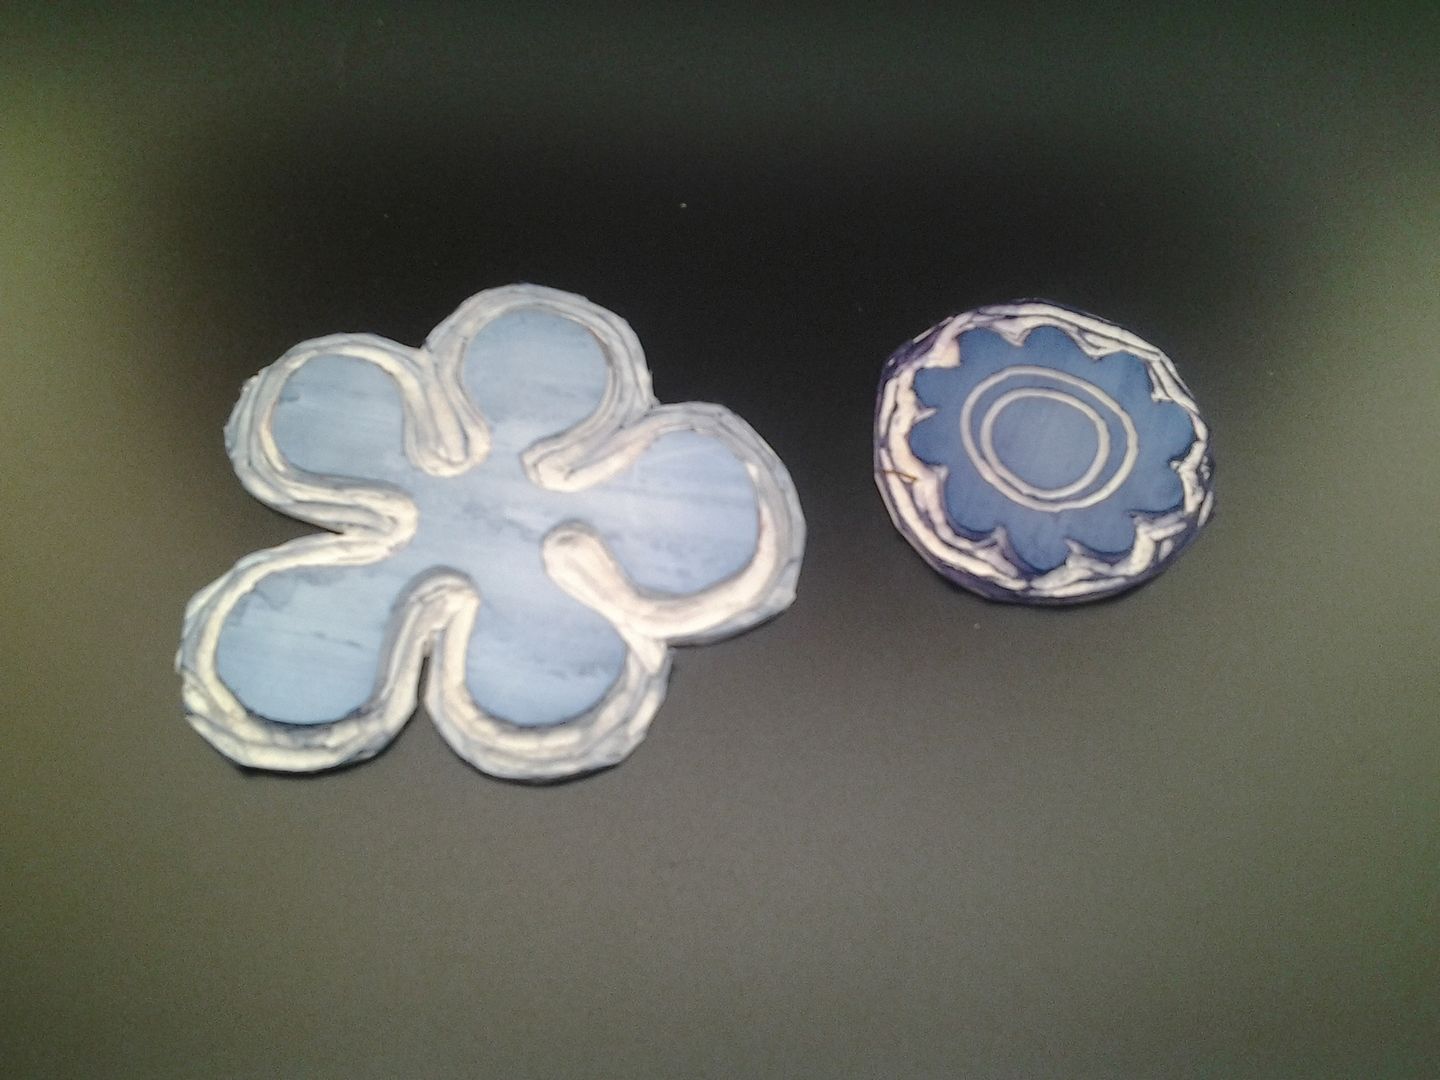
This one is a brooch.  I used blue glass in two shades.  The lighter blue one has some silver confetti on top, and that's sandwiched in with a piece of clear glass.  


I like the way this one came out too.  It's certainly very unusual!


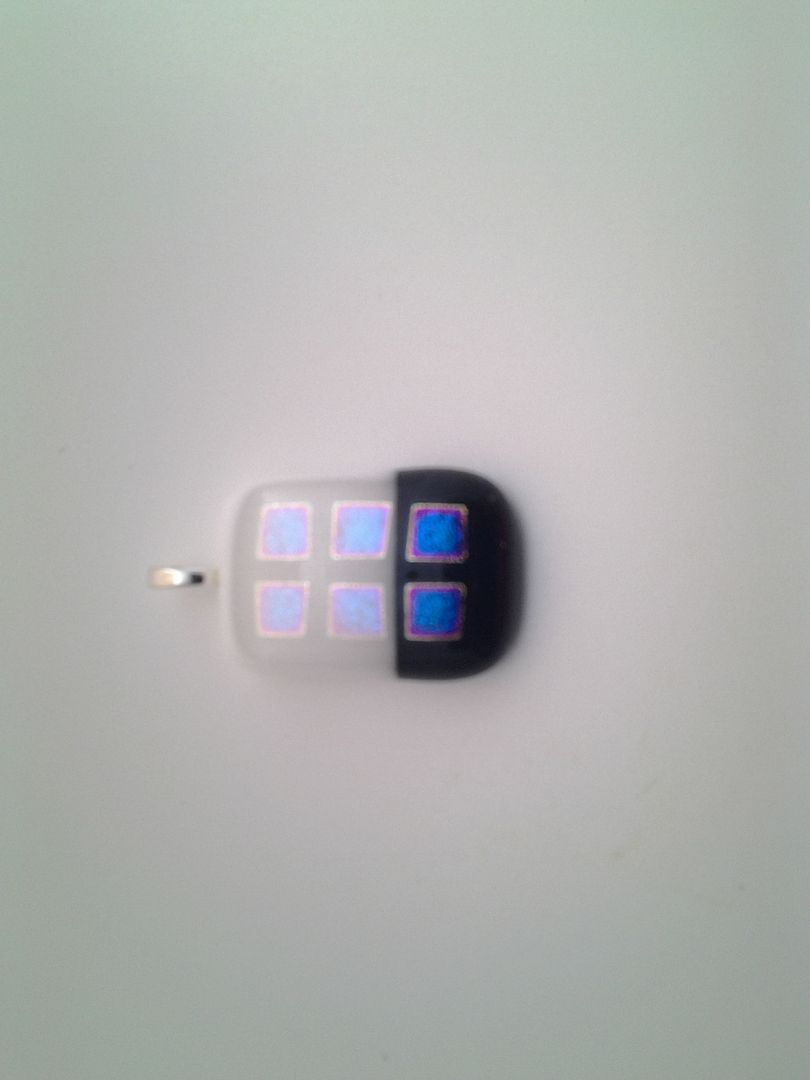
Finally, this one is a piece of black glass and a piece of white glass sitting on a white base.  I used a piece of dichroic (it's clear with holographic squares on it) on the top.


We had a brilliant day.  I really enjoyed playing with the glass and designing pieces of jewellery.  I really do have to get myself a kiln at some point!

Friday, 11 March 2016

Beadweaving stars

Wonderful mum tracked down another source of craft classes for us.  There is a local textile group called Living Threads who run a series of workshops which non-members are invited to attend.  There are various textile and embroidery classes and also some bead weaving ones.  We're booked on to some of the embroidery ones later in the spring.

Our first class with this group was a bead weaving class with Patti McCourt,  we attended a class that she ran at the Bead Shop last year.

Patti had made up a load of kits for us, so we just had to choose the colour scheme.  The one I chose was mint, aqua, copper and red.  Not a colour palette I would have put together myself, but wow, does it work!


The pattern uses pearls, twin beads and size 11/0 seed beads and I think it's a beautiful pattern.  I'm really pleased with the necklace that I made (and I did finish in the class!) and have worn it quite a lot.  

Tuesday, 8 March 2016

Chevron shoe mat

I have finished the shoe mat that I was making a few weeks ago.  A lot of you expressed horror that I would put muddy shoes on such pretty fabric, but hey, it's better than putting shoes on ugly fabric!


I made a panel from HSTs in a chevron design.  I used a charm pack of Fancy by Lily Ashbury and some Kona Coal.  The finished mat measures about 40" x 16" so it's long and skinny and it fits perfectly underneath the radiator.


Here is a picture of the back.  I have no idea why I've taken a picture of the back or why I might have thought you would be interested to see it!


I layered it right sides together with an old towel, sewed all round leaving a gap, then turned through.  Anything to avoid binding!  


I quilted it with my walking foot, just echoing the chevron.  I was hoping to avoid quilting the outer edge as it would be lots of stopping and starting, but it just doesn't look right without quilting.


I chose to only do two lines of quilting in the triangles though.


I think it looks pretty cool from the back.


And here it is complete with muddy shoes!

Saturday, 5 March 2016

counted beadwork

I got a little counted beadwork kit for Christmas.  It is from Ann's Orchard Needlework and is, perhaps not surprisingly, a picture of a bunny.


It is basically half cross stitch, but you slide a bead onto the thread with every stitch.  The rabbit and flowers are size 11/0 seed beads, the background is tapestry wool, also done as half cross stitch.  I think that's called tent stitch.


It took just a couple of hours, but I quite enjoyed it.  I think I have a book of counted beadwork that I picked up in a charity shop, I should perhaps dig it out as I certainly don't have a shortage of seed beads!


Wednesday, 2 March 2016

Letterpress printing

A few weeks ago we went to a Craft and Cake event at a local pub.  To be honest, it was a bit disappointing.  There was no cake!  There were a few artisans demonstrating their work - painting, knitting on a machine and soap making, and upstairs we found a couple doing letter press printing.  It was free to have a go if you didn't mind waiting your turn, which we didn't.


There were boxes with all different letters and some pictures on wooden blocks.  We were given a tray and a frame and had to fill the frame with whatever we wanted to print.  I am absolutely fascinated by communism so was chuffed to find the hammer and sickle block!  I put it in the middle of some type.  The wooden blocks were for shoring up the text to make sure it was wedged in tight when you pick the frame up.


Then over to the machine.  You put the ink on with a brayer, as demonstrated below by wonderful mum.


You put a piece of paper on top, push it into the machine, tighten the screw, then undo the screw and pull it out and ... ta da!  One letter press poster.


Spot the "a" which isn't actually an "a"?


Clearly the recognising (or not) of backwards letter "a"s is a family trait!

We've booked on a workshop, in March I think, so I just need to come up with another idea.