
A couple of months ago I did a workshop at Threads in Derbyshire. It's taken me this long to post about it as my life has been so hectic recently. I'm not sure I'm going to be able to continue blogging, I haven't blogged in weeks and I'm 2 weeks behind on my blog reading... time will tell.
Anyway, back to the class. We made Temari balls!
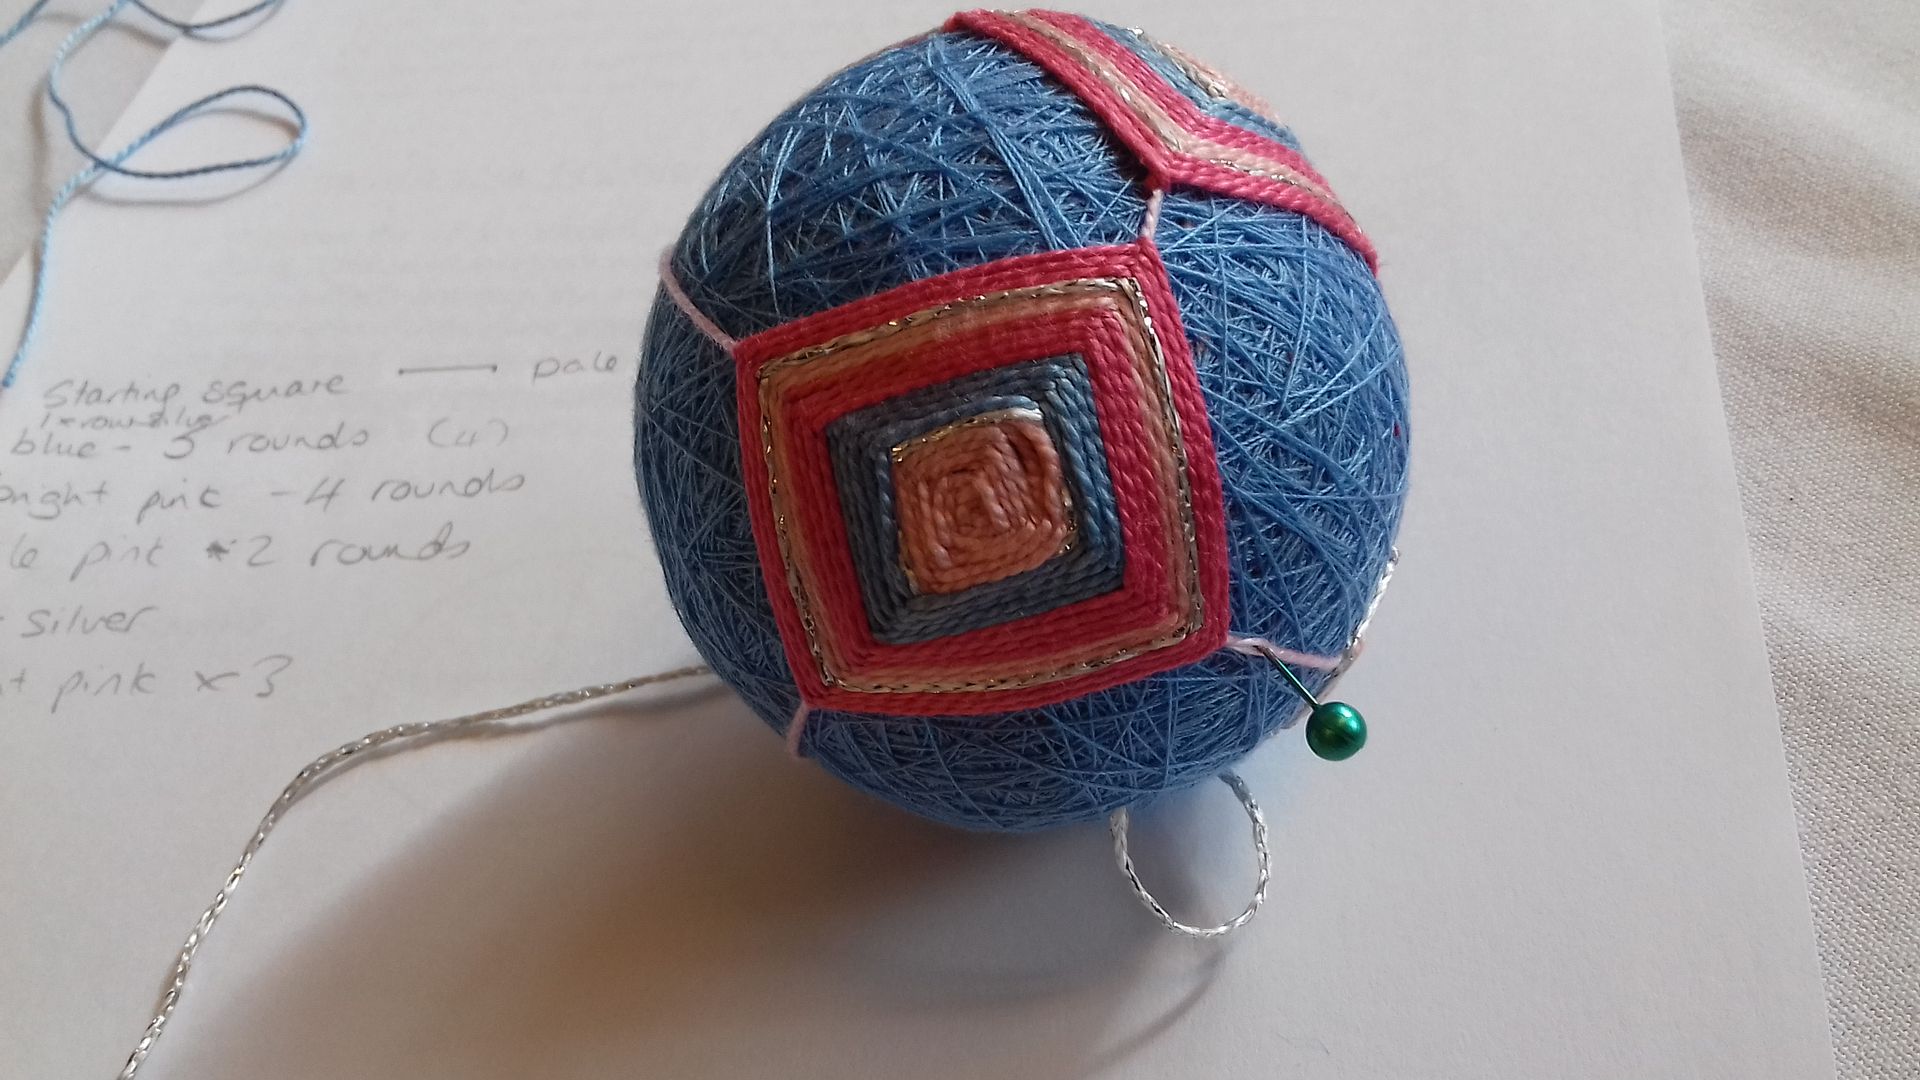
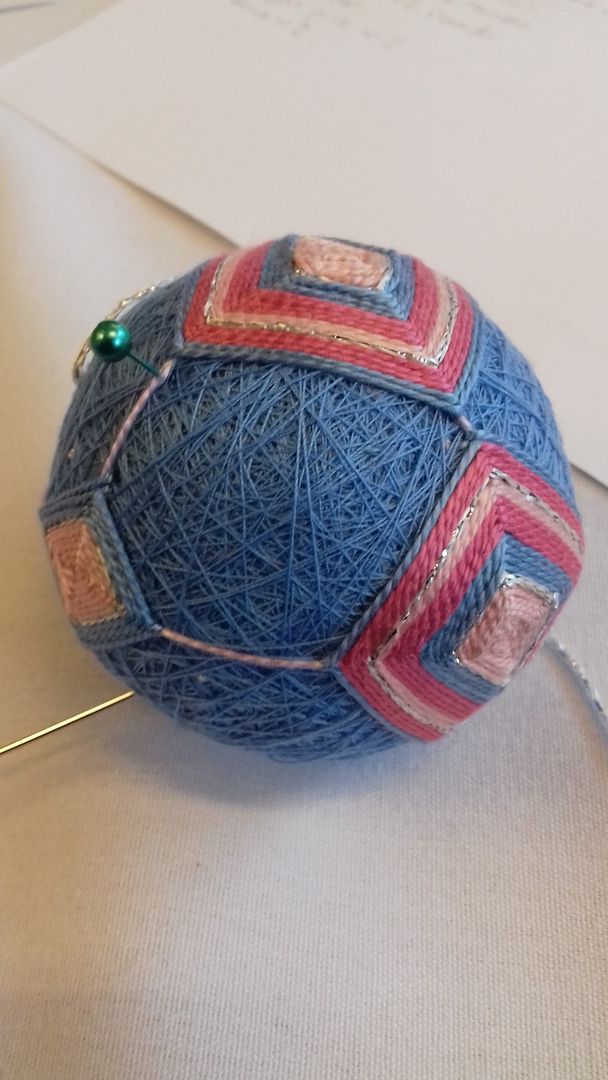
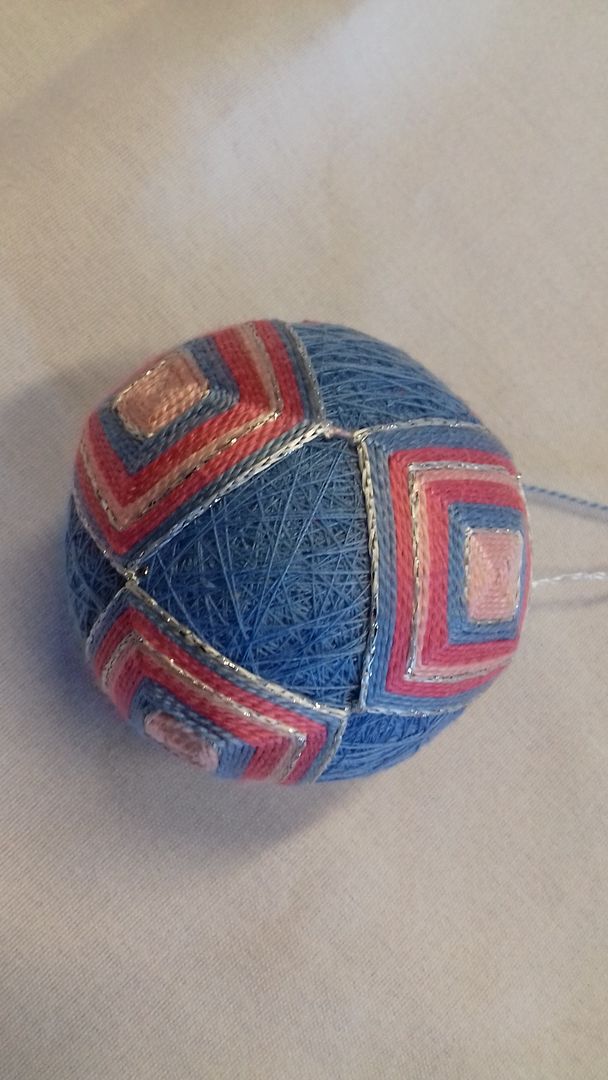
The photos above and below are my ball at the end of the class... I was so close to finishing! And, first time ever, I finished it off when I got home - photos later.
Cathy always provides a kit, and scissors are available, so you don't need to bring anything except your lunch. There's also plenty of homemade cake throughout the day...
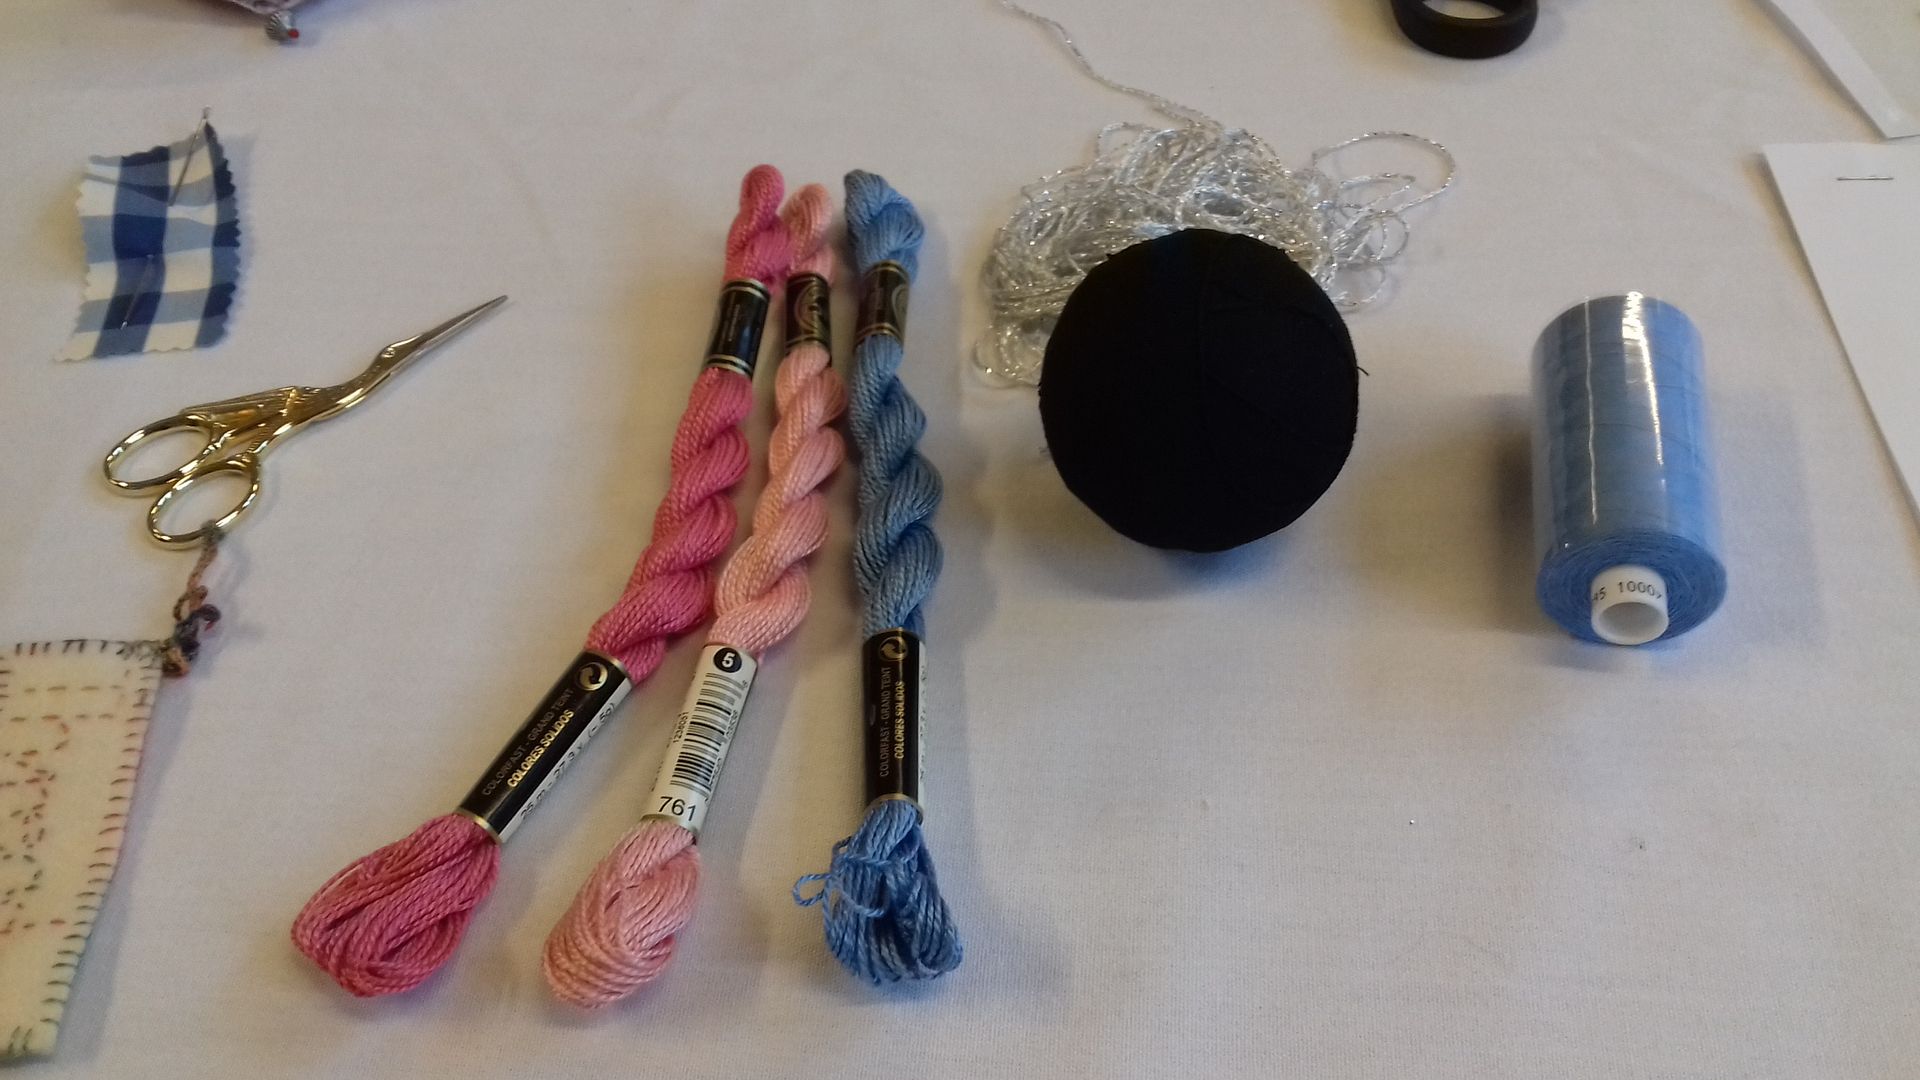
We chose our colour schemes from packs that Cathy had made up, I deviated slightly from my usual blue/purple preference to blue/pink! The ball is a small styrofoam ball that Cathy had wound with old tights before the class to save time. This gives you something to sew into.
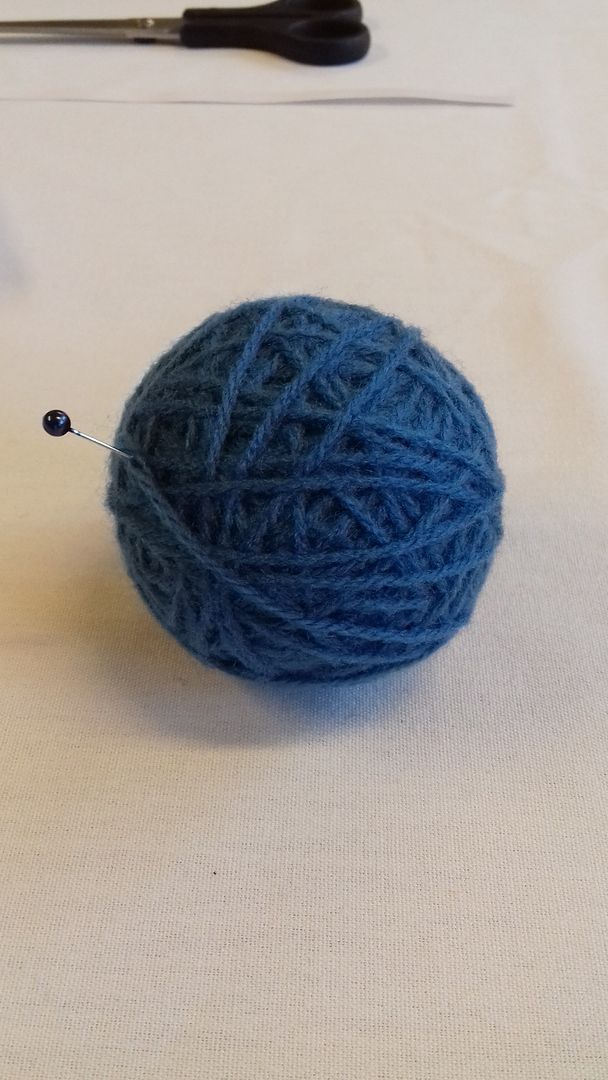
First we wound the ball with yarn, just to cover the black from the tights. We chose something close to our thread cover in case we missed any parts, or any peeked through.
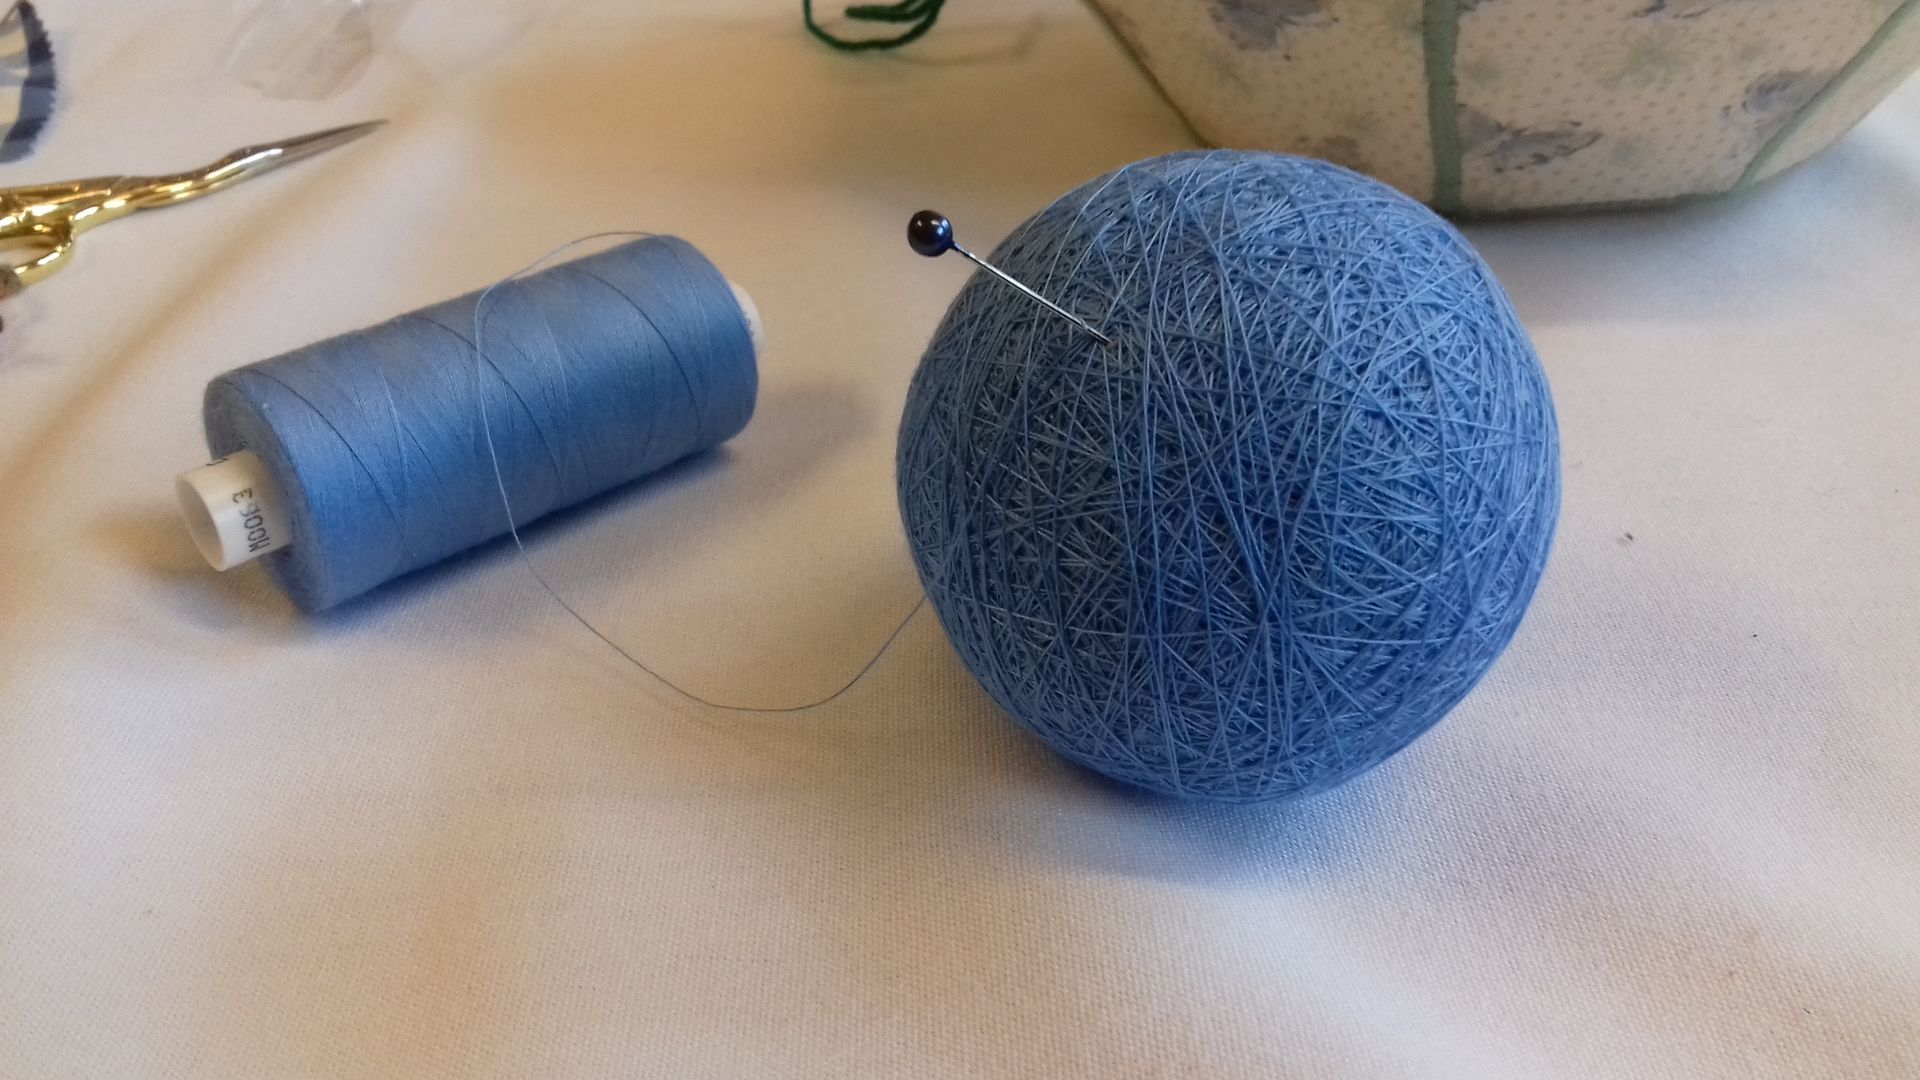
And then we wound the ball with thread. Just ordinary sewing thread. Yes, it took quite a while!
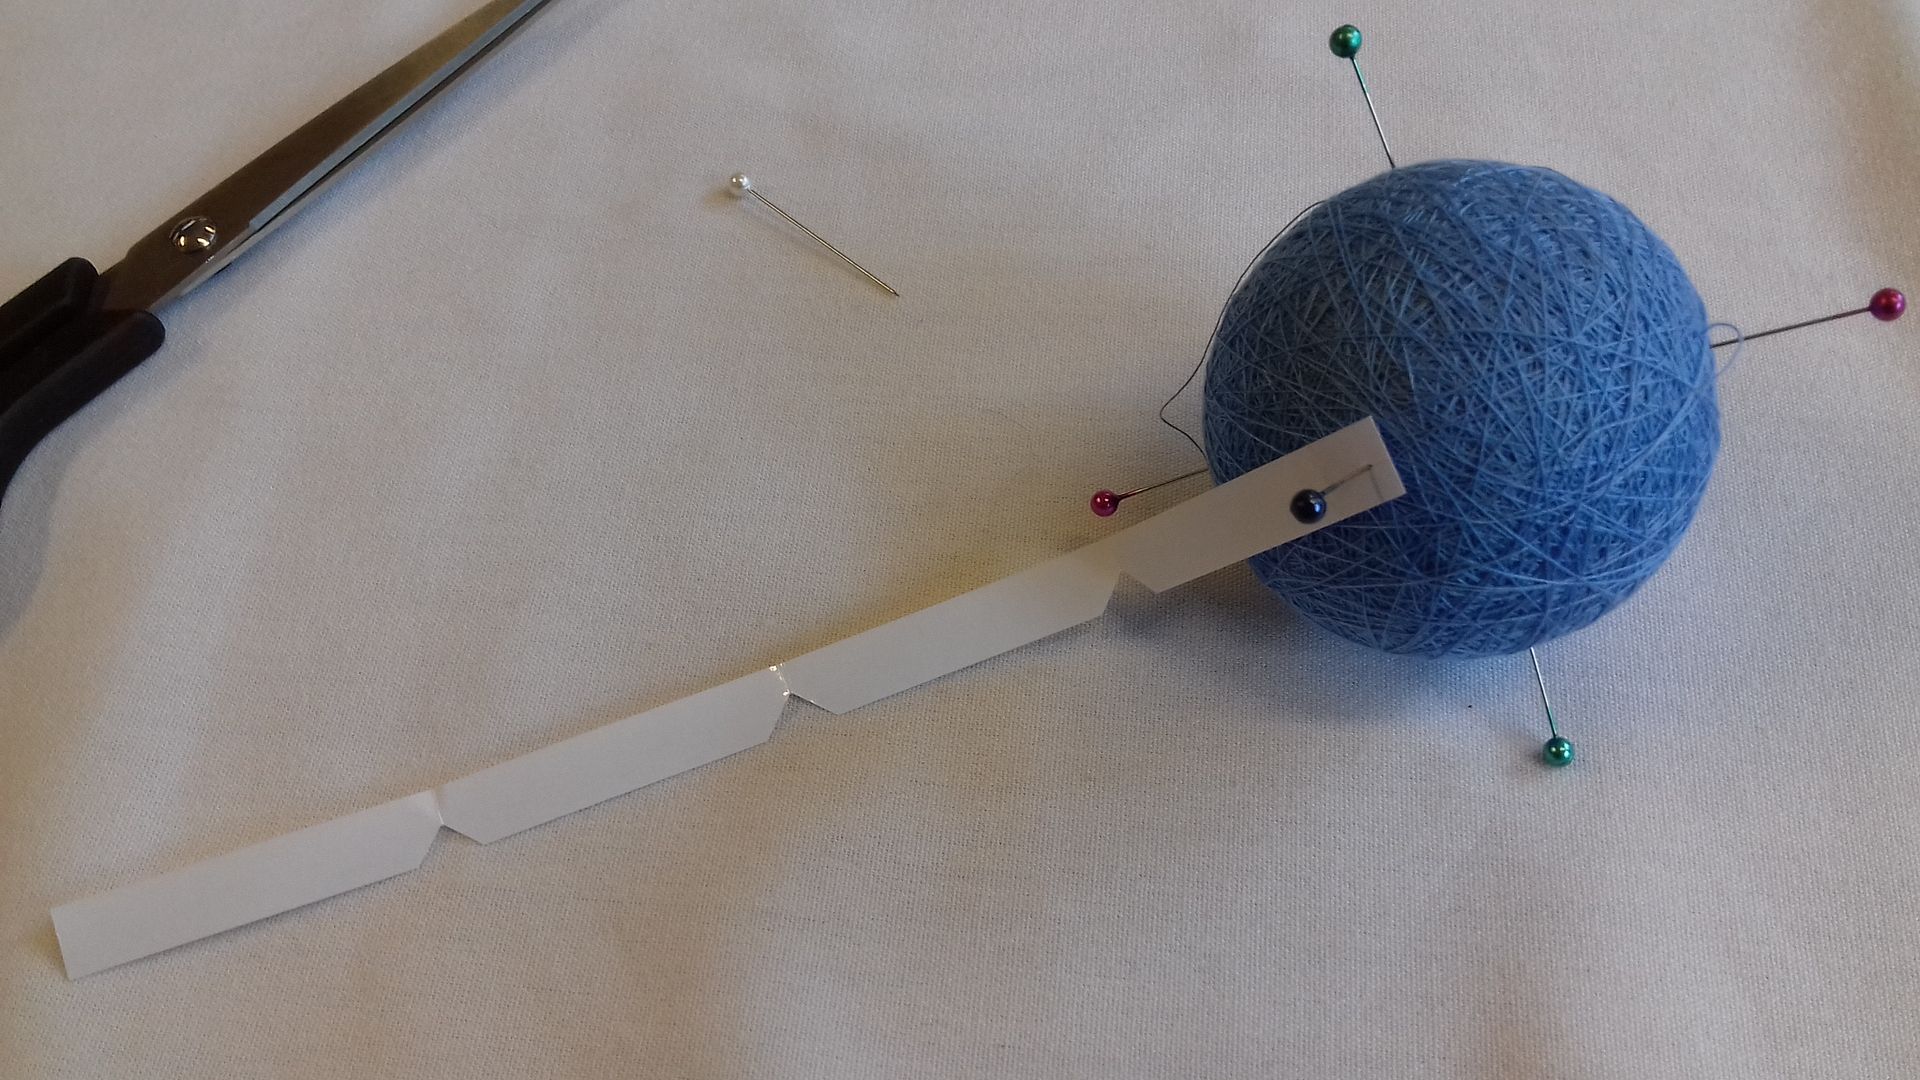
Next came measuring to divide the ball up - I think we made 10 section balls? This stage took AGES as it had to work from all different directions.
Perle 5 was used to mark out the divisions...
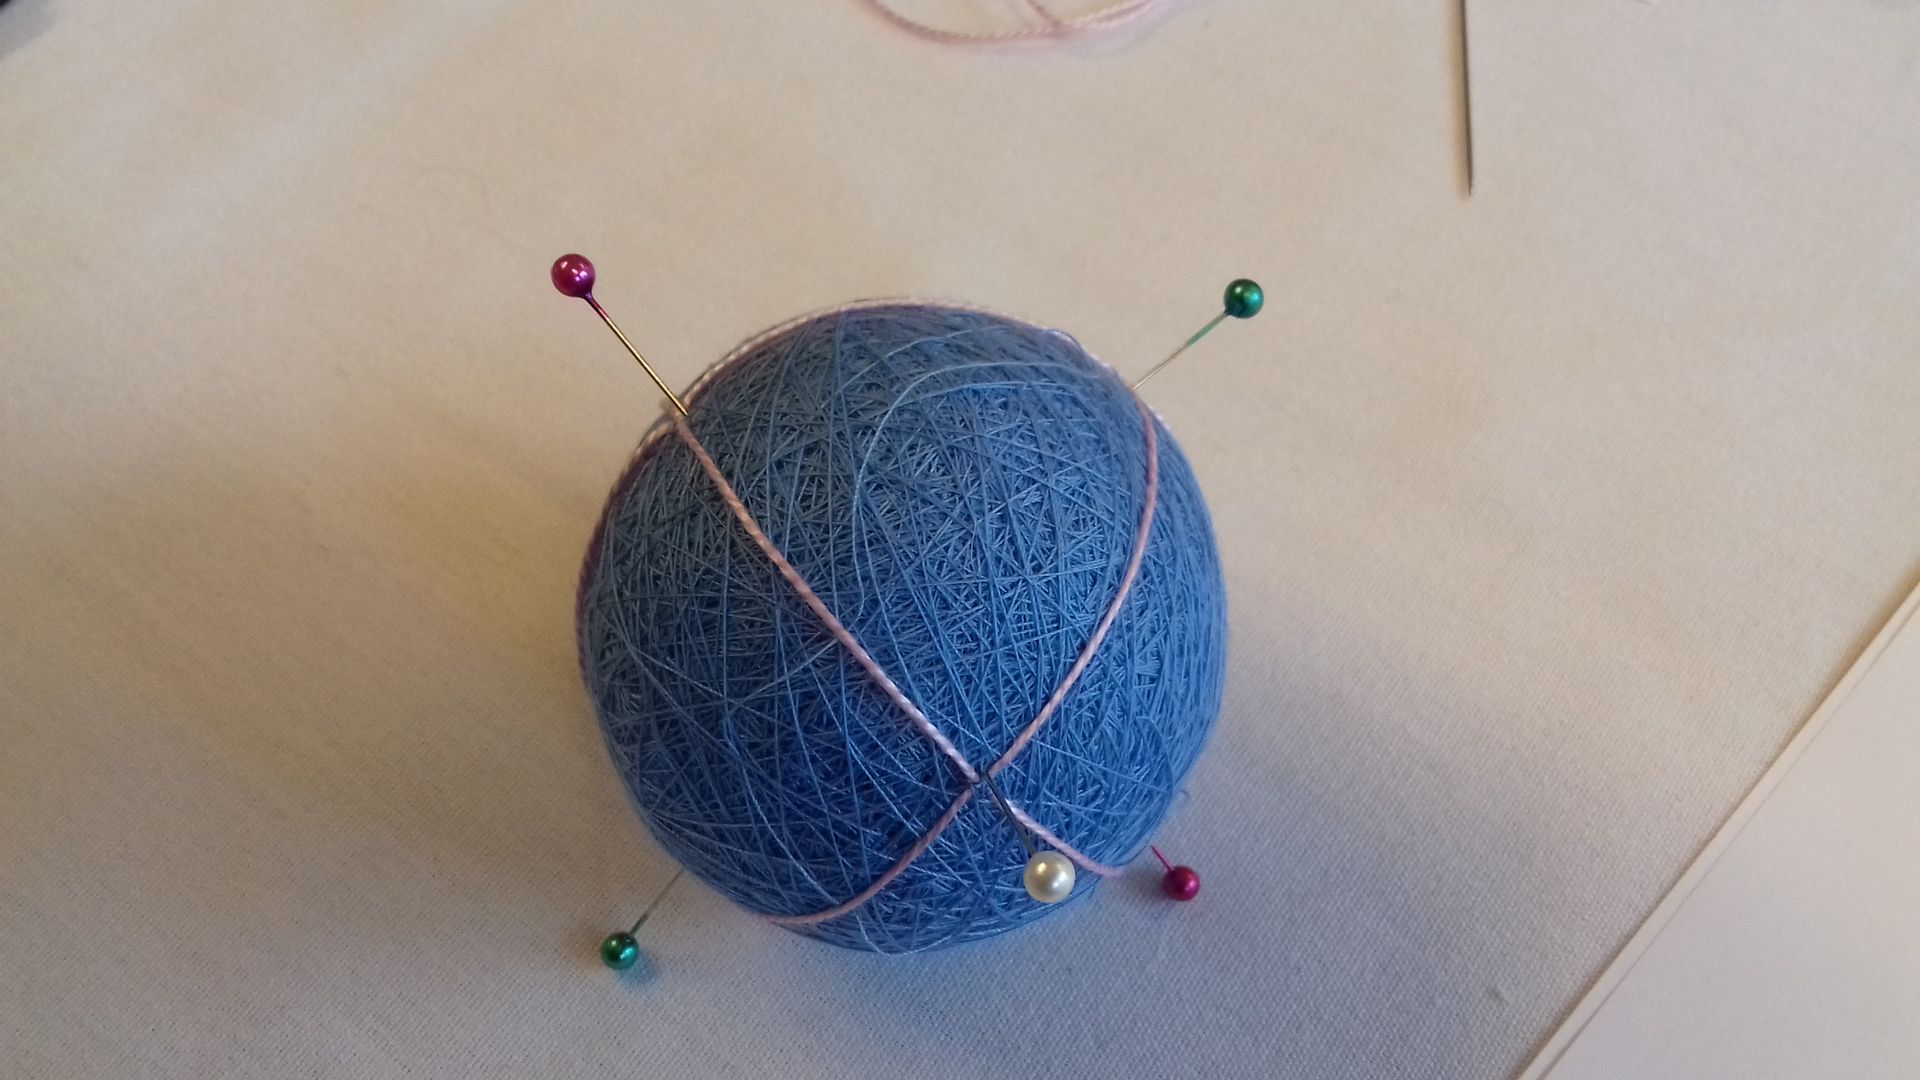
Then the embroidery began! We started with a pretty basic ball. It's fun and soothing. During the class Cathy showed us various other examples and wow... you can make some amazing Temari balls. If you haven't come across this before I would recommend Googling it.
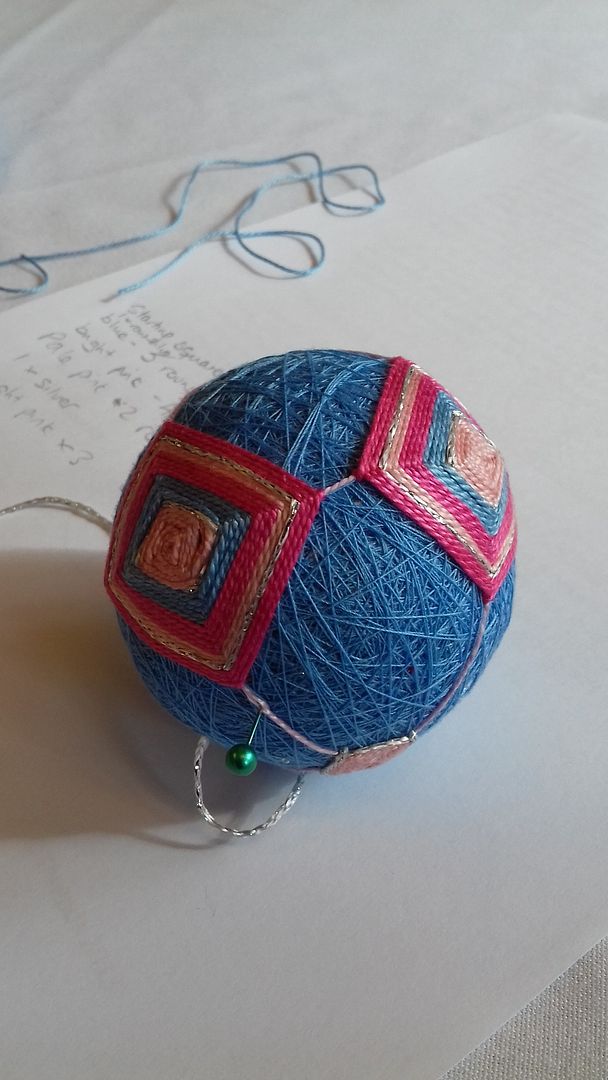
More embroidery... We had 3 different colours of Perle cotton plus one sparkly thread in our packs. It was up to us what combination we used and how many rounds of each before changing colours.
As my measuring wasn't completely accurate, I did have to fudge a bit on the number of outer rounds to make the edges meet. Cathy did point out that it doesn't matter too much and showed us some examples of embroidering other designs over those marking threads you can see a tiny bit of above.

I'm not sure what the picture above was taken to illustrate!

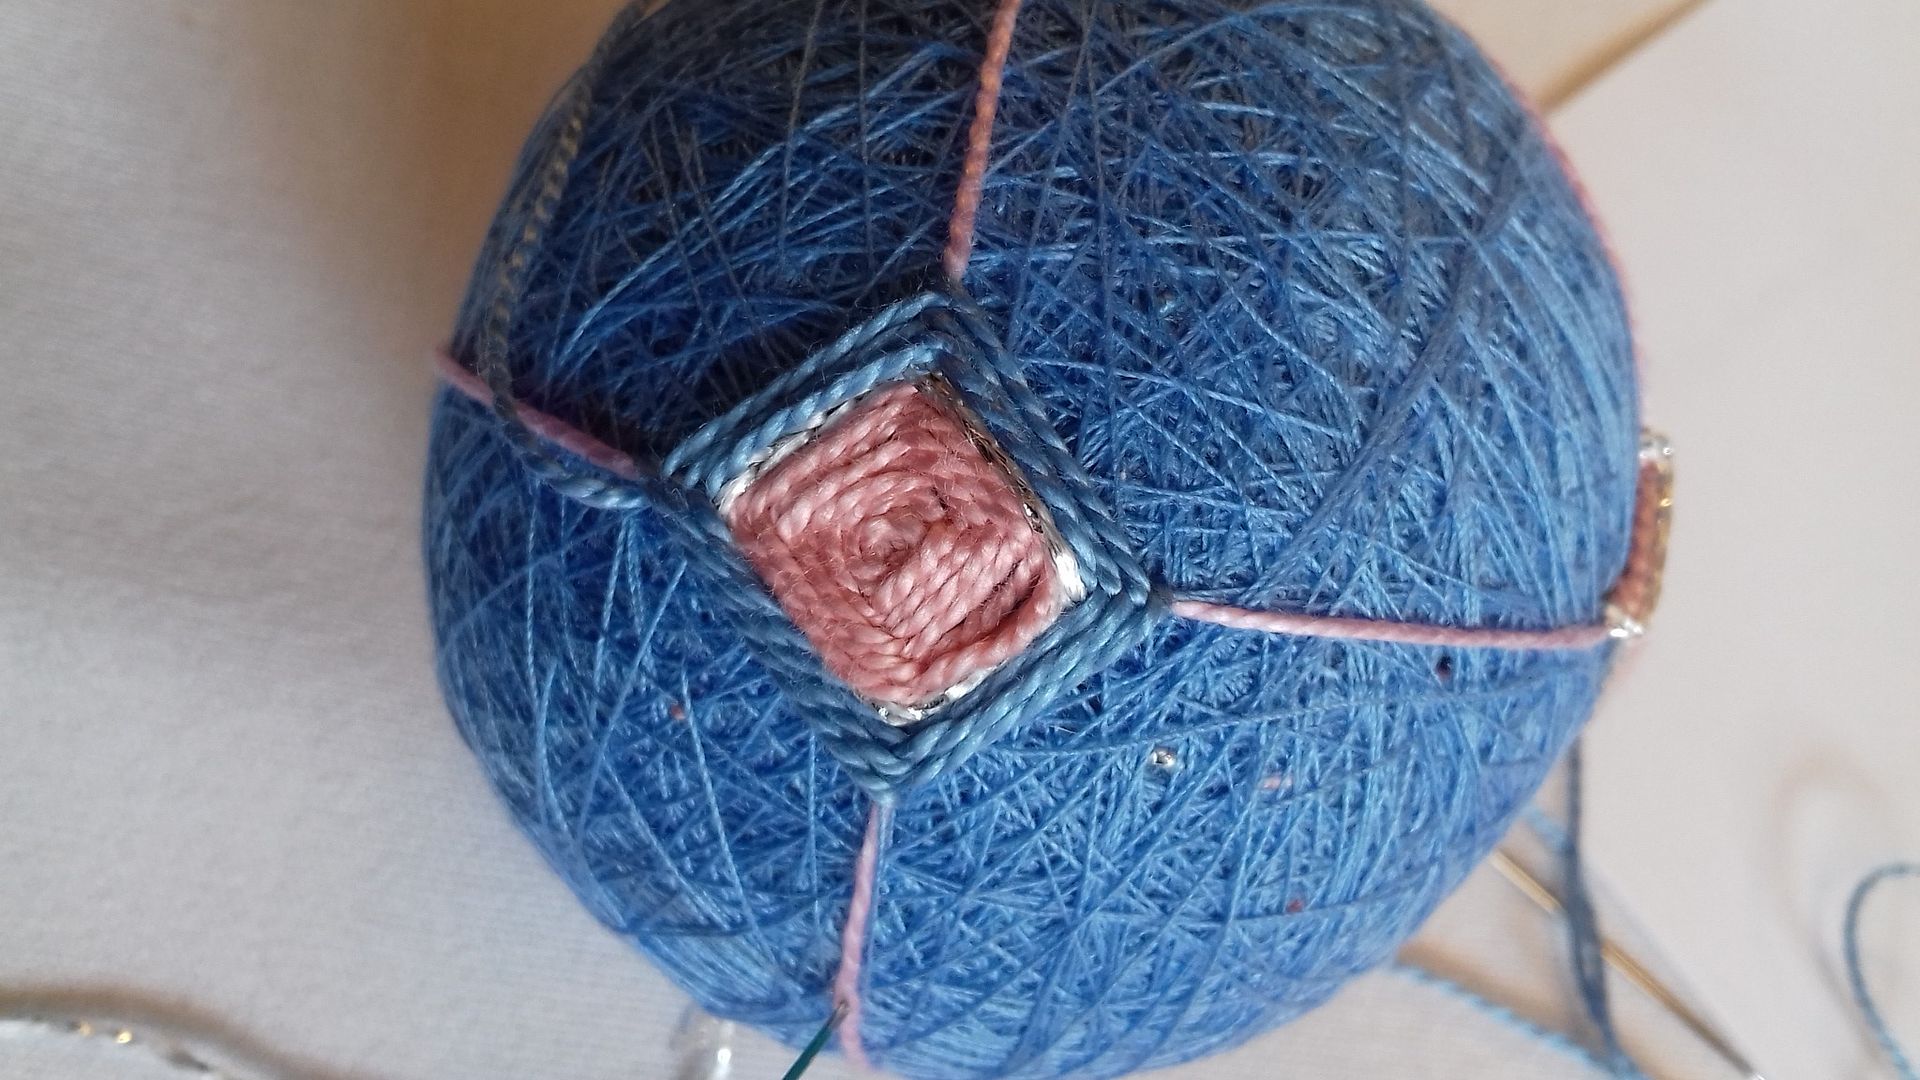
And here's my ball with the internal silvery bits added! They didn't take long at all and, I think, really finish it off.
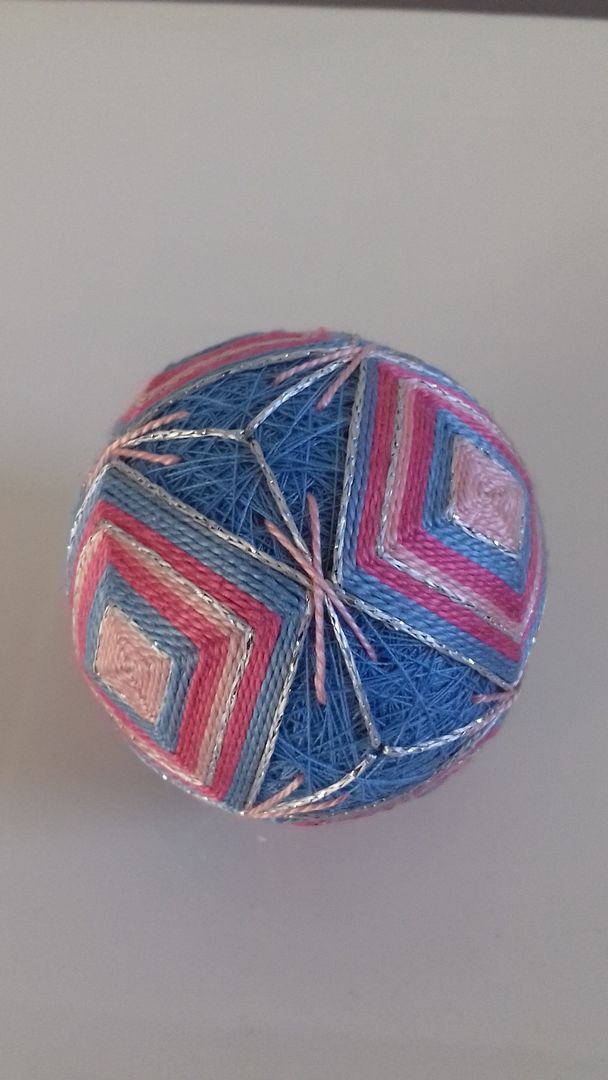
This was massively enjoyable and a great way to spend a day. If you are in the East Midlands area, I'd definitely recommend any of Cathy's classes, I've done a few in the past, including Schwalm and Crewel. I bought another kit to make a second ball... of course, I haven't got round to it yet!
14 comments:
Please keep blogging, always a delight to read!
That's really pretty and unusual. Although it must have taken a long time, the end product is definitely worth it.
Best wishes
Ellie
It does sound like a good course!
Love your temari ball, it's beautiful and no one will notice if the measuring was a bit off. Look forward to seeing your next one
This looks wonderful I had no idea of the process involved.
A fantastic work, Wendy!
I love it!
Hugs from Spain
That looks fantastic!
Your temari turned out very pretty!
that's amazing.... I love it. I hope you don't stop blogging as I love to read what you get up to.. but of course I understand other life happenings also come up....
Hugz
Love it! The silver really does finish it off beautifully. I hadn't come across temari balls before so I just went and did a google image search and wow... some of the designs!
I've never heard of this craft and wonder what you do with the ball after you make it? When you say tights, do you mean hose? Does that just give the Styrofoam added cush? Love your colors and the design is quite interesting.
Wanted to pop back to say thanks for the info on your decorative ball. Much appreciated. I had changed my settings for awhile, but was getting too many emails and a lot fewer blog comments ...so flipped it back to no email.
Our doing my blog walking, hope things are going well for you.
This looks like great fun! I’ve had a kit for way too many years to try this craft out. But every time I look at it I decide it’s too hard and put it back! But perhaps if I find a YouTube video I may be able to work it out. Yours looks great in those colours and I love the little bit of bling!
I also know how you feel about blogging. I really want to continue, I’m just hoping it is a short term blip as I sort my life out in another country! I do hope you continue, I do enjoy reading your posts.
This is clever and very effective. I've just followed you by email because I don't seem to see your posts in bloglovin anymore. I hope you'll keep blogging :)
Post a Comment