

The class was on Crewel Embroidery. As you know if you read my blog, I have done crewel work before, but as I'm self-taught, it's always good to attend a class and see how other people do things, and learn from the experts of course!
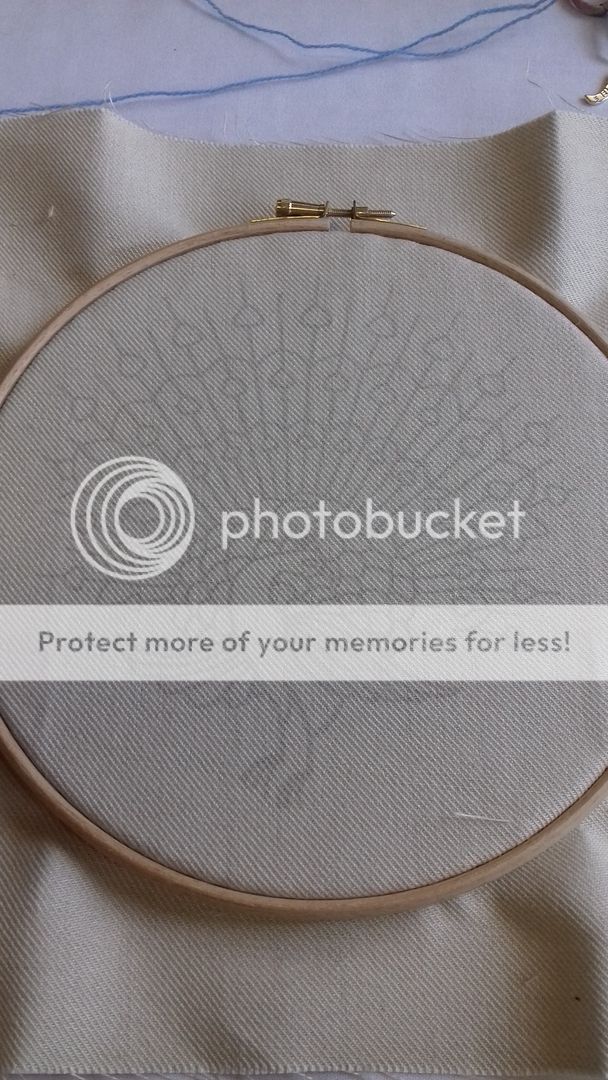
The pattern was this beautiful peacock which was printed onto a piece of twill linen. We also received all the threads needed, mainly Appleton's wools, but also some 21st Century silks and a metallic thread.

We began by outlining the body with a split back stitch. I like this stitch, it's so much easier to do that a regular split stitch and I do like the way split stitch looks, though this will be covered over in the next step.
The next step was long and short stitch to created shading. Although I'm doing a lot of this on Mellerstain Parrots, it is an area where I need some work. The way the workshop was structured was that we did a bit of each part of the pattern to see the different stitches and techniques, so nothing got finished, though I did go back and do a bit more of the body later on. I don't think I've included enough light blue so will have to add some more in.
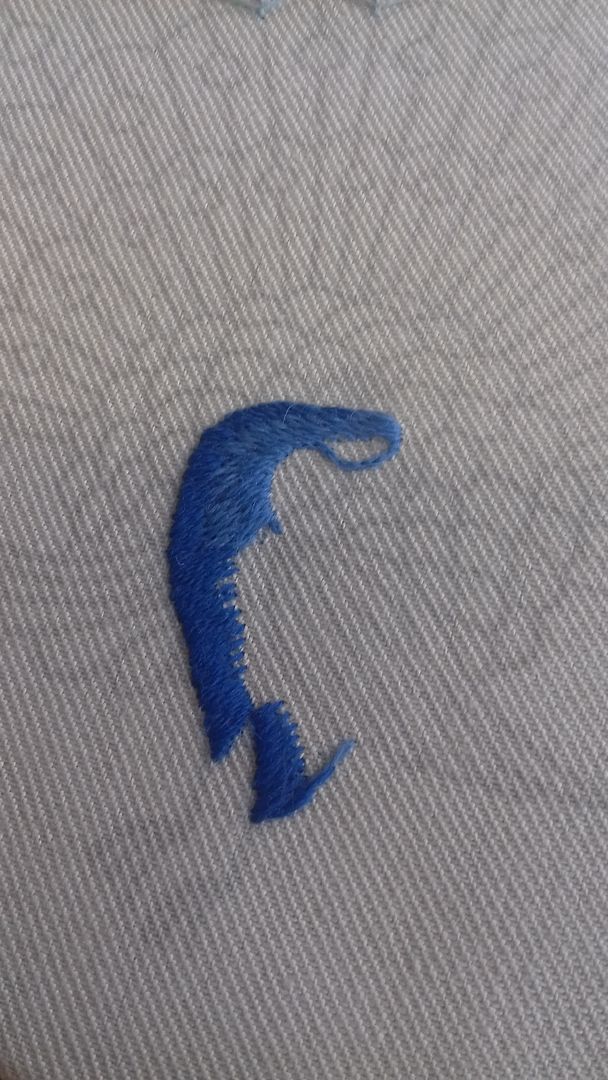
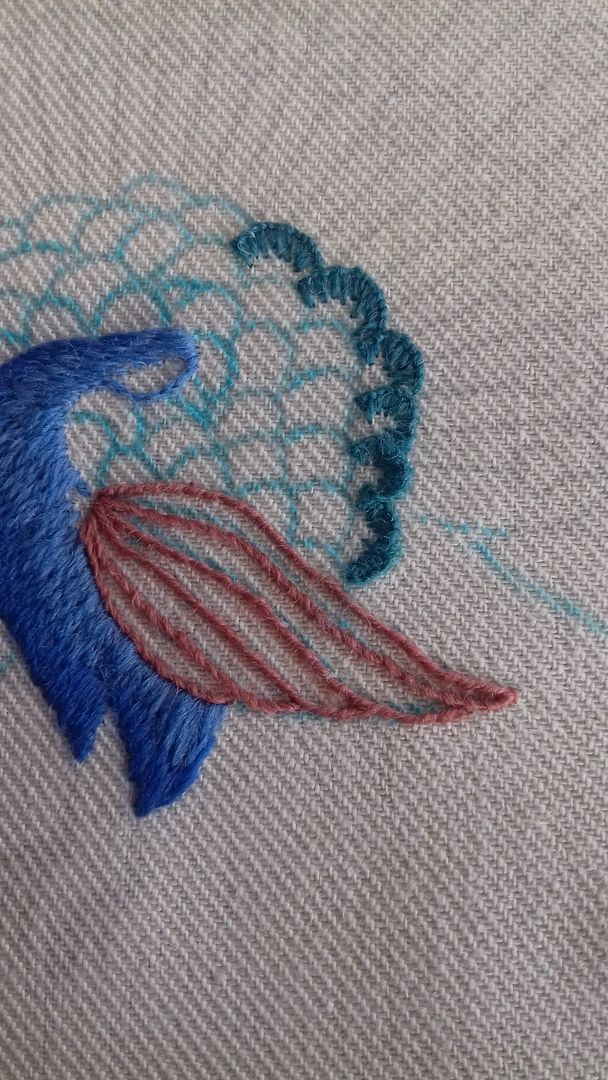
The feathers are done in fly stitch, in three different colours, though I've only done the one colour here. I like this stitch, but it was a bit stressful trying to get it neat around the eyes!
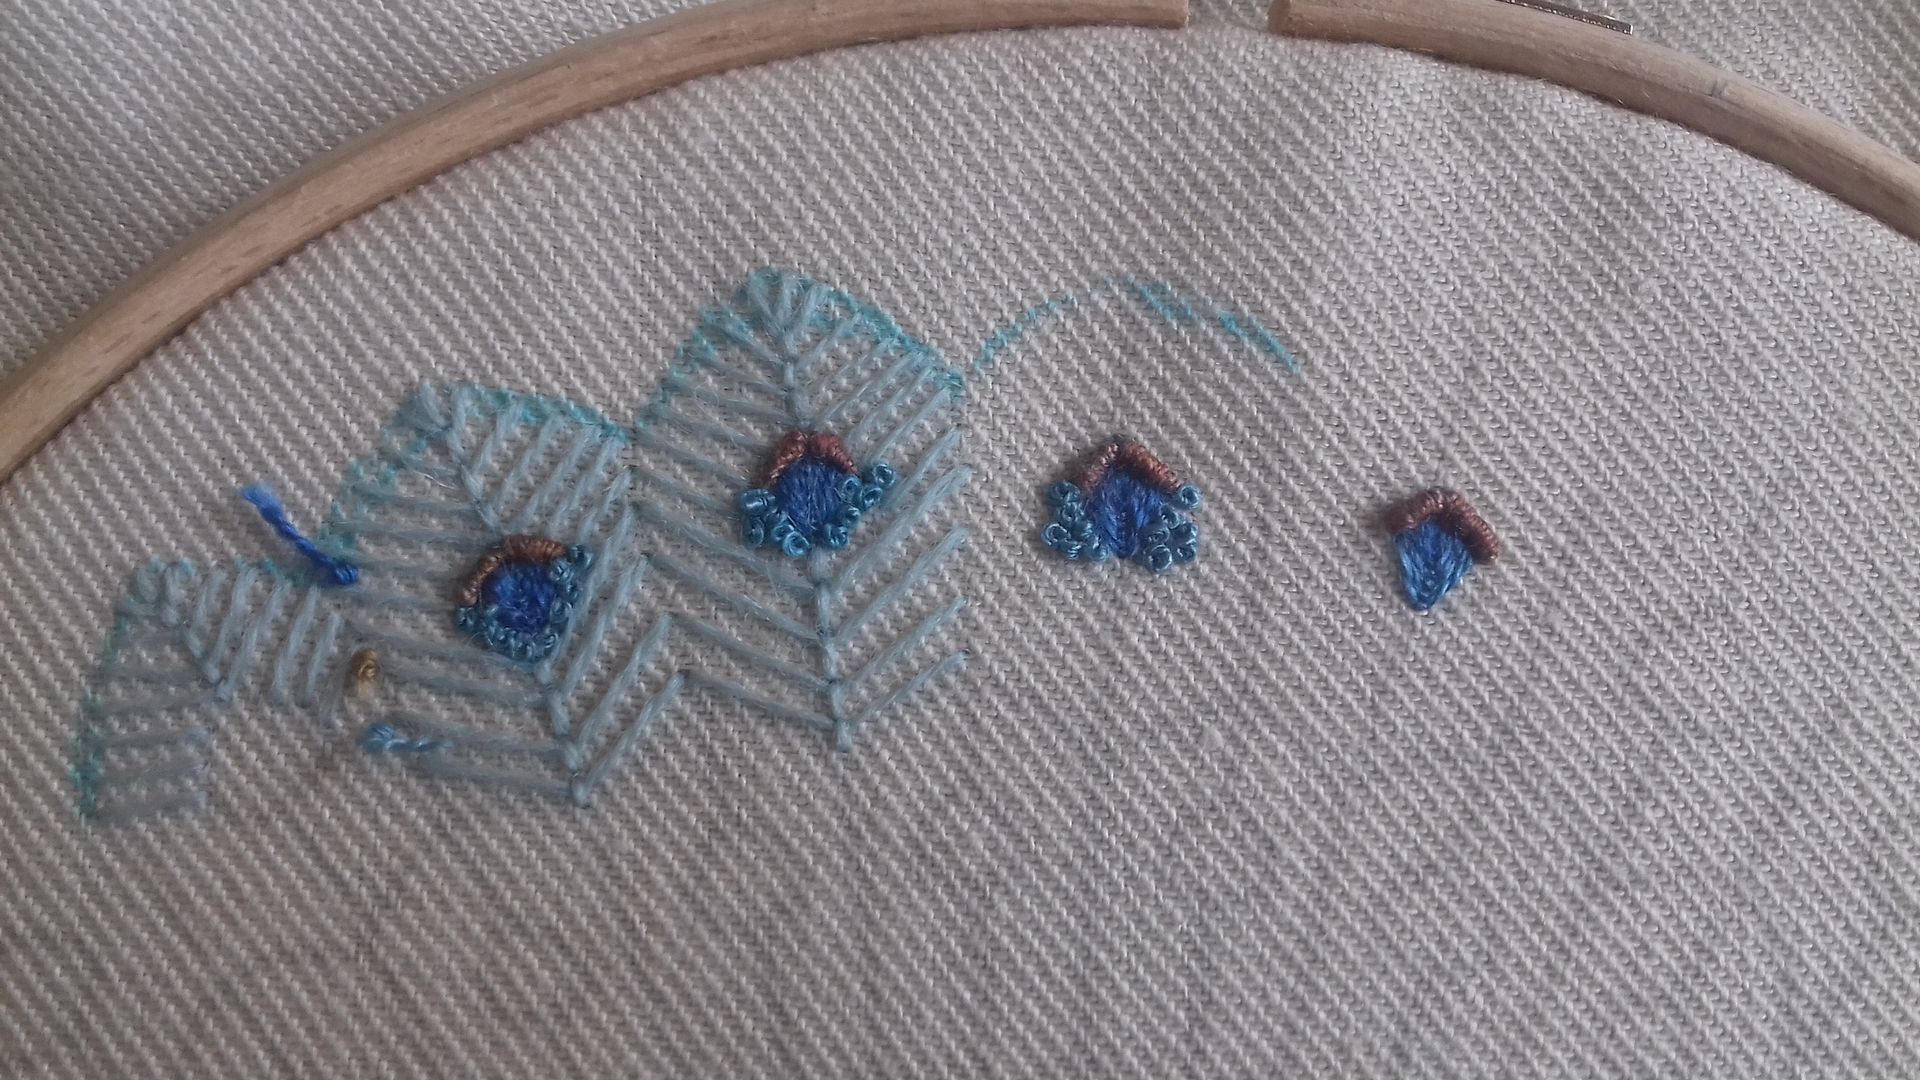
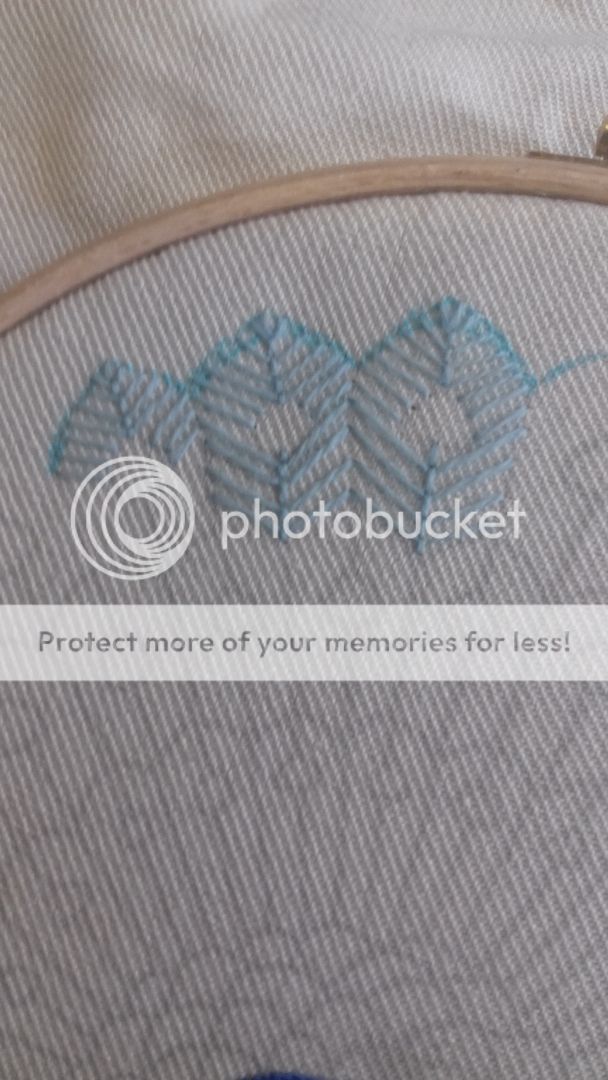
I seemed to have missed a couple of photos out here. Next we switched to a blue silk and did closed fly stitch in the eyes. They were topped with a bullion knot in variegated silk. I used 26 wraps on mine and I have to say, I'm rubbish at bullions! The spaces to the left and right were then filled in with french knots.
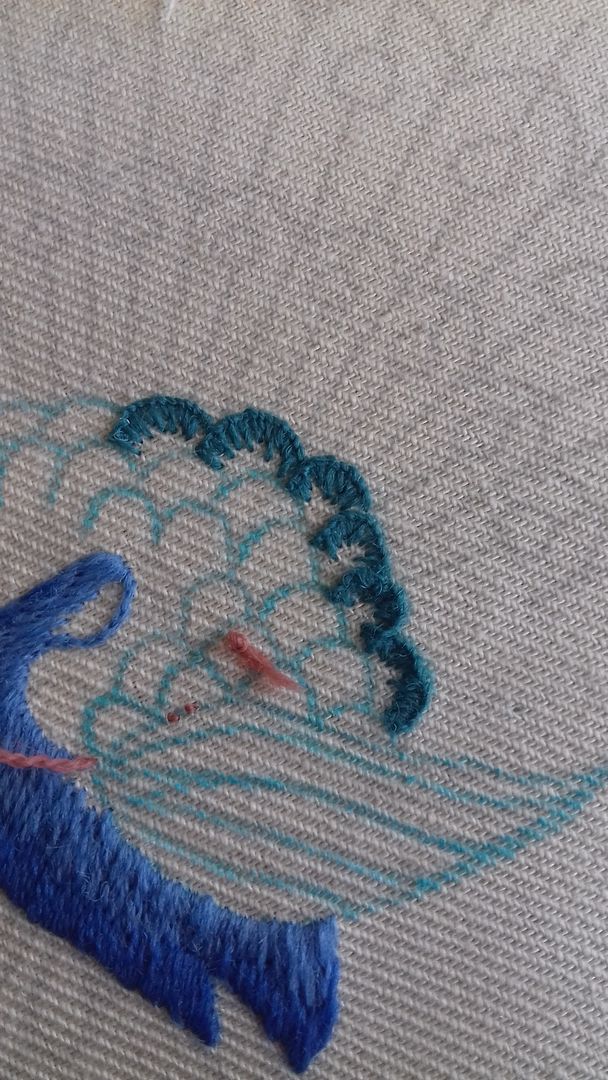
Next we moved on to the base of the tail, the scallopy bit next to his bum. Yes, that's the technical term for it. We did this using long and short buttonhole stitch, back to using the wool. I was rubbish at this! I'm not very happy with what I've done and there's a chance it will come out. It does have some long and short shading over it, so I will try that first and see how it looks.
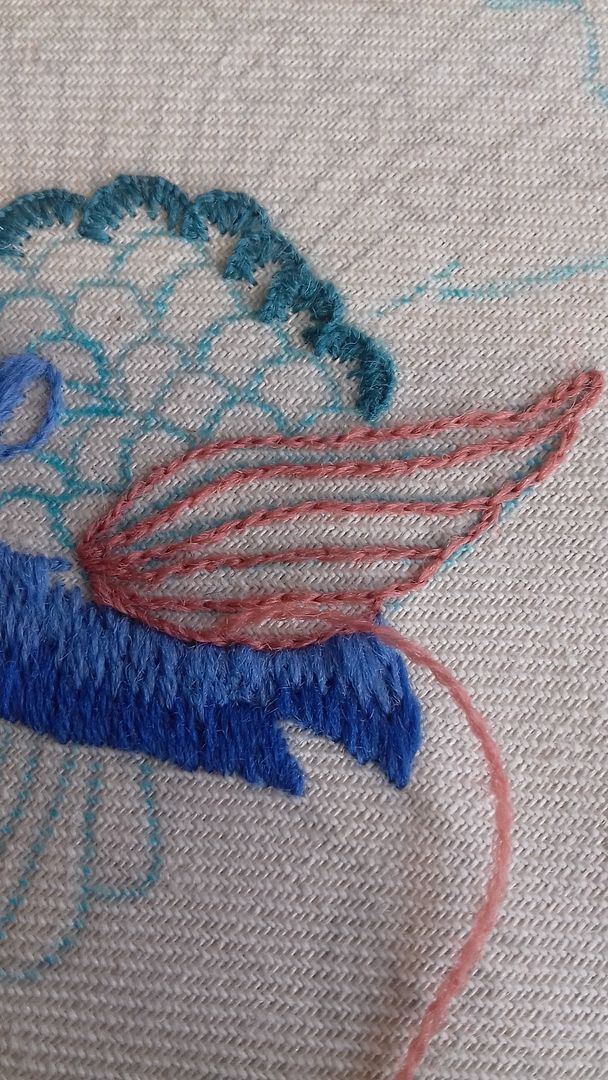
Next the wings were outlined in split backstitch. The next step was to whip this so I had to be careful I wasn't making the stitches too short, and that they were all a similar size.
Here it is all whipped. You can probably see better in the photo below.

I have added a line of stem stitch in a slightly paler wool above the second outline in the photo above. I have to fill the wings up with this stitch.
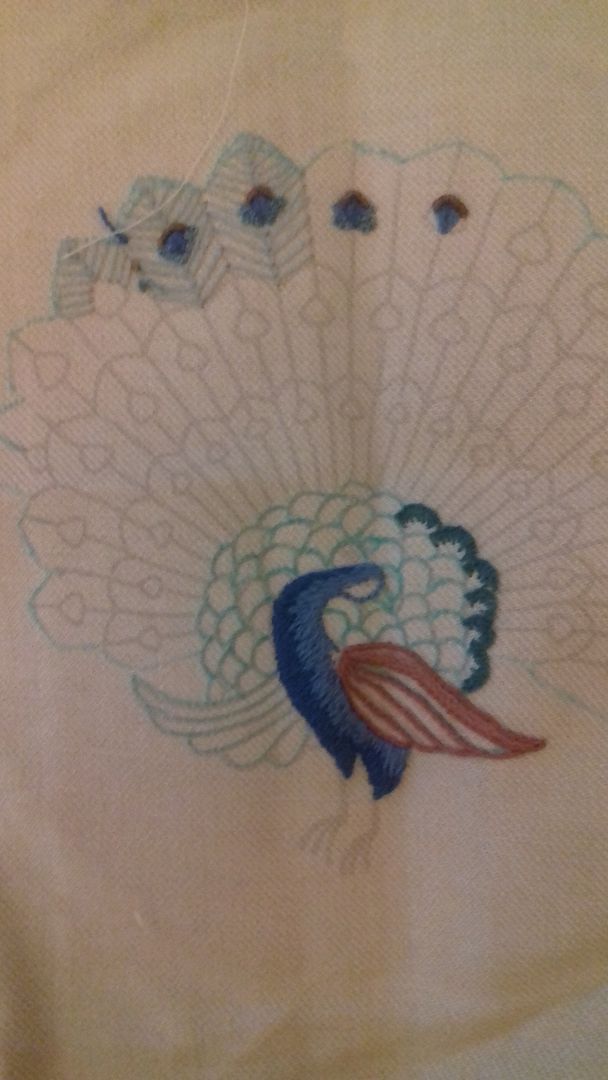
And here it is at the end of the class. Clearly I've got a long way to go! There are also beads to add and metallic stitches. Cathy's example is stunning so I hope I can make mine even half as good.
Now, you know how rubbish I am at getting things done? It may be a while before you see this again... but you will see it!
17 comments:
This is a beautiful project Wendy and you have made a fabulous start! Can't wait to see it finished! Have a lovely weekend! Christine x
He's a lovely peacock! I'm really looking forward to seeing him again!
Very nice! You were able to complete quite a lot during the class.
That was fabulous. I really enjoyed reading about the process as well as seeing the results. Whipped split back stitch is definitely on the list of stitches to try!
I love the look of handwork like this, and envy those with the patience to do it. I guess I need to slow down a bit and enjoying the making more instead of trying to tick of a list of projects (when, let's face it, I don't really need more 'stuff').
Oh my that's a beautiful pattern, and the threads are yummy. This will be fantastic when it's finished, Wendy!
This looks gorgeous! Sounds like it was a great class. Hope you work on this piece again soon as I would love to see more of it! :)
Wow, this is a complex piece of embroidery! The teacher covered a lot in just one day.
I am sure that your Mum was watching over you and sending encouraging thoughts too.
I hope you don't leave this piece for too long, I'd like to see more of it.
What a lovely design and you have stitched it well! It sounds like you had a wonderful time, and was a great class. Can't wait to see it progress amongst the other things you have on!
A great start and a nice design :-)
what a wonderful peacock you are going to have when you complete this, do you go back for further classes or are you on your own now with it?
this looks fabulous. Glad you had a good time and look forward to seeing the updates
This will be lovely when finished. I don't have the patience for embroidery and I can't do french knots...which seem to be in every pattern I try! I don't always comment but I love your
silver triangle and the rag wreath was very nice.
It's a lovely design and looks like lots of fun.
Hi Wendy, it was lovely to meet you on the workshop and you have described and photographed all the steps so well! See you again soon, Cathy from Threads Workshops
Hi Wendy, it was lovely to meet you on the workshop and you have described and photographed all the steps involved so well. See you again soon, Cathy from Threads
This looks so lovely already! I can't wait to see your progress on it. Great work! :D
Post a Comment