Monday, 31 October 2016

more finishing

As I mention, a lot, I've not been crafting much outside the classes I take with mum, but I have been doing something, I've been finishing a few things off.


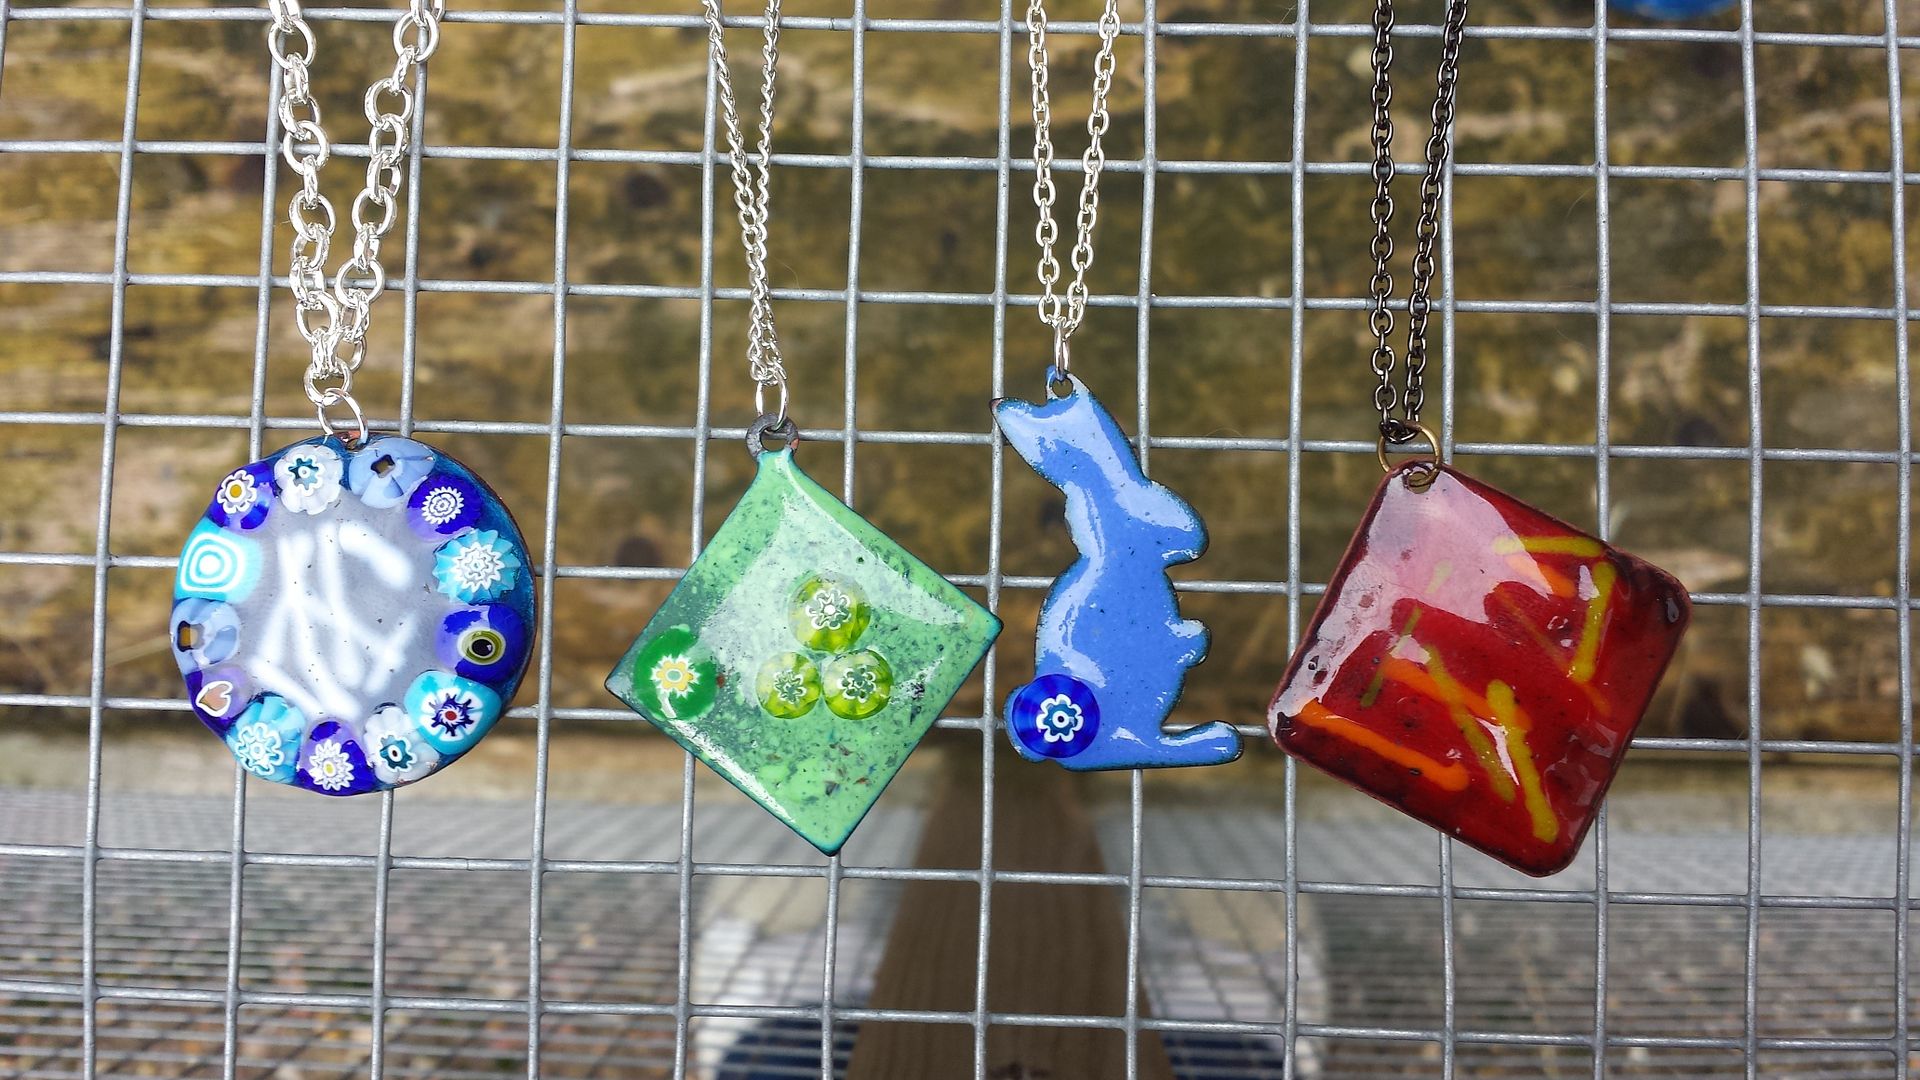
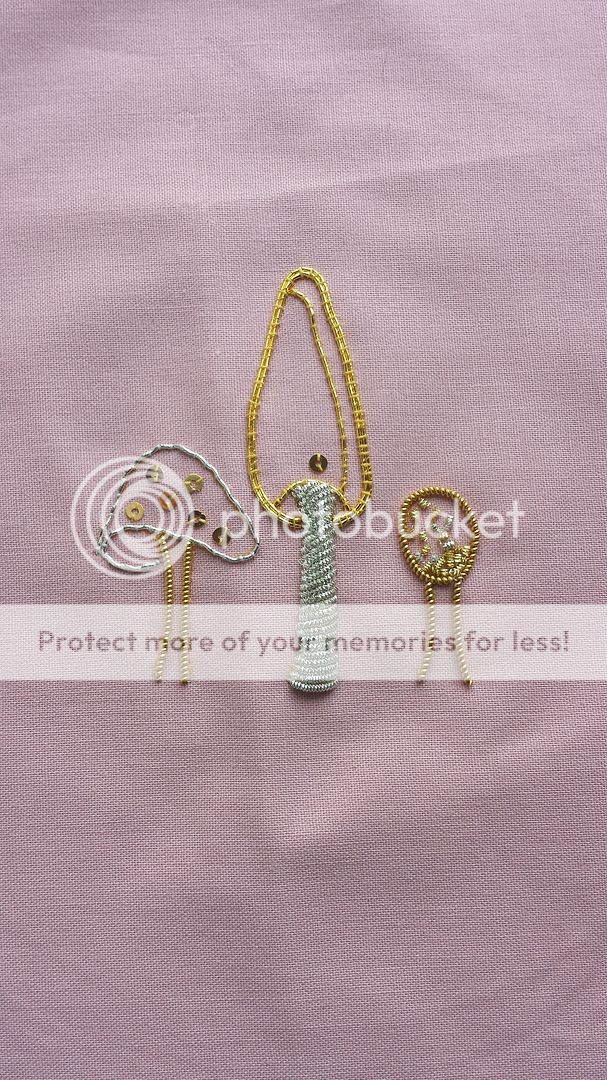
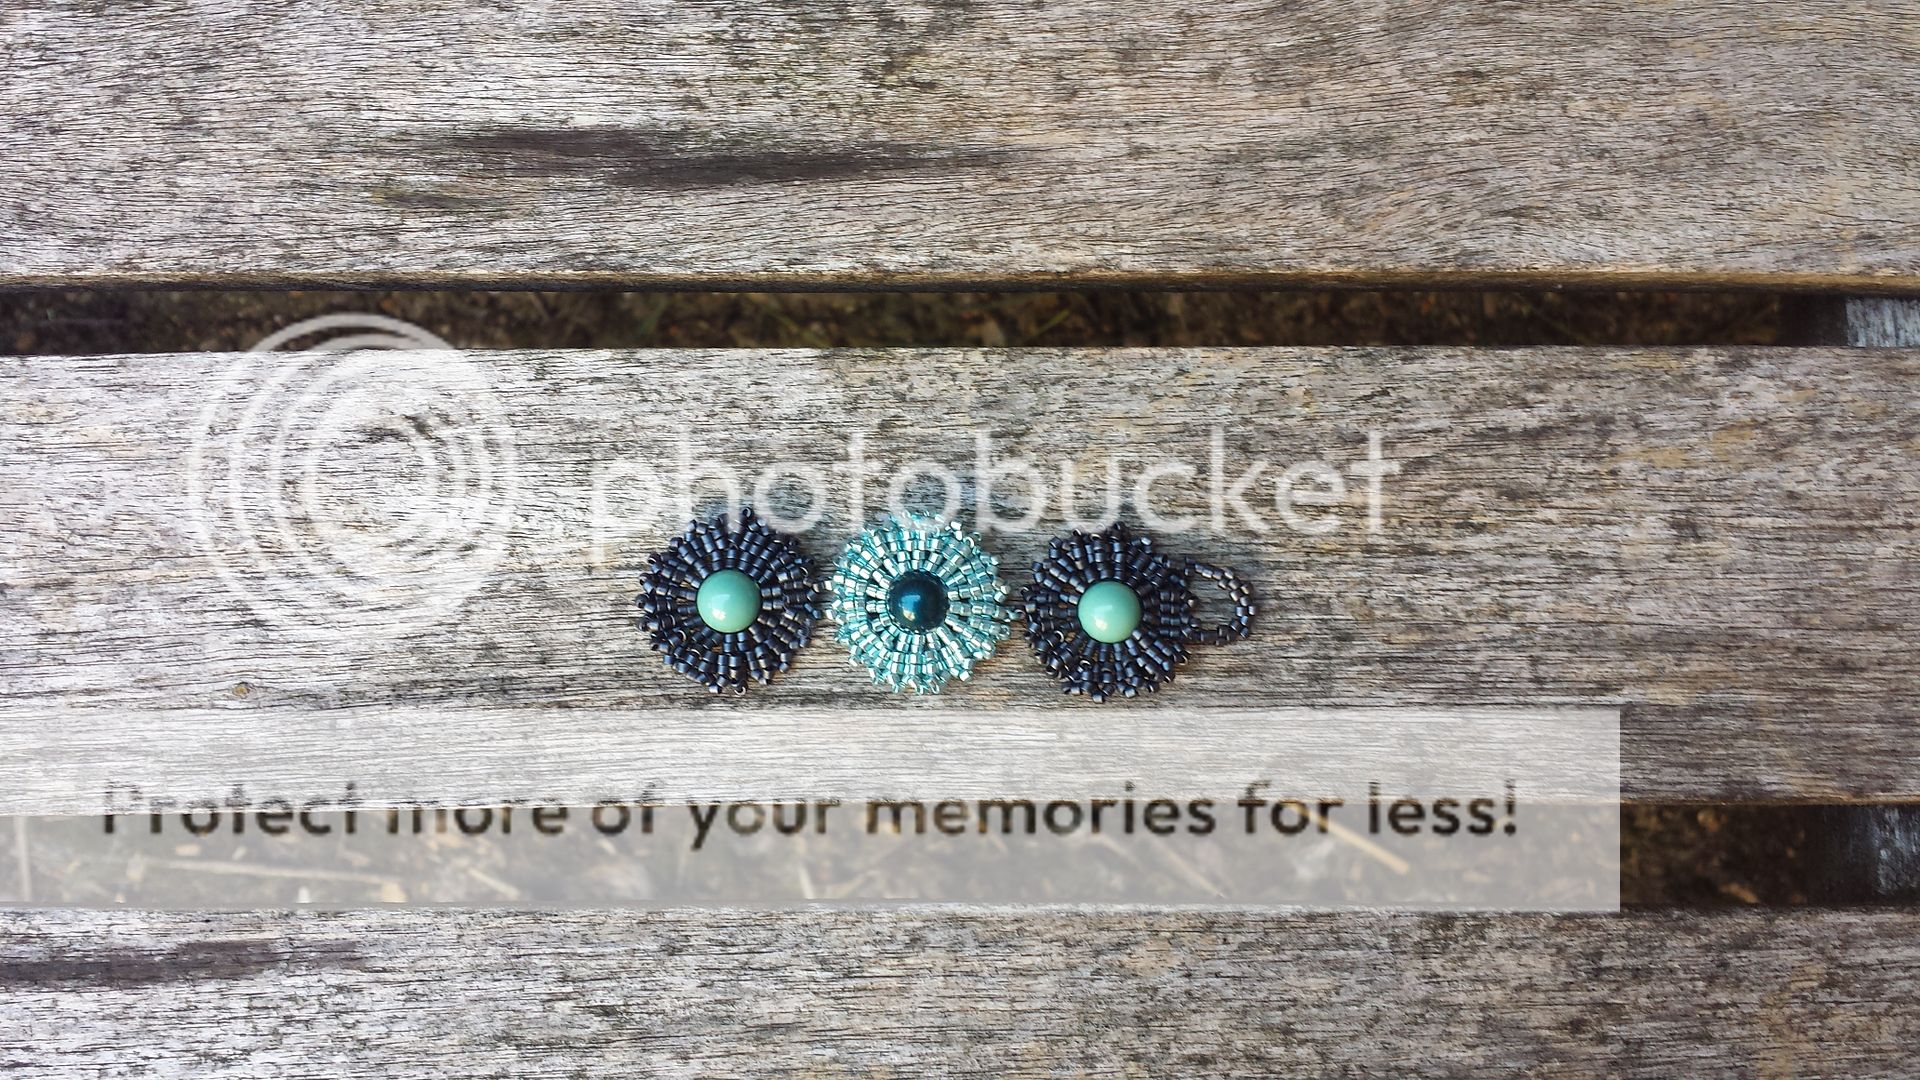
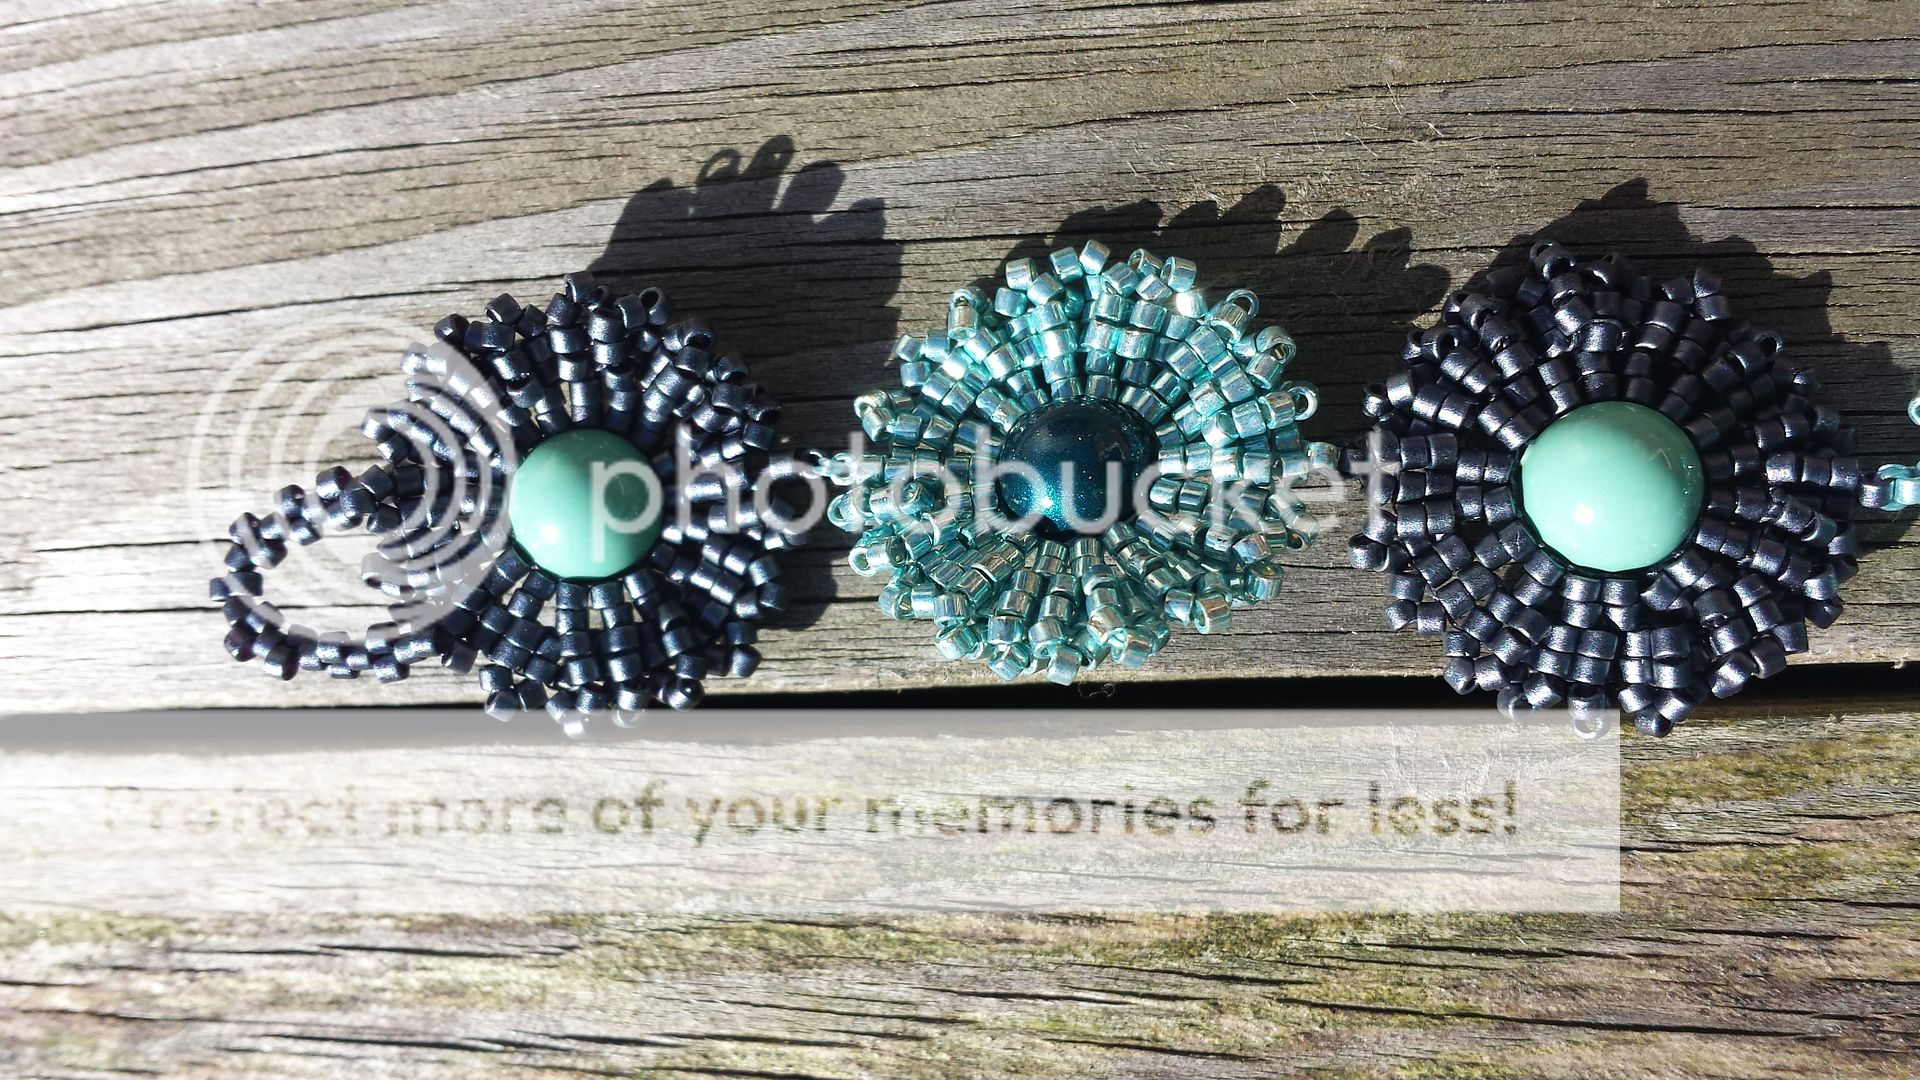
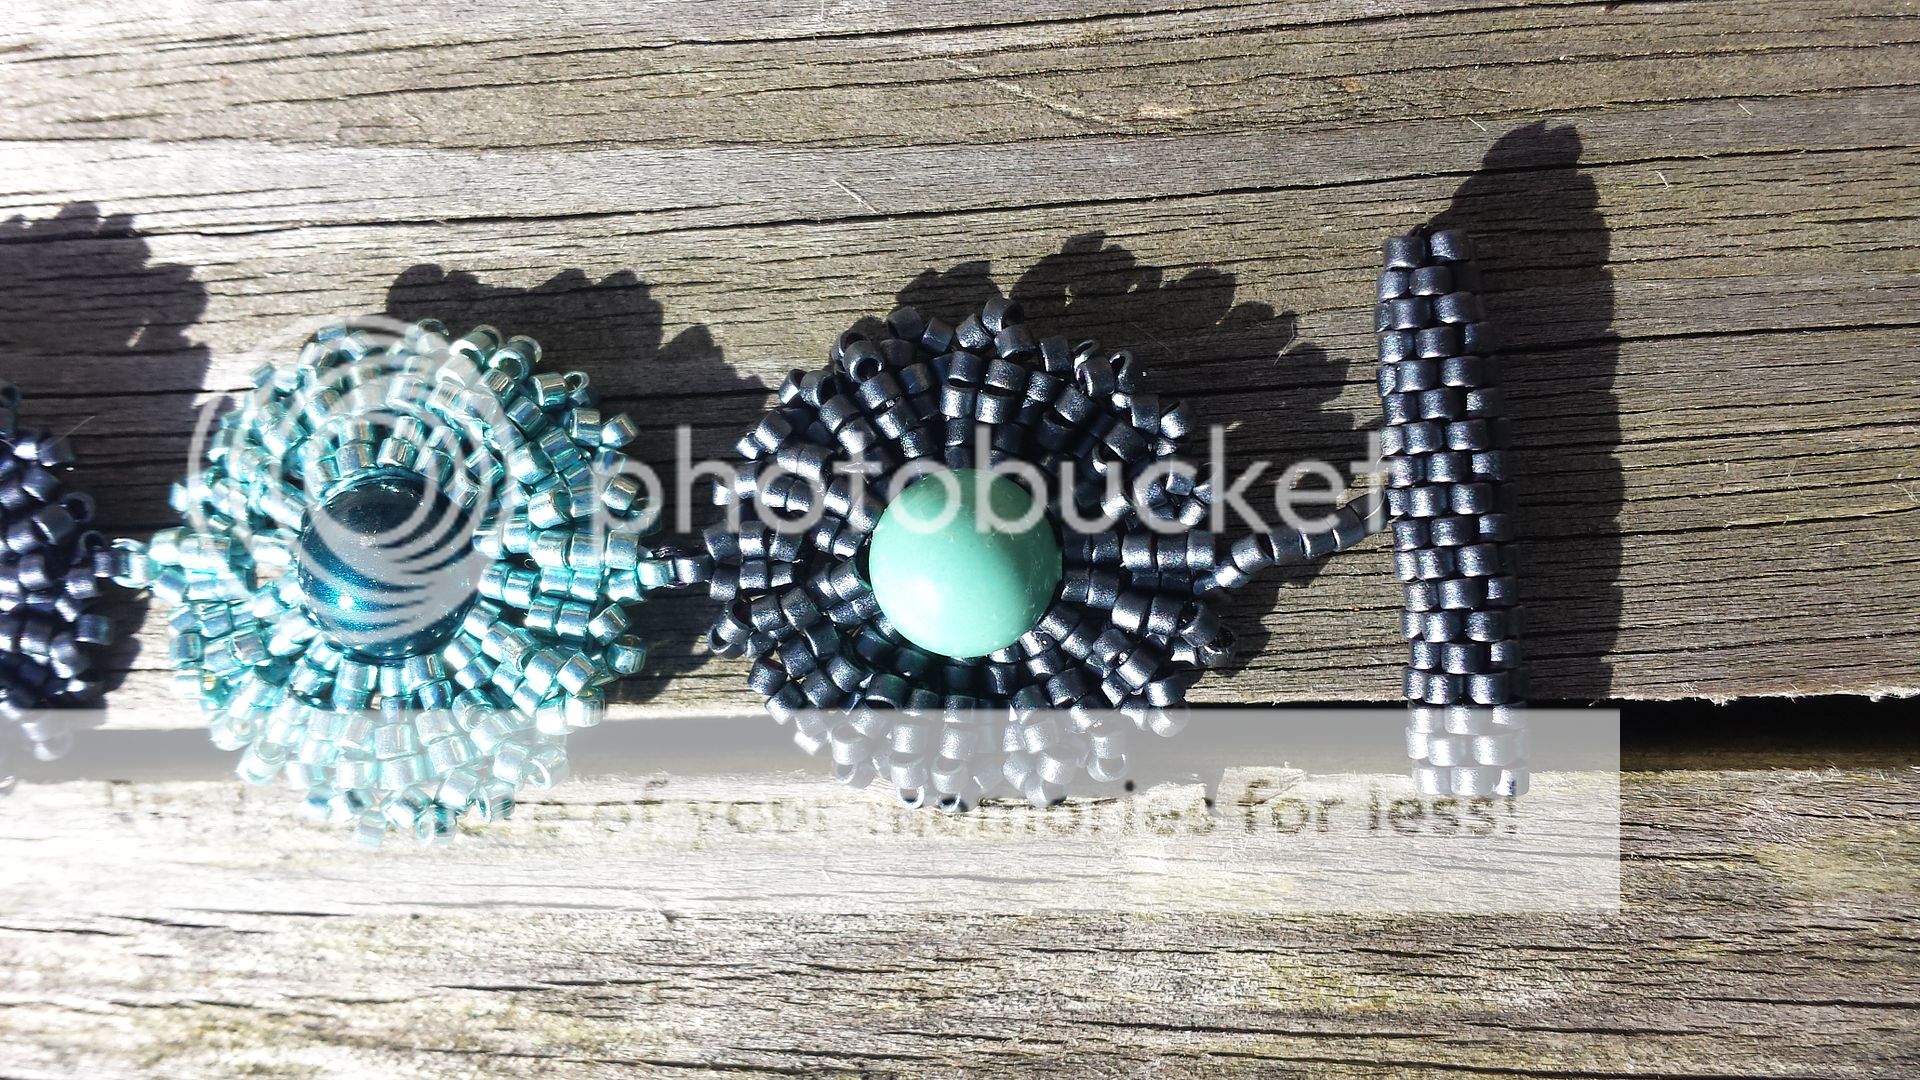
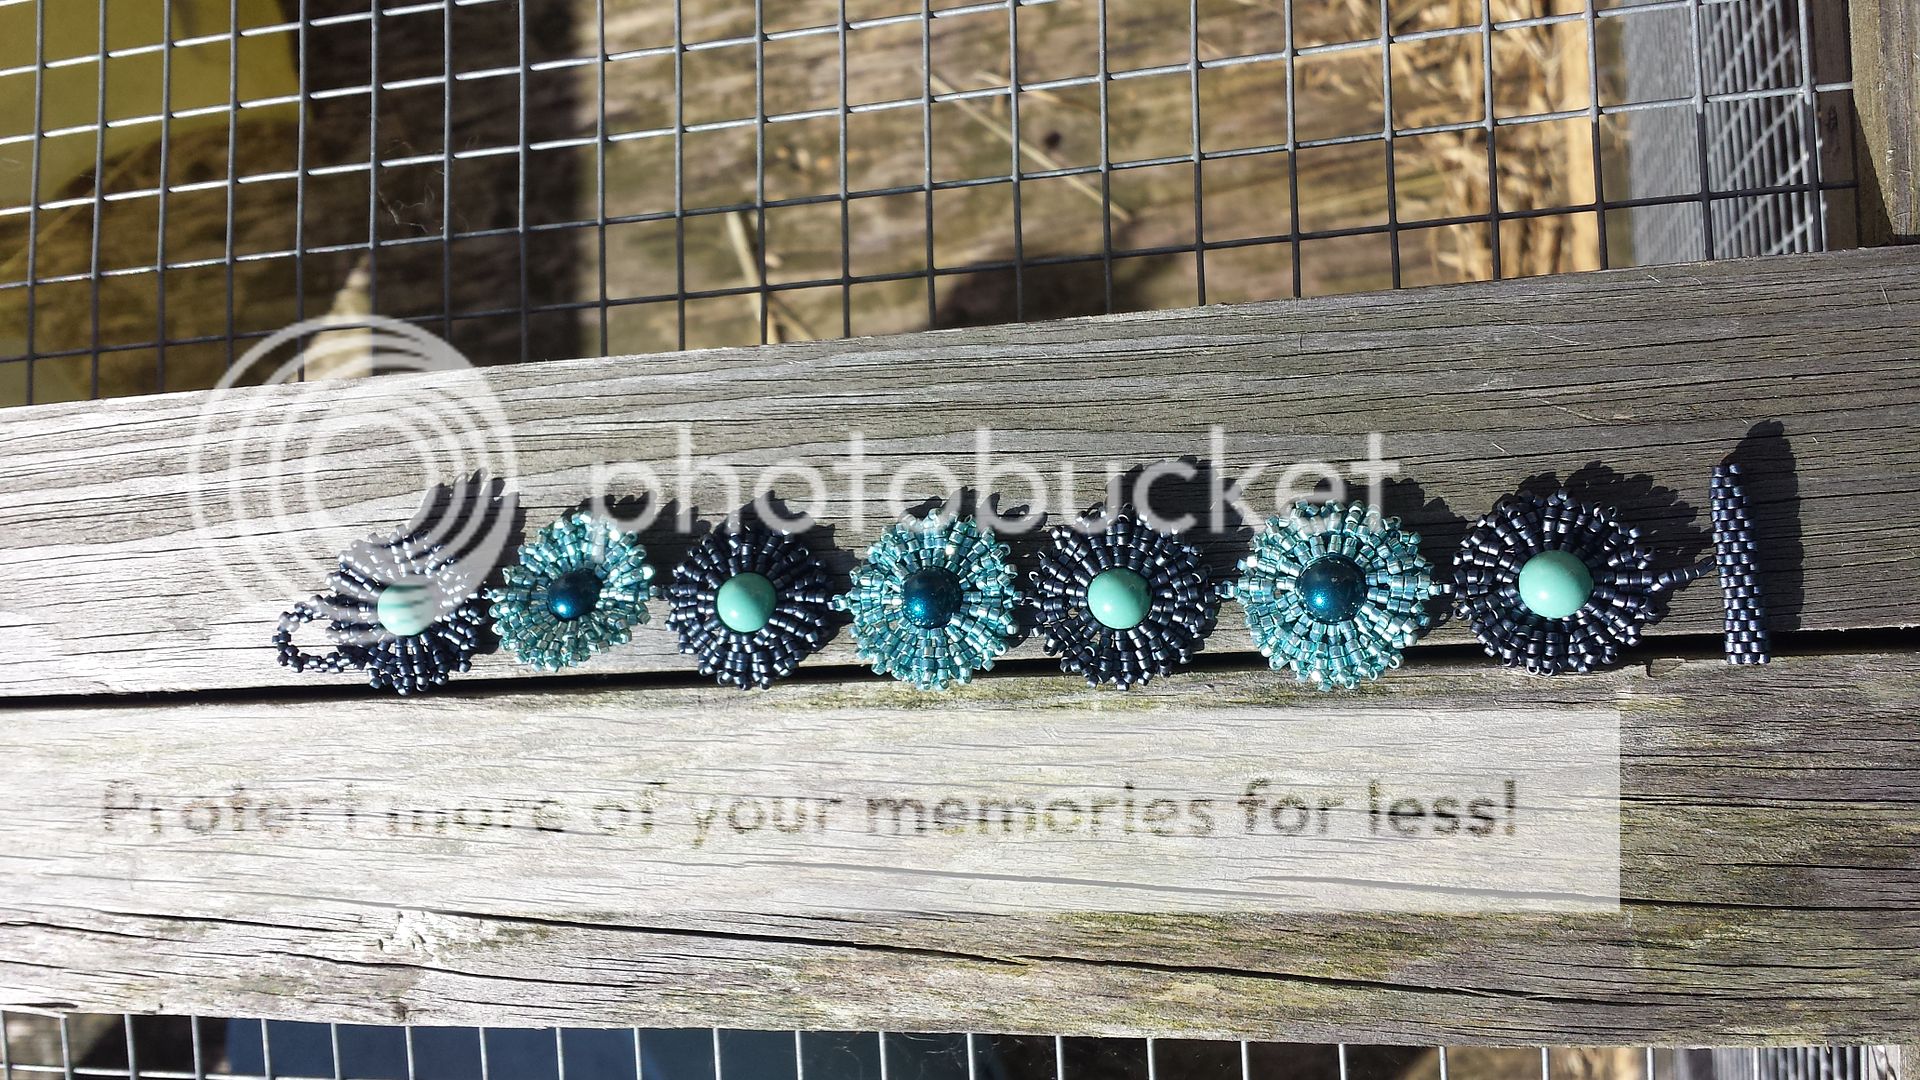
I made these enamelled copper pieces at the Manor House hotel, 2 years ago now.  You can see the original post http://thecraftersapprentice.blogspot.co.uk/2014/10/manor-house-enamelling.html.  They have been lying in my jewellery WIP box ever since.  I'd open it, look at them, put them back and forget about them!  This time I took them out so I wouldn't forget and they sat on the table for a couple of months instead!


I made each one a different pendent, using various pieces of chain I have.  I often buy fancy chain at craft shows and this seemed a good use for it as it can overwhelm a beaded pendant.  I've forgotten how to spell pendant again.  I could have made kumihimo or beadwoven straps for them, but I quite like them simple.


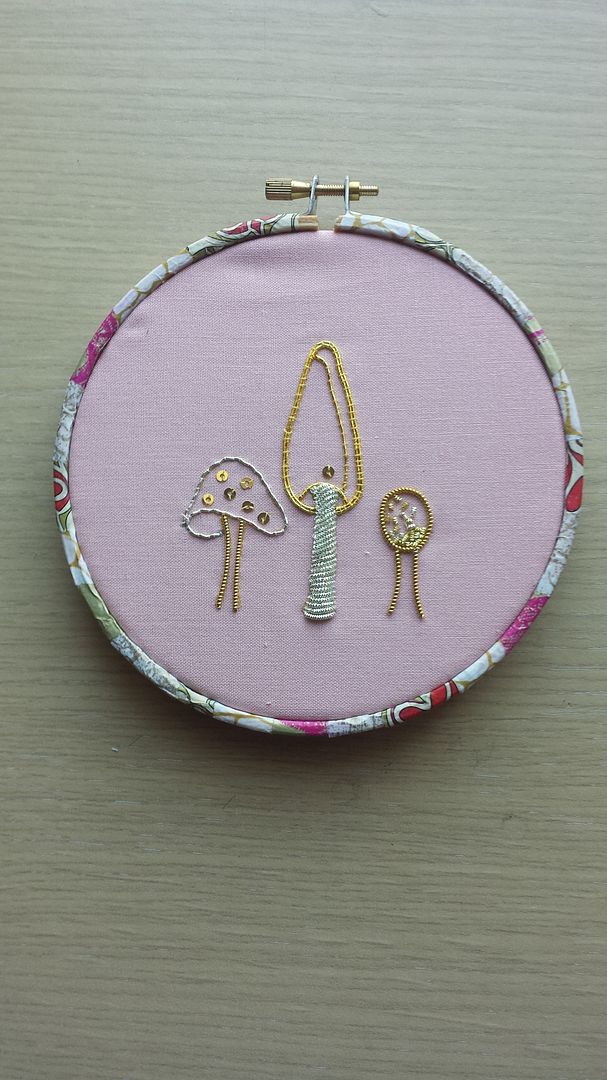
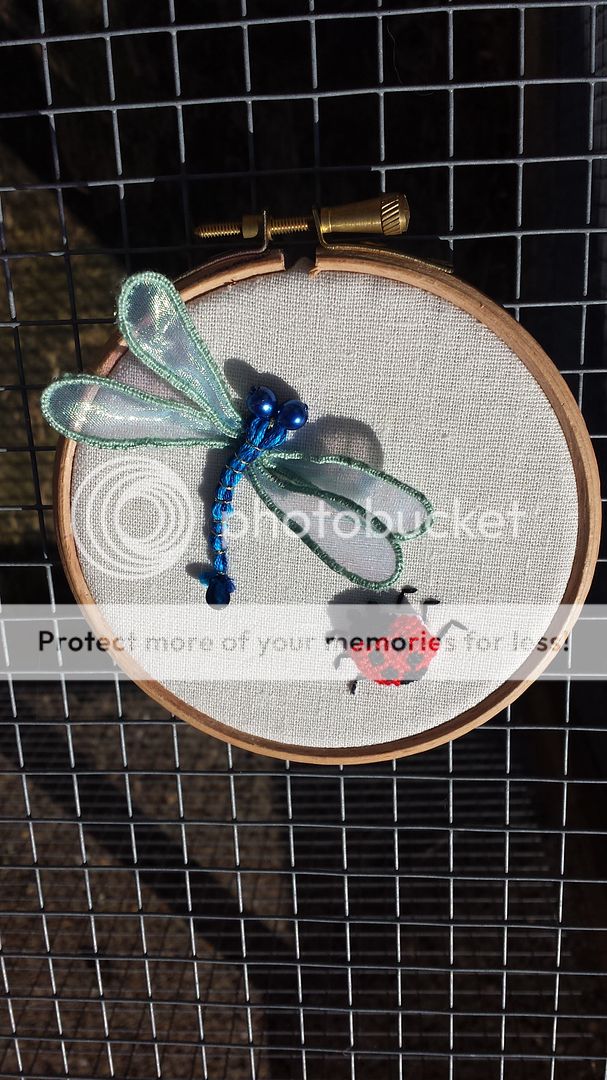
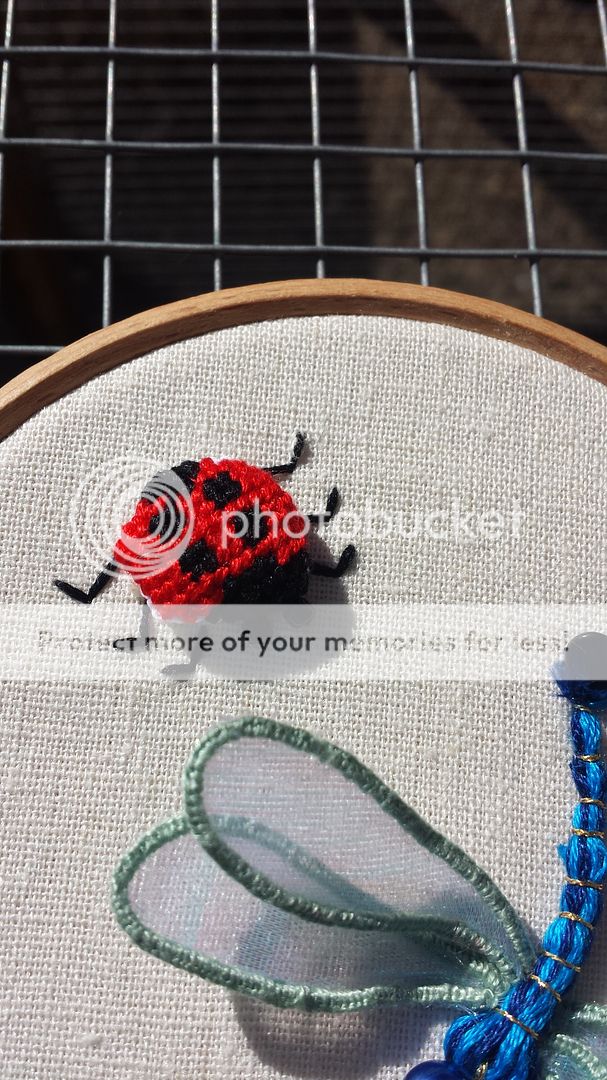
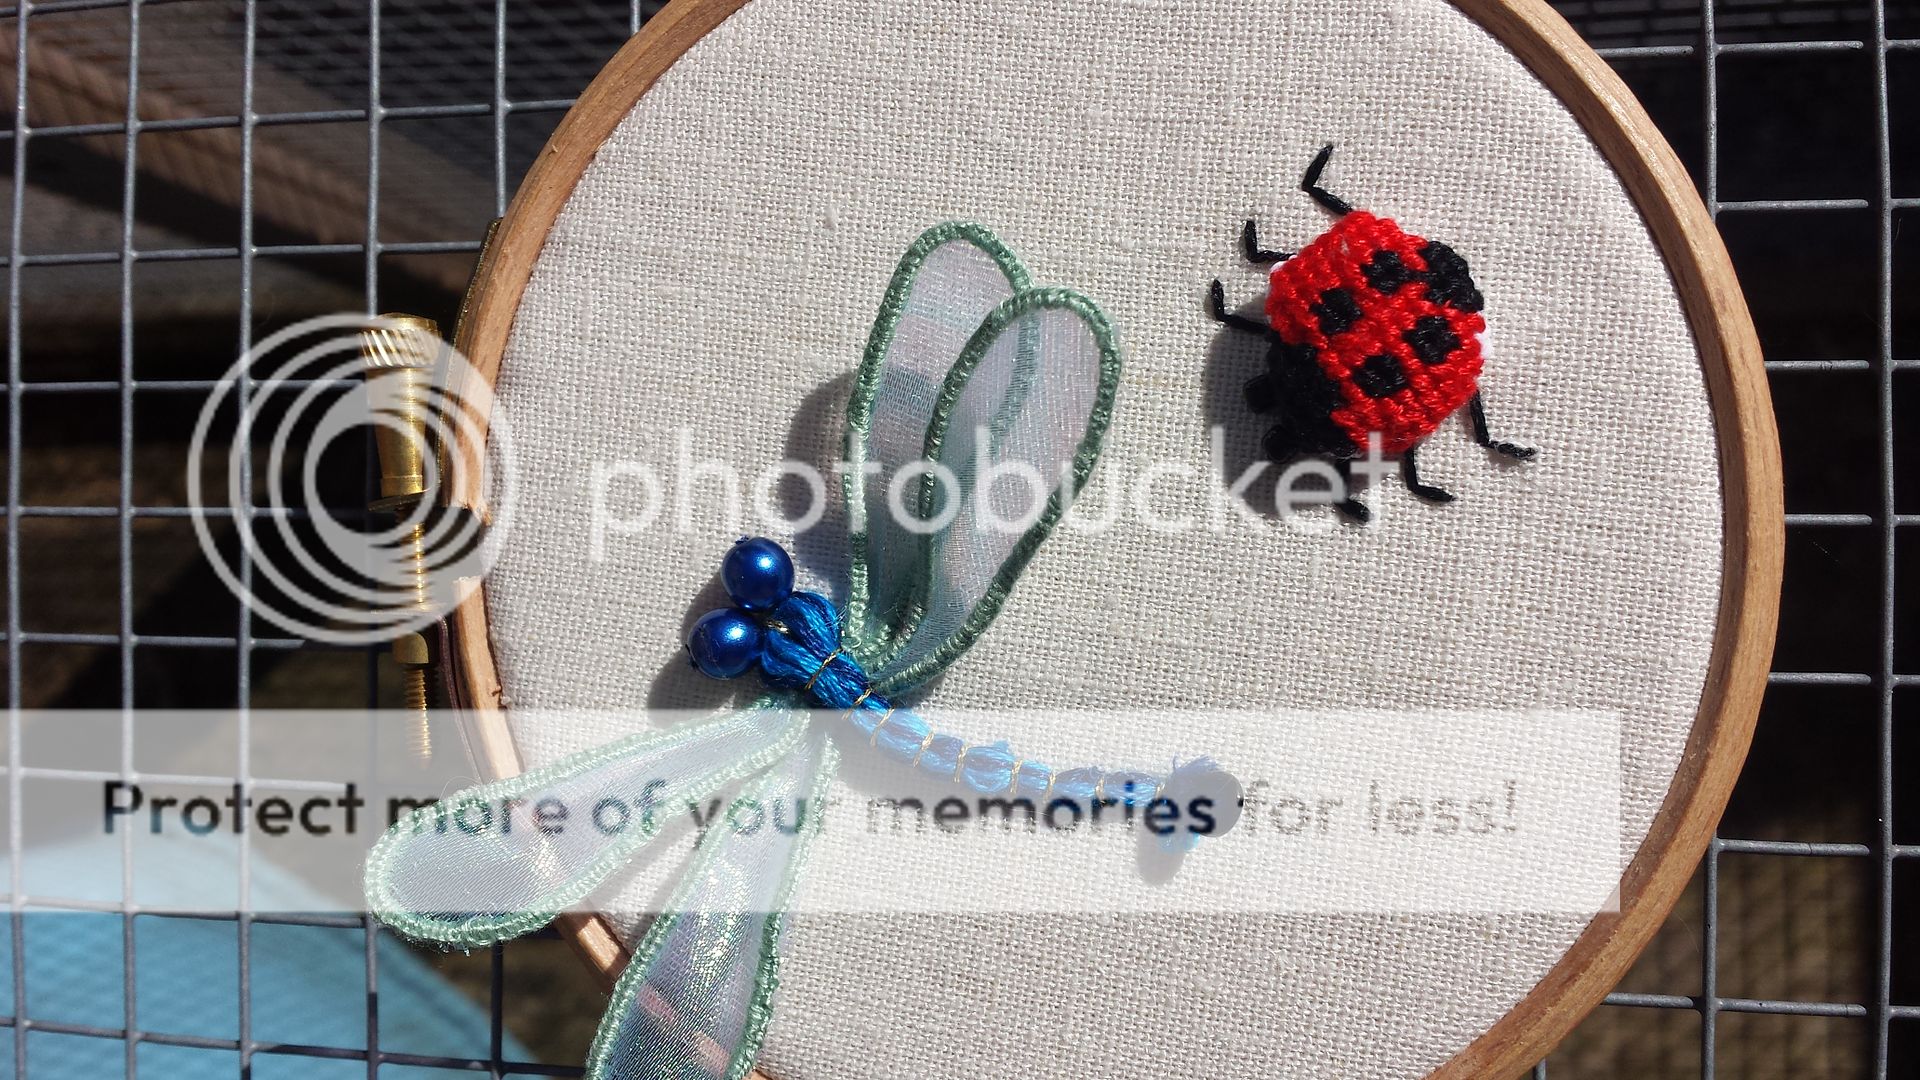
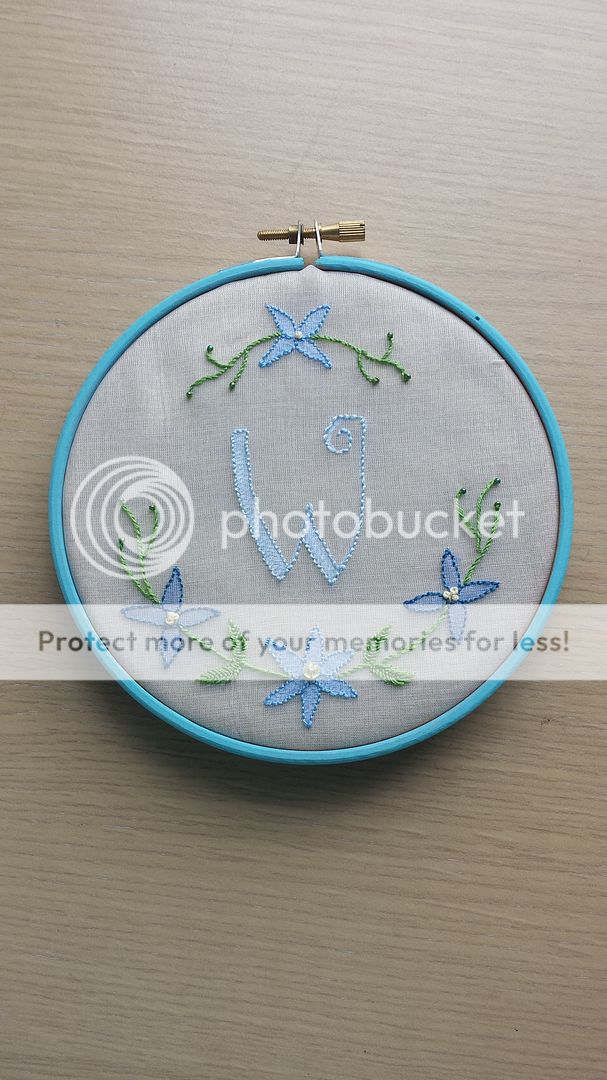
In my last finishing post, I showed you that I'd finished this goldwork piece.  I had to order an embroidery hoop for it as I wanted a 4" hoop but only had 3" or 5" ones at home.  Then it took me an age to decorate it as I wanted to paint it but couldn't find my paints anywhere.  I still can't find them and, as I'm sitting here typing this, I remember where I put them!  Too late now.  I decopatched it instead.


I chose red, gold and silver papers and stuck then down in the same order each time.  I'm not sure if this will damage the embroidery, but then it's hardly a heirloom piece and I don't have any heirs anyway!


Finally, I finished these pieces.  I made a really long red kumihimo cord, then cut it into two.  I threaded a bell flower on the necklace piece and made the other piece into a double-wrap bracelet.  I'd be nice with some charms on it so I may add to it at some stage.  The necklace on the right was actually made by my friend Kerry, but the ribbon was too long.  I'm short and very chesty and long necklaces looks stupid on me and are probably dangerous with the way they swing!  I shortened it by a few inches and added new ribbon clasps.

Now I just need to buy some red clothes...

Friday, 28 October 2016

polymer clay marquetry

A year or more ago I signed up to a newsletter from a local polymer clay group, but never found the courage to go along and join a session.  Then a couple of months ago the newsletter stated that there would be a workshop with Cara Jane for a bargain price.  When she was still blogging, I always read her blog and think she's a real master at polymer clay, so I got mum to agree to come along too!

The class was in polymer clay faux marquetry.  You can see Cara Jane's pieces here.


We had 9 different colours to mix.  Maple, Oak and Mahogany, each coming in light, medium and dark.  We were using Kato Clay which I've never used before and it took some working to mix the colours!  We were split into groups of three, so only had to do three colours each, sharing the blends that we made.  We then layered then up within the three groups to make a striped block, as above.


Apologies for the background of the photos, we had to take along a glass board to work on and I use this old kitchen chopping board which is pretty garish!  We cut our slabs into this shape so that they could be put together to make...


These two canes.  The placement is different in each one.  We then got to work compressing and stretching the canes to make longer, thinner canes.


That was quite some reduction!


The idea is to cut thin slices of the cane and lay them out to make faux marquetry patterns.  Alas, I didn't have time to do it in the session as we moved on to a different technique and to be honest, I'd completely forgotten about it until I saw these photos and started to write this post!  I will add it to my UFO list (seriously contemplating making one...) and try to feature it in a "finishing up" post soon!


The photo above shows very thin slices of the oak and mahogany, laid together and then ran through the pasta machine to make these pieces which look like wood grain. This was the second technique we explored.  We were to make a covered box, or maybe some pendants.  


I failed to finish anything at all and it still looks just like this!  I made the round motif for the box top, The smaller motif on the left was my first attempt, using a diamond cutter I had.  I soon realised that the pieces didn't fit together nicely though as the corners were curved.  That's when I started using the template you can see in the background to cut diamonds.  Again, this is not finished!


I either need to get on with this, or go to a clay day at the local group and get it finished!  Regardless of what I came away with, I had a fantastic time and was amazed at what could be achieved with a bit of polymer clay.  The group are really friendly and lovely and I'm sure I'll go back soon.

Tuesday, 25 October 2016

coiled bowl which isn't coiled

In the summer, mum and I went to a workshop with Katherine Fortnum.  I still wasn't very well but managed to do OK that day.  We were the only people in the class!  We were to learn a coiling technique to make a decorative bowl.  I couldn't roll the required sausages.  I tried and I tried but then I realised if I carried on, I would start to get upset and frustrated so asked if I could do mine by rolling the clay flat and cutting out shapes.  Katherine, very kindly, said yes and helped me to build a bowl in that way.  

I'm not sure that clay is for me, but if it is, I'd rather use the porcelain clay that we use with Katie Almond as I find it so much easier to work.


We used moulds to build our bowls in.  I cut some hearts and began to build it up.  I've just realised that I didn't take a photo of mum's bowl - I would have been able to show you what a coiled bowl looks like (it's not just one long "sausage" that coils round, it's small coils stuck together). 


As each part was built in, It was important to ensure the inside joins were all nicely blended in, to give the bowl some strength.


I added in some smaller hearts, I think I'd cut them out of the middles of the bigger ones, but I don't quite remember.


Turning the bowl out of the mould was nerve wracking!  It could have easily have collapsed...


A bit of painting - we couldn't do much as we weren't able to dry it out between coats, it would have cracked.  This is what I find off-putting about this kind of clay.  It's actually really fragile.


I painted my heart bowl in the same bluey-green I used for my heart windchimes - very predictable!


And here it is all fired!  It's about 6" in diameter, and maybe 3" high.


I can't really think of much more to say about it, but I have some more photos, so you'll just have to look at them!


Are you still looking?


Thursday, 20 October 2016

Finishing - stumpwork and gold work

I've been finishing things!  Almost completely....

First up, remember I did some Stumpwork in a class?  Well I finished that.  First I had to finish the wings.  They were made separately to the main piece, using a piece of paper wrapped wire to form the outer edges and button hole stitched onto a lovely organza fabric.


The picture above shows them cut out.  I cut them out, then realised I was supposed to coat the back of the wire in glue!  Ooops... as long as people don't poke the piece, it should be OK!


And here it is all finished and mounted in a hoop as it's for my hoop gallery.


I made the ladybird by using a running stitch, then gathering it up tight to pull the edges round the back.  I stuffed it and sewed it closed.  I didn't do a great job with this, but it was hard!  It was stitched on Aida which isn't exactly a giving fabric.  I might have been better making it into a covered button!


The wires for the wings were poked through the fabric and tacked down on the back.  I'm really pleased with the final piece!  The wings are so lovely and shimmery in real life.

I also finished the goldwork that I started at a class.  There wasn't that much to do here.  The left mushroom was stitch with rococco, for which there were no instructions!  I guessed and couched it down.  I added the spankles and the pearl purl for the stem.


This isn't hooped up yet as I needed a 4" hoop and only have 3" or 5" ones!  I've now ordered some and will probably bind it with a gold or silver ribbon.

I had already finished my shadow work piece, but it's now mounted in its hoop.  There is a piece of green organza behind it which looks nice.


That was really hard to photograph and I don't think I was very successful!  So, just one more to hoop up and that's all 3 WIPs from embroidery classes done!

Sunday, 16 October 2016

Mellerstein Parrots #2


It's time for the three-weekly SAL update.  I'm embroidering the Mellerstain Parrots by the Crewelwork Company.  Here is where I was...


And here is where I am now. It's a bit of a spot-the-difference competition!!


I completed a small branch and added the centre to a leaf which had been left without.  I also stitched an acorn and half an acorn.  The seed bit of the acorn was done in padded satin stitch which was fine, the cup was done in french knots and I'm not convinced.  It said to do them with 1 strand, but it would have taken about 12 years, they were so tiny, so I did them with two.  


I think I'll finish the second one and do the swirls, then see what I think.

I'm sewing along as part of a SAL, you can go and see what the other participants have been up to here:

AvisClaireGunCarole, LucyAnnKateJessSueConstanzeDebbieroseChristinaSusan
KathyMargaret


Feel free to come and join us, just contact Avis.

Friday, 14 October 2016

frilly flowers

Today's post is about a beading class we took at The Bead Shop Nottingham with guest tutor Kerrie Slade.  It took place during National Beading Week which was at the beginning of August.  I'm definitely not one of these bloggers that makes something in the morning and posts about it in the afternoon!


We learned to make these lovely daisies.  They are made using 8mm Swarovski pearls in the centre, we brick stitched around them using size 11/0 delicas which are cylindrical beads so sit together really nicely.  I couldn't make my mind up which colours to use, so used them both!  The daisies weren't too difficult, but were quite time consuming and I only got these three done in the class.


You might be able to see the loop on the right.  In the pattern there is a loop on each end of the bracelet and it is fastened with a ribbon.  This is really not a look that I like, so I decided to put the loop on one end and make a toggle for the other.


I made a toggle using the delicas and following instructions in one of Beth Stone's excellent books.  I much prefer it like this.


Luckily the toggle fits nicely through the loop and neither is too big.


The class sample had 6 flowers, but was too tight for me, even though I have quite small wrists.  I made 7 flowers and it has enough dangle in it.


I have to confess.  The class may have been in August, but I didn't actually finish this until the end of September!  At least I got it done though!

Tuesday, 11 October 2016

Necessary sewing

It was time to make myself a new lunch bag and September's meeting of the EMMQG was just the time to do it.


Above is the new lunch bag.  Below is the old lunch bag.  I made it back in April 2013 and, reading back through that post, I hated the Lamfix lining from day 1.


Look how manky that is!  It's been through the wash a couple of times, but it was gross and I was embarrassed about it.  Check out the inside:


Putting it through the was caused the adhesive-oilcloth-type-stuff that I'd ironing onto the cotton to peel away.  In some places, like where I'd attached the handles, it had ripped.  Over time more and more bits had ripped off.


And then the zip pull broke.  It was time.  It had to be done.


I didn't need a pattern this time, it's a basic pouch with handles.  I also decided there was no need to have a wipe-clean lining as I'd never needed to wipe it clean, it was more important that I could put it through the wash.  The main fabric is a gorgeous Rowan fabric, possibly Amy Butler?  It was given to me by Kerry-who-abandoned-me.  I used some Littlest on the ends and some Art Gallery elements.  The colours all matched perfectly, though I can't decide if they are blue or green!  

I did a diagonal cross hatch quilting to attach the fabric to the InsulBrite.


This time I attached the handles to the outside only, before I added the lining, and I put a strip of wadding in them to give them more body.


I don't know what the lining fabric is, I've had it in my stash since my first sewing days.  I made this one a couple of inches bigger in each direction than the previous one as some of my plastic sandwich boxes were a tight fit.


Hmmm, what was I trying to show with this photo?  I must have thought you'd want another look at the lining.  


One this that was not an improvement over the original - the ends of the zips.  What a mess!  I was really careful to make sure that the ends of the zip had a fabric piece on them big enough to be included in the seam allowance, with enough left over to sit neatly.  Didn't happen.


I don't know what the ends of the zip are so bulgy!


As I seem to be going for some kind of world record of number of photos of one lunch bag in one post, here's another!

Saturday, 8 October 2016

Bugling

I know it seems like I'm only posting stuff that I've made in classes over the last few months, but that's all the making I've been doing.  I'm seriously worried that my creative motivation has upped and left me for good.  I can concentrate in a class, and really enjoy it, but crafting in my own time just doesn't happen.  

So today is the result of another class, this one was at The Bead Shop Nottingham and involved a bit of bead weaving using bugle beads which I've never used before.  Bugle beads are the small, long, tubular beads that you see a lot.


You can see them in the picture above.  On the left are silver 11/0 sead beads, then the blue bugles and then Swarovski bi-cones.  Aren't those bugles a beautiful colour?  Steph, the tutor, had made a sample using those silver and blue shades with red bicone crystals.  I chose to use the same colours as I love them, though I changed the crystals for purple ones. 


I finished this in the class, but it took longer than it usually would.  I just couldn't get my head round it.  I think this class was just after I'd had a change in medication and was suffering from terrible brain fog.  I saw someone on Facebook recently sneering at the term "brain fog" but actually it's a thing and it's really unpleasant.  


I really love the design of this bracelet, I think it's quite Art Deco and I really love the Art Deco style.


It's finished with a toggle clasp, which is my favourite kind of clasp.  Instead of attaching a metal one, we used an empty diamond and made a toggle to pass through it to fasten the bracelet.

More craft class news coming up, and feel free to try to kick me back into crafting, I really need it in my life and feel a loss because of it.