Showing posts with label LANT. Show all posts

Friday, 10 January 2014

Where Wendy thinks she's a carpenter...

... or rather a carpenter's assistant.  

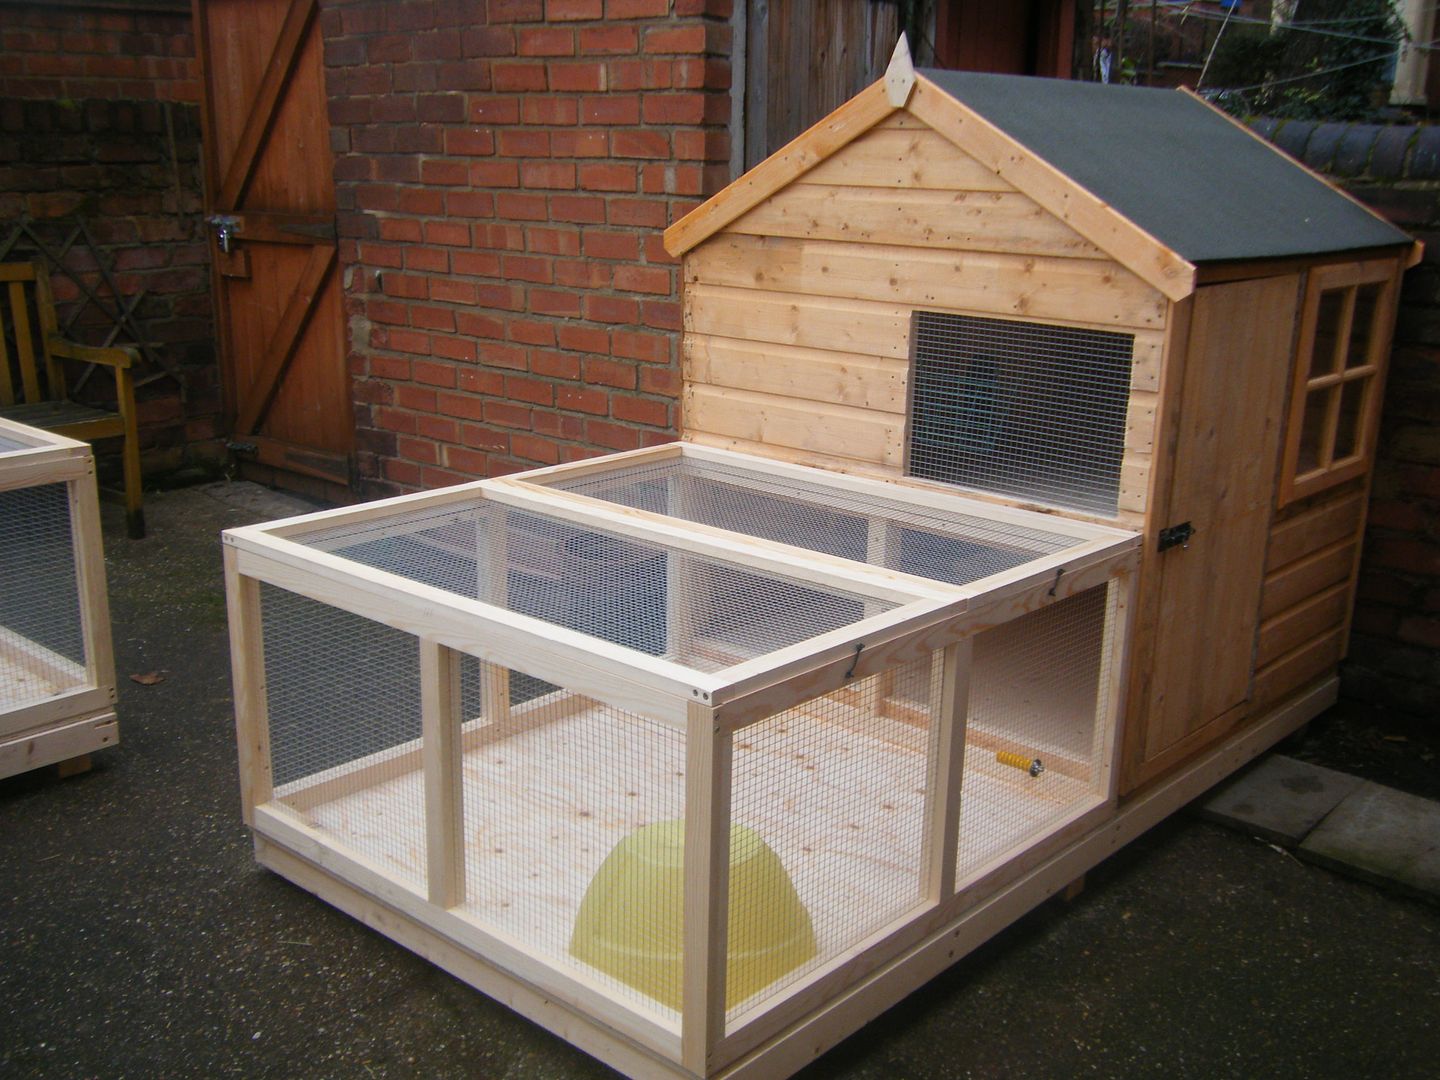
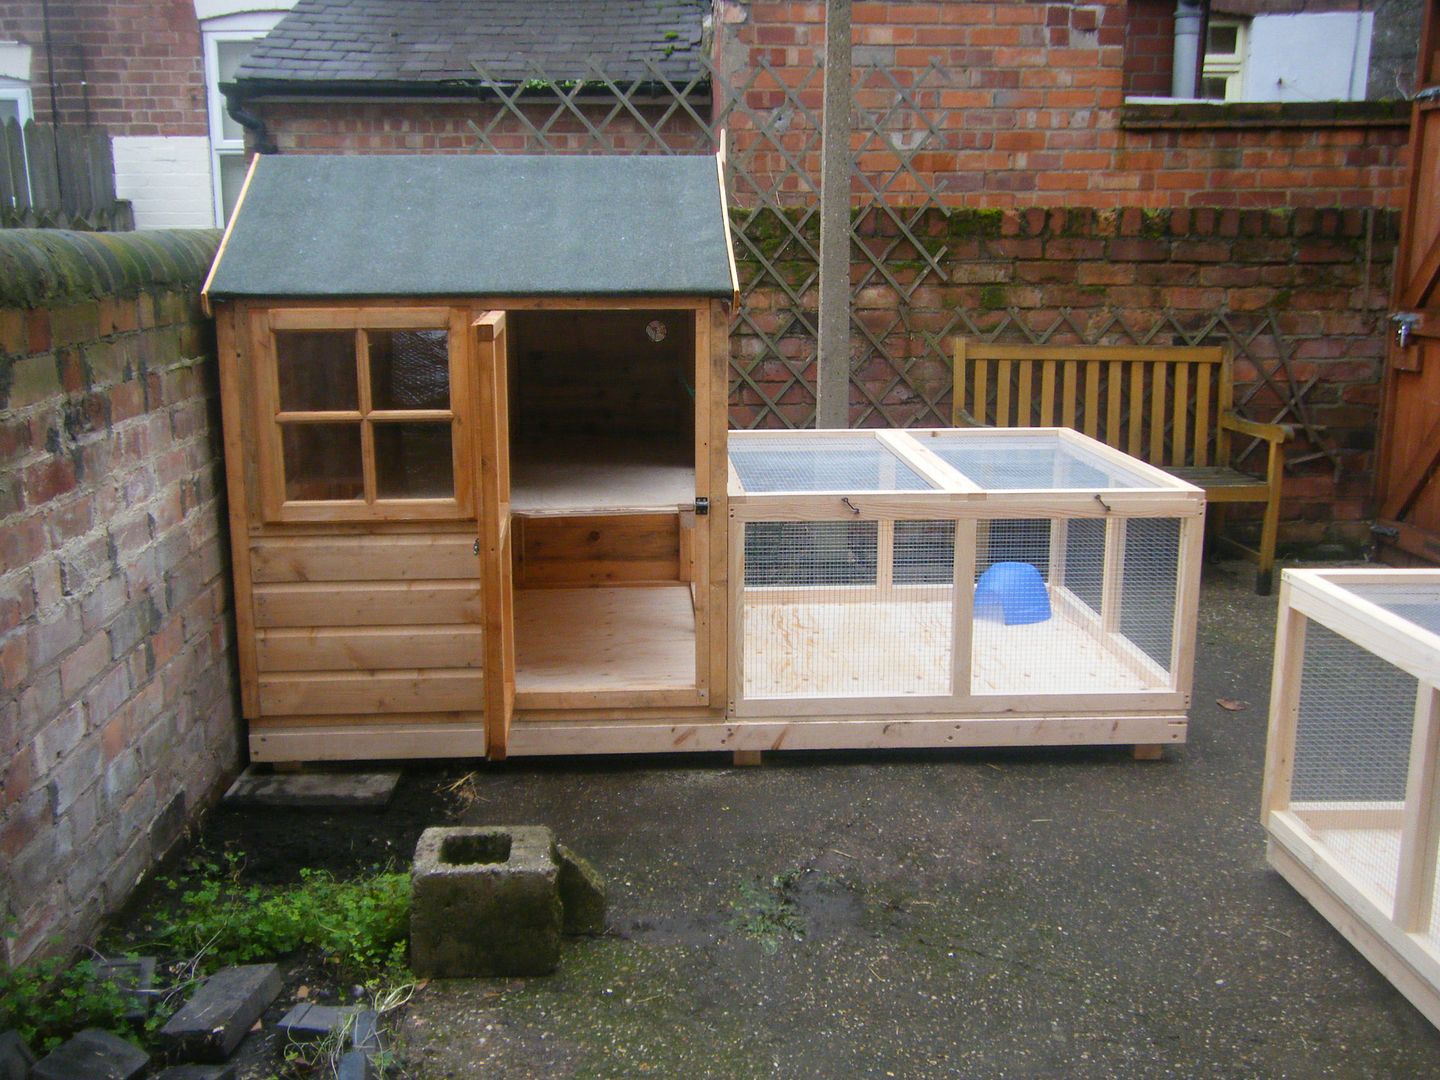
I may have mentioned once or twice that I have 4 lovely bunnies at home.  They live in two pairs in two hutch/run combinations bought from Pets At Home.  Colin and Ellis's hutch was literally falling apart and I wanted all 4 to have more space.  Cue two playhouses from B&Q and one husband who's a trained joiner/draftsman... 


Boxing day saw me holding and passing and carrying.  I did a bit of hammering too.


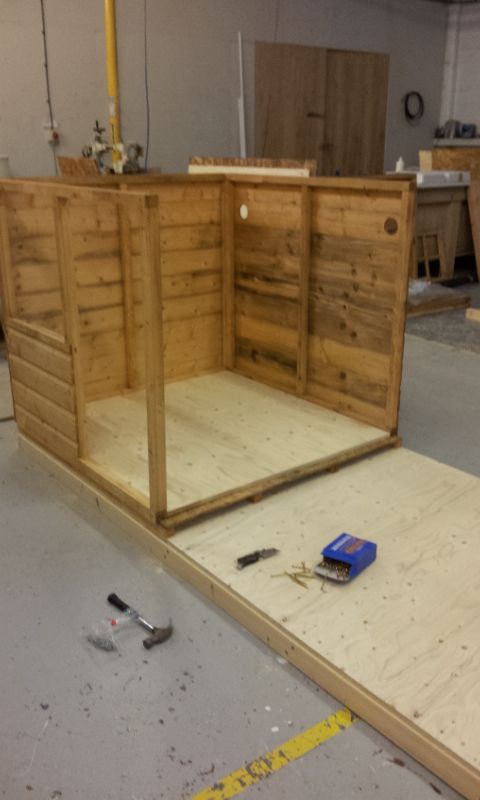
New Year's Day saw me drilling (first time ever!), screwing (screws into wood, minds out of gutters ladies), sawing, sanding and hinging.  Yes, hinging is a real word.


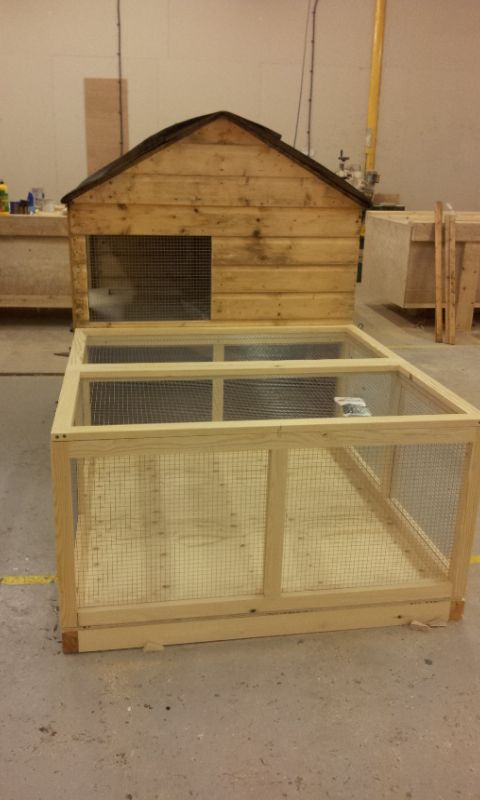
The playhouses are 4' x 4' and 4' high, so we added an extra floor.  We also had to cut the holes for the mesh window and for constant access to the run.  The whole thing is on a timber raft to keep it off the floor and level it out in our slopey garden. 


The lids to the run lift off for easy access (for me, not the buns!)


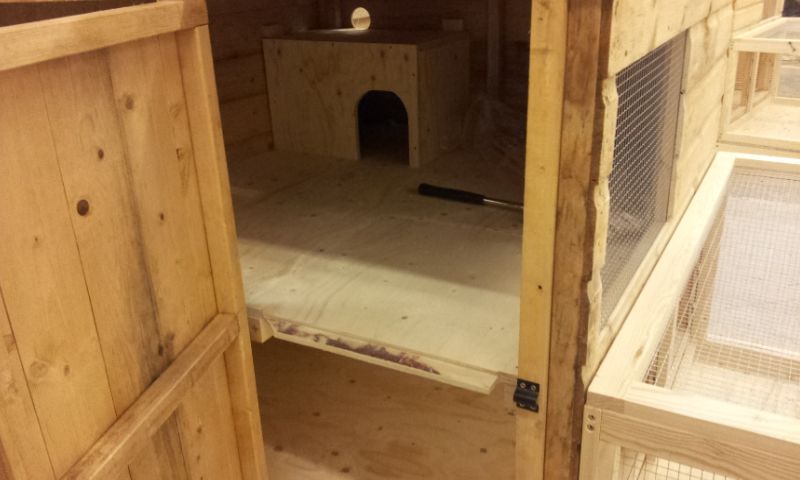
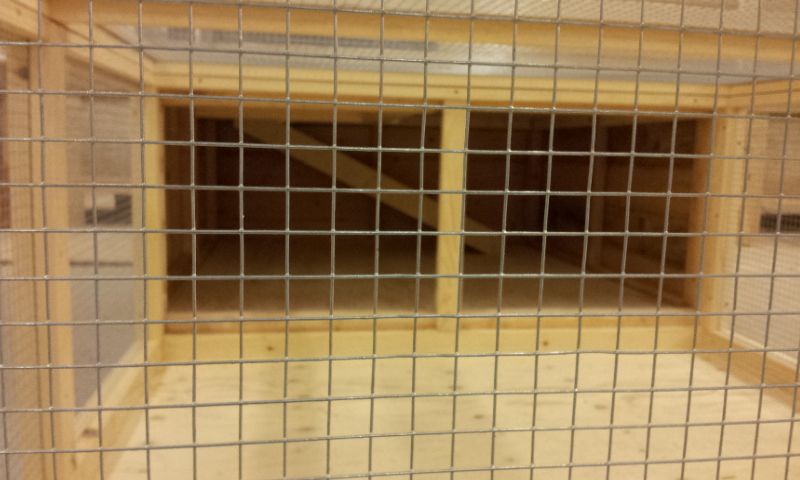
They have a sleeping area with space to sit on top as bunnies like to do.  The panel at the front lifts out so I can reach in to clean them out.  The hammer won't be staying.  


Mr CA also built them each a staircase!  Tiff is getting fat and they're all getting old and I worried they wouldn't be able to manage a ramp for much longer.


Want to see them in-situ?


We brought the buns home from my parents' where they'd been staying for the weekend whilst we sorted out the hutches.  They were understandably quite nervous at first.


After a short while, Tiff and Harry were running up and down the stairs, crossing each other on the way.


Ellis sat upstairs for a long time before venturing back down.


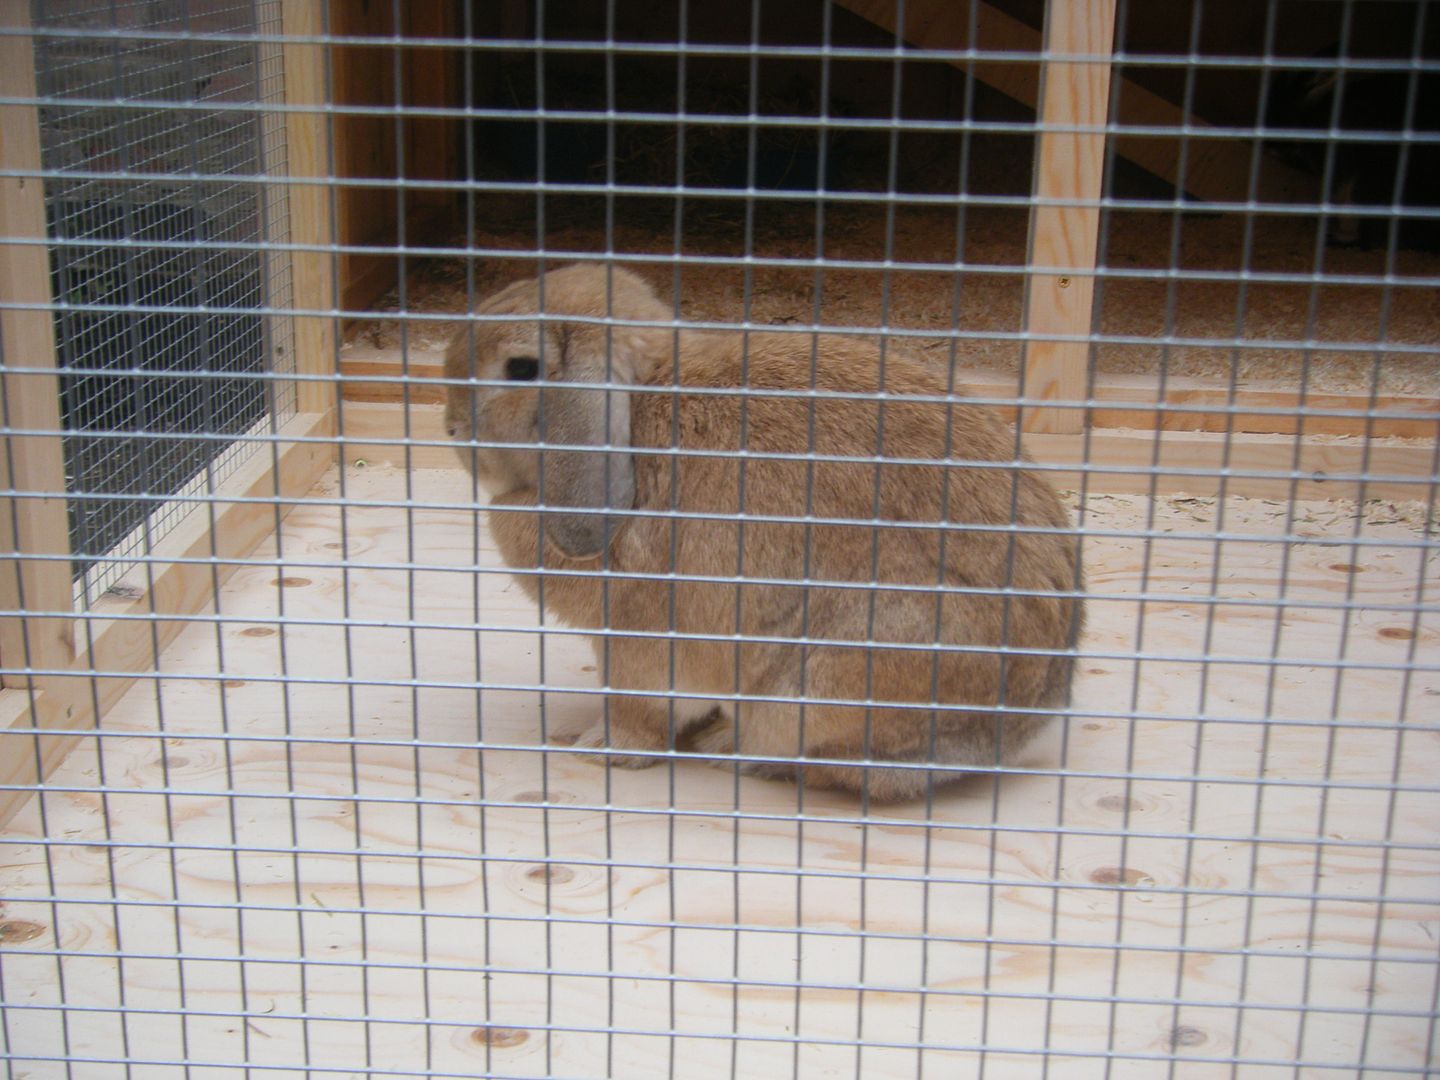
Photo above is of a contented Tiff, Ellis wouldn't have her photo taken!


Colin... well, Colin was angry.  And scared.  And confused.  He's still angry with me now and keeps thumping his back feet at me.  Poor Colin in his great big house with his new toys and a floor that doesn't stink of wee (yet!) !
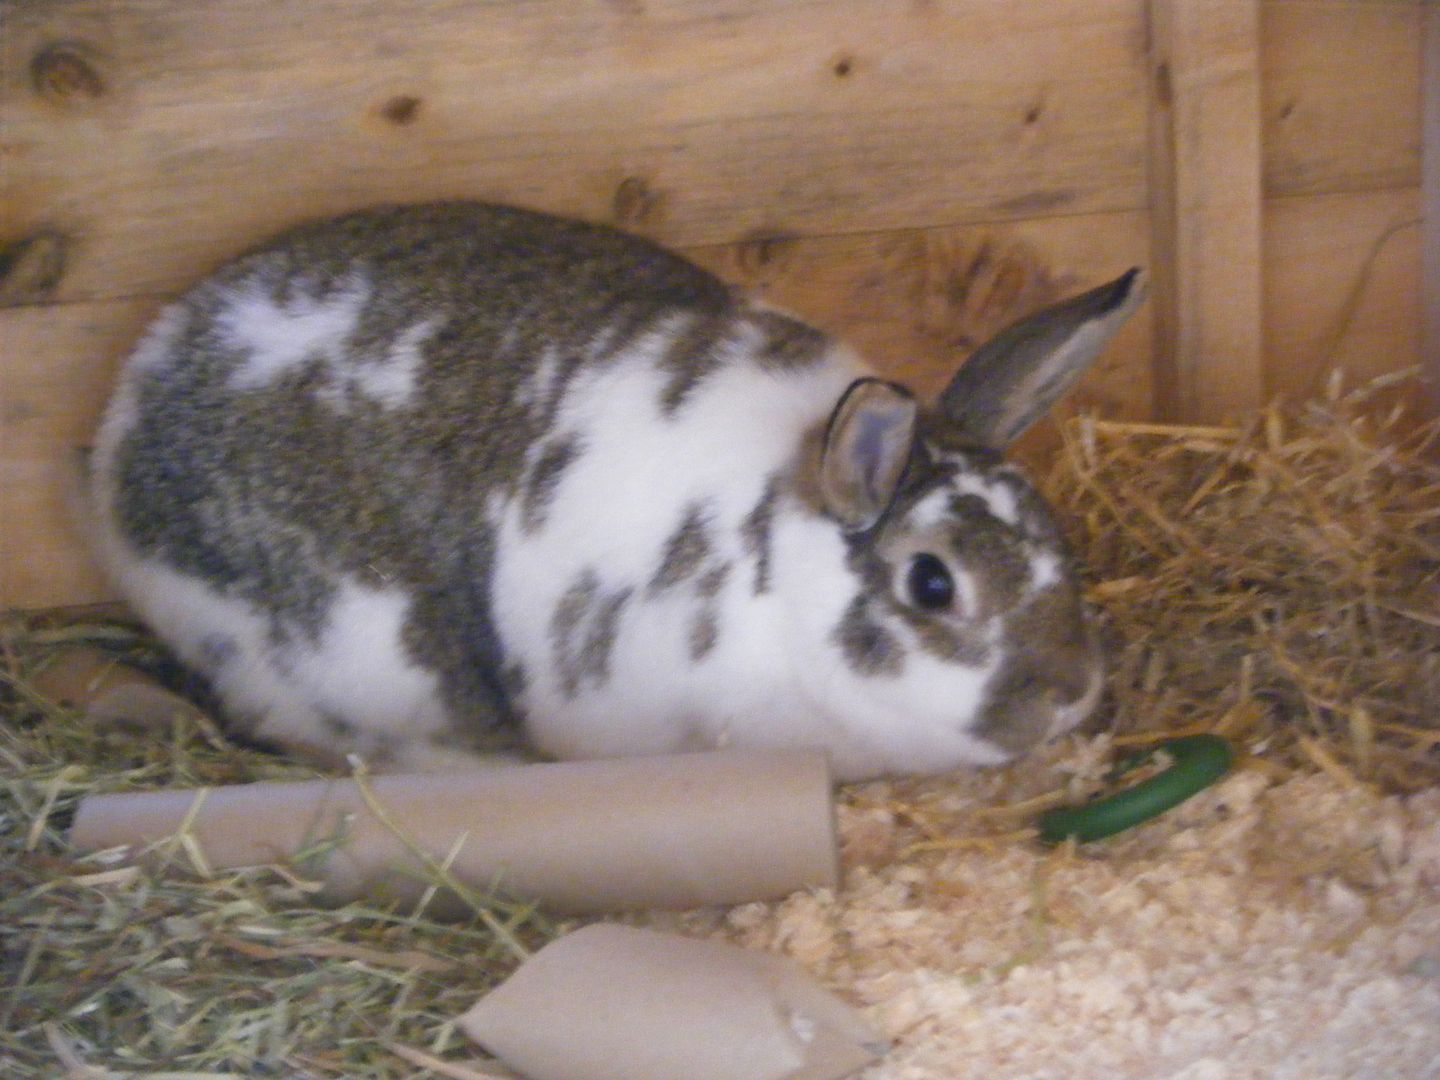


Poooooor Colin!

Tuesday, 31 December 2013

Bead embroidery


Happy New Year's Eve everyone, or, depending when you're reading this, Happy New Year.  I have such high hopes for 2014, first off that everyone stops calling it "Two Thousand and Fourteen", I mean, we didn't call 1914 "One Thousand Nine Hundred and Fourteen", did we?  Well, the French did, but that's different.  Secondly, I hope 2014 does not turn out to be the horrendous, disastrous, soul-destroying year that 2013 did.  Fingers crossed.

I considered doing a look back at the year, but it was so crap that I don't want to, I'm so glad it's nearly over.  Instead, my long overdue post about the Bead Embroidery class I took at The Bead Shop Nottingham.  I was planning a post about the fantabulous crafty presents I got from my bloggy friends this year, but I have yet to take photos and the weather outside is dull and cloudy and raining.  Blurgh.

So, bead embroidery.  Wow, loved it!


We made brooches using Swarovski navettes which are sewn on to Bead Foundation with ordinary sewing thread.  I outlined the navettes with size 11 red beads, including a picot edging.  I then bordered it with size 15 hematite beads (which I always call Hermaphrodite much to my mum's horror).  The centre is a Swarovski bi-cone crystal with a ring of the size 11s.


We were given a small square of Ultrasuede to finish off the backs at home.  I cut mine roughly to shape, then started sewing it on to the back with the size 15s as decoration.  I was cutting it to shape as I went.  After a petal I found a nicer, neater way of sewing on the 15s so undid it all to start again.  Well I couldn't!  See the black shape above?  How on earth did that ever fit on the back of the flower???  I'm waiting patiently for my order of Ultrasuede to turn up so I can finish it!

I hope you all have a wonderful 2014 and I look forward to catching up with you all in the New Year.

Monday, 9 December 2013

How to be a hooker

Last year for my birthday I got a latch hook kit.  I think this is called Looker Hooking in the US?  It's of a Union Flag and it's been sitting waiting for me for ages.  I kept putting it off as I knew I'd have to read the instructions.  Well that took all of 2 minutes!  Sometimes I just don't understand how my brain works.


I found it a little tricky at first, but soon got in to a rhythm.  There's about an hour and a half's work in there, so this is going to be a long job!


It's comes with a pre-printed canvas and lots of pre-cut strands of yarn.  You also get the tool.  It took me a while to fathom out how the hook worked as I wasn't following the instructions correctly, it's actually really easy so I thought I'd show you too.


Here's the yarn you get with the kit.  You could of course buy a latch hook, some yarn and a piece of canvas and make up your own design.  There may be freebies on line too.


You hook onto the horizontal bars, not vertical which I'm cunningly showing you in this sideways picture above that makes it seem like I'm lying!


The hook goes all the way under a double "thread" and the hook is open.  The movable part of the hook needs to be on top of the "threads".


Wrap your yarn around the hook...


Then put the two ends of the yarn under the hook.


Then simply pull through.  It will form a little knot like this.  There's a name for this knot but it escapes me.  Pull the yarn ends to tighten and move on.  It gets a bit painful on the hands, not from the action of hooking, but where my hands are rubbing on the canvas.  It's a lot easier when I've got some done and can rest a hand on it.


Sunday, 1 December 2013

Beaded Robin

I had a little kit for a cross stitch which came with a 3" plastic hoop for framing.  I didn't much like the project so had a quick look in my books for a different design.  I found one in Picture It in Counted Beadwork.  This little fella is made from size 11 seed beads.  The book said to use Mill Hill beads but I had Mikiyaji and they seemed to work just fine.  I've never done counted beadwork before, but it was simple.  I used 14 count Aida to go with the size 11 beads and it was simply a case of doing a half cross and threading on a bead.


Yes, I know, that hoop is not plastic, it's felt.  I didn't like this design in the hoop, not sure why.  Rooting through my drawers (of the chest-of-variety, I don't keep craft supplies in my (UK) pants) I found this felt frame that must have been free with a magazine.


Mr Penguin looks quite happy to be in it.  I did a running stitch round the circle and then blanket stitched round the edge.  It took forever.  Well, about an hour.


I wasn't watching my stitches on the back, but I think they blend in well enough.

Sick of Christmas decorations yet?  Tough...

Monday, 25 November 2013

playing with fimo

Following the craft class, I wanted to try some more polymer clay techniques I'd had my eye on.  The first is an imprint technique from the book Patterns in Polymer by Julie Picarello 


I created a layered stack and then used various items to imprint it.  I didn't have many items I could use, I need to keep a good eye out and maybe visit B&Q.   Above I mainly used cutters, but the crosses are a screwdriver, the circles at the top are from a spool and the wavy lines are a cutter.


This really terrible shot is of the layers.  I can't get a decent in-progress shot of some crafts, like polymer clay, as I do them downstairs in the dining room which has a special film on the window so people can't see in.  It means that the light is also blocked.  Working on a garish cutting board doesn't help either!


The idea is to cut thin slices.  I didn't succeed with that!  Most of mine were wedges or about 10mm thick!  Here's a couple of the slices.


Don't you think this one looks like a frog!


I cut a couple of decent areas out with cutters and I'll turn them into brooches.  The failure of this made me want to try again, but this time I started at the beginning with something a bit more basic from the same book.


Not so bad!  But they're also very thick.  I wish I hadn't cut the large one out so asymmetrically.


I then pulled out The Art of Polymer Clay Millefiori Techniques by Donna Kato.  The striped cane was fine.  What I did with it... not so much!


OK, so back to an old technique that I know is a success.  I've made these before, but not in blue.  I am going to make them into necklaces, the small round ones are beads which have been pieced through the sides.


Still managed to make a mess of this though!  So the marks?

Friday, 22 November 2013

craft class fimo

Guess you can't guess where I went to a craft class?  Yep, The Bead Shop Nottingham.  This was was using foils with polymer clay.  I can't remember what the foils were called but they were thin sheets which you could rub onto the clay before it is baked.


The photos aren't brilliant as I really struggled to capture the shine from the foils.  I used pale blue and dark blue clay and different colours and patterns of the foils.  As you can see, the foil didn't transfer completely.  I found it really hard to get the foil to transfer.


I do like the cracked and crackle effect that you get with these foils. 


Of course, I also played with the blue foils.  One was solid blue, the other a very garish holographic effect which was too much as a sheet but works well on these small shapes. 


I cut the hearts using heart cutters and poked a hole in each one as I'd like to make a dangly necklace.


The tutor also showed us how to do rolled beads.  The blue ones aren't that great, I'm not keen on the colour of the clay.  I rolled over the foil after it was applied with an acrylic roller.  That flattened the clay a bit and so broke up the foil.  I do like that effect.


I much prefer the black ones though.


I struggled to get a good photo of these too, but I think this one isn't that bad!

Tuesday, 19 November 2013

french knitting

You may have noticed that I didn't do a Wipocalypse post at the end of October.  No?  You didn't notice?  Didn't think so... I'm under doctor's orders not to put myself under any stress whatsover and even though it's a self-imposed challenge with no real consequences, I can't help getting competitive (with myself?) so I'm going to do the next, and final Wipocalypse round up at the end of December and whatever I achieve, I achieve.  

That was my rather long link into a post about French Knitting, or Spool Knitting as I believe it's sometimes called.  I acquired this little bee French Knitter at Harrogate last year and have been pondering it for a while.


I started with some lightweight DK yarn.  I love the texture and pattern, but I'm not really sure what it could be used for.


My real objective was to use wire to create jewellery, perhaps with beads trapped inside.  It didn't work out.  The silver wire is very fine, 36 gauge I think, and didn't hold its shape at all.  I moved on to 28 guage, but still no success.  I'm not sure if the problem is the shape of the pins at the top of the spool.  Has anyone tried French Knitting with wire?  Did you succeed?  I could do with some tips as I would like this to work!


As the wire was such a flop (literally), I thought I'd try with some other materials I had to hand.  The green one is 1mm rattail and the bottom one is cord.  I quite like them, but again, I don't know what I'd use them for.


The photo below shows the rattail and cord version with the yarn version.  The yarn provides a much tighter weave though I wasn't pulling any harder or knitting any more tightly. 


Hmmm, I'm going to go back to pondering French Knitting.


Tuesday, 5 November 2013

Texturing Metal - craft class

Good morning ladies, I hope you are all well this Bonfire Night morning.  Not really sure if Bonfire Night morning makes sense.  All the fireworks seemed to happen round our way at the weekend.  When they started I went rushing out to see if the buns were OK.  They just looked bored with it!

On Saturday me and my wonderful mum went to another class at The Bead Shop, Nottingham.  It's a good thing they keep adding classes or we'd have to find something else to do!  This class was texturing metal.  It was an experimental class rather than a class where you go away with a finished piece.  This has been on my WIP list all year since I got some hammers for Christmas, but it was good to get some advice and tips.


We started off making some coils.  The silver one is 1.5mm wire and the copper one is 0.8mm, though we used 1mm too.  Once we'd made some coils, we had a good old bash.  We used a chasing hammer and there was also a Beadsmith hammer with interchangeable heads to give patterns.  I wasn't keen on that on the wire, I think it'd be better on sheet metal.  Above the silver one has been bashed flat at the top, then textured.  The bronze one is also hammered flat.


I used two different heads on each side, this one gives it a bit of a shimmer.


Next we moved on to colouring the copper with a heat gun.  I always thought you needed a torch for this so it was good to know I can use my trusty heat gun.  Heating for different lengths of time gives a different colour finish.


Here I was experimenting with heart shapes - the one on the left is a clear winner.  All were hammered flat.  The left one hasn't been heated at all, the middle one heated to an amber colour and the one on the right to a purple/blue colour.

The class was really interesting and now I need to get my hammers out and have a bit of a go!  Better get the dining room sorted out so I have a table to work on...

Thursday, 24 October 2013

Thermomorph - something completely different

Good afternoon ladies.  I wanted to get this post written on Tuesday when I had my day off, but I just ran out of time so I'm running a bit late.  I've got something different for you today - ThermoMorph by polymorph.

I was sent this product free of charge by polymorph in exchange for a review, however all views are my own and I was not compensated (apart from the free product).


So what is it?  It's a tub of little white granules of plastic.  The idea is that you heat them up and you can mould them.  When they cool down, they're rock hard, but they're completely reusable so if you don't like what you've made, you can heat them up again and start again.

You can find more information about the product on Thermomorph's website


I got a big pan out of the cupboard and some tongs.  I filled the pan with boiling water and waited for it to cool down to around 60 degrees (C).


Here are the granules in the pan.  They look a bit like rice.  When they start to melt, they turn clear.  The instructions said to take the newly-formed clump out of the pan when they get to that stage and leave it to cool.  So I did as I was told.  I found that within minutes it was setting, so back in the pan it went.


I started by moulding a little bunny.  And this is where I first hit a snag.  If I allowed the thermomorph to cool at all, it started to set and I couldn't do anything with it.  I found the only way to work with it was to leave it in the pan, take out a bit and form it, drop that bit back in the pan and try to keep it away from the main clump, pull another bit off, mould etc etc.  Not the easiest way to work, and a bit painful as it was very hot.  I also found the bunny starting to melt when I was trying to fix him together.  The ears were a lot thinner than that to start with.


I left him to set.  His head fell off.


Time to try something new.  I flattened a piece of Thermomorph and stamped into it.  That worked really well.  It's kind of hard to see in the picture below as the set product is quite glossy, but the stamps imprinted perfectly.  The only problem I had was that I couldn't cut them out, I didn't have time before it started to set to stamp it and then cut round it.


Whilst I was playing, I also made some plain lumps to try some finishing techniques on later.


I cut this one with scissors as it was turning to the set stage.  It was fairly easy to cut, but hard to make it neat.

A few days later it was time to try the finishing techniques.  The tub suggested you could carve it.  I tried with a craft knife, a scraper board tool and a lino cutter.  I couldn't not carve it.  No photos of that as it would be a picture of something that has not been done!  I did manage to stamp it.


One major snag.  I used dye-based ink as I knew pigment ink wouldn't work.  It stamped OK, but even the next day it still wiped off.


3d paint?  Yep, that worked... not sure what I'd do with it though in light of the moulding/carving problems.  OK, last technique...


Acrylic paints.  Yep, they worked a treat.  So, what conclusions have I come to?  I found it very hard to work with and so difficult to know what to do with.  I think I have found a use for it though as when it is set it has a lovely glossy sheen to it and the acrylic paints look lovely.  I'd have to mould very simple shapes, possibly stamp them, and then paint them.  

I don't think it's suitable for children as it was actually very hot when I was moulding it.  The instructions do say to leave it to cool, but when cool it set... bit of a catch 22.

Perhaps I'm missing something?  Do you have any thoughts of what I could have tried with it?

Anyway, if you want to give it a go yourself, here are the details:

Product Name: Thermomorph
Price: £19.95
Size: 500 grams
Material: Polymorph granules

You can buy it here.