Showing posts with label bunnies. Show all posts

Friday, 3 March 2017

Some more sashiko

I wanted a break from my Mellerstain Parrots, so, instead of choosing one of the WIPs from my list, or one of the kits from my list, I dug in my drawer and found something else completely!

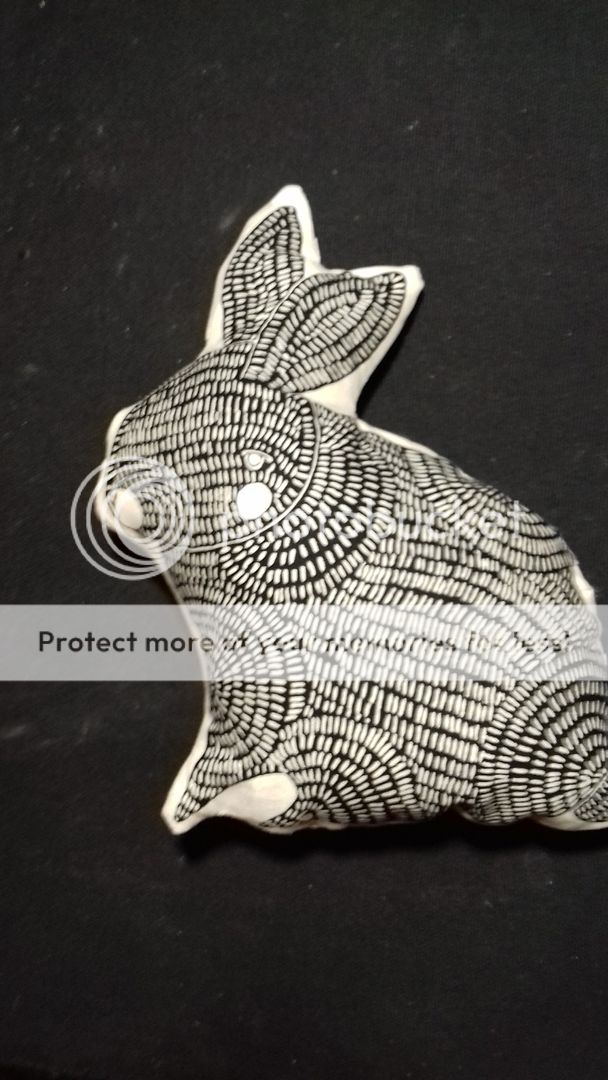
I bought this little Sashiko panel at the Knitting and Stitching Show in Harrogate back in November.  Having finished it by the start of March must be some kind of record for me!  I bought it from the Japan Crafts stall, you can buy it here.  As I had Sashiko thread and needles at home, I just bought the panel.  I think mum bought a kit of one of the other designs, I'm sure I'll come across it when I get round to sorting out more of her stash.  

Anyway, it only took a few evenings.


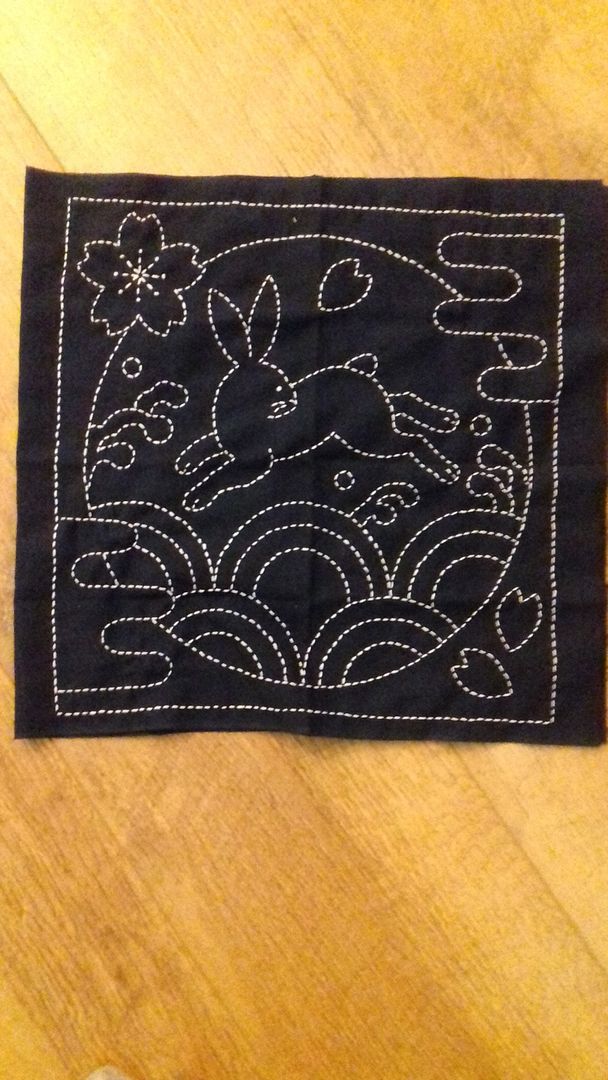
I took a photo before I began of the pre-printed fabric, but it disappeared from my phone.  As the lines were marked in white, I had to be careful to cover them completely, but I still found stitching it very leisurely using the technique of loading my needle with several stitches before pulling through.


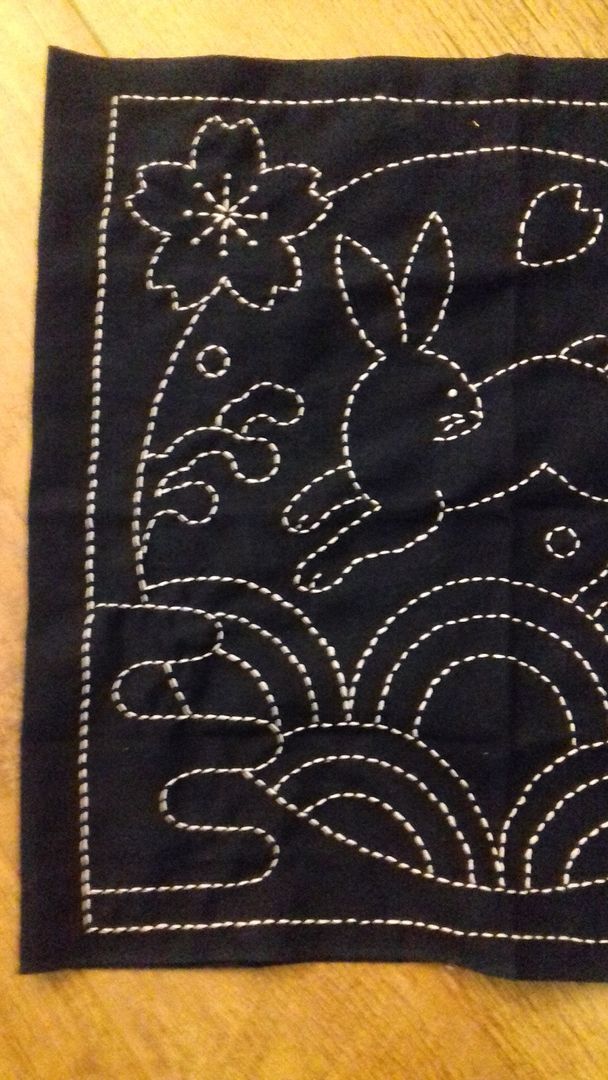
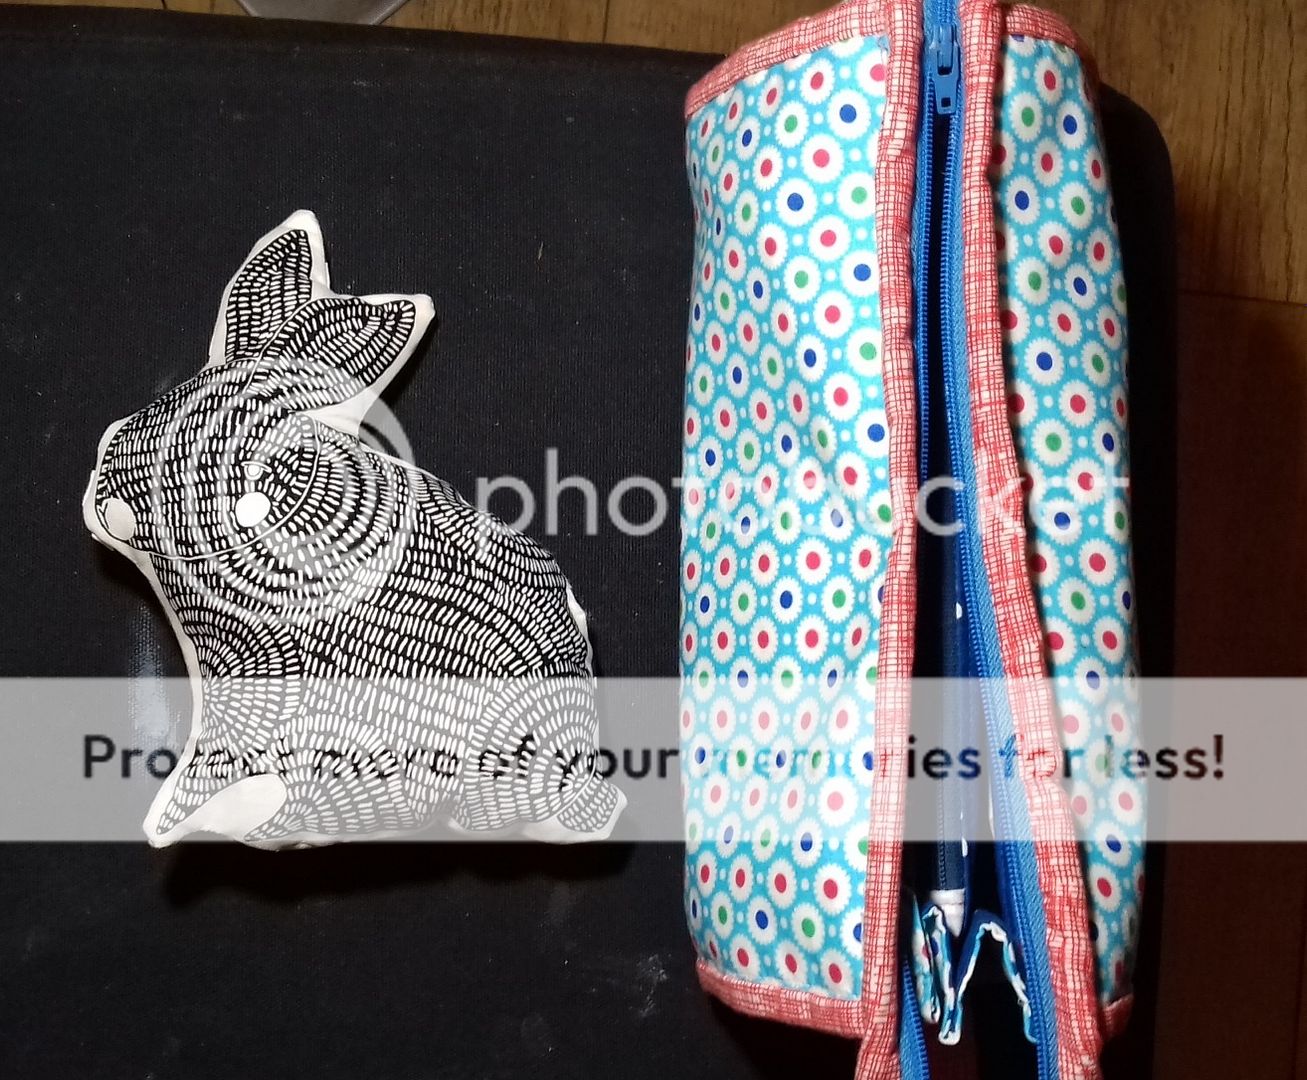
My stitches are far from perfect, but I'm happy with it.  Now just to decide what to do with it - probably a cushion.

Thursday, 23 February 2017

tiny kit finish

Remember I'd listed 17 kits for '17? Well I finished one!  OK, it's the smallest kit ever and took about 4 hours...


It was a cover gift with an issue of CrossStitcher magazine, in 2016 I think.  I'm not sure what I'll do with it, possibly add a ribbon loop and hang it on a drawer handle.

One down, 16 to go...

Friday, 3 February 2017

a bookmark and a bunny

I must have finished this at the beginning of January.  I know I was planning on showing it to mum when I next saw her, but then I never did.  I think now that mum has gone, you really are the only audience for my makes as very few people are interested!


This is a Michael Powell design, I bought the kit from his stall at Harrogate.  I've always wanted to stitch one and so I went with a bookmark as that was within my budget.


The two pictures above show the bookmark with all the cross stitch done.  Doesn't look great, does it?  All you need to do is add a little magic... i.e. backstitch...


Much better!  The kit included the tassel to add to the top, and the felt for the backing.


I just carefully stitched this in place so it was neat on the front, not so neat on the back, but considering no one will ever see it, it doesn't really matter!


I bought a panel and a layer cake of Thicket a while ago.  I finally got round into making one of the bunnies up into a simple little stuffie.


I used my Sew Together bag to give you an idea of scale, because of course everyone has one?!?


And here's his back side.  Thankfully clean, unlike poor Harry's.

Saturday, 24 December 2016

Christmas cross stitch

Happy Christmas Eve!  It makes a change not being at work on Christmas Eve!  Last night I finished off my last Christmas card. This year I made and sent a grand total of 3 Christmas cards... to be honest, I'm amazed I made any at all the way the past three months have been.  But things are looking up...


Some of you may have seen this work in progress on Instagram.  I got it finished...


Then I made it into a card.  Unfortunately, the photo was on my phone and my phone just inexplicably died on Tuesday.  I can't remember if there were other photos I hadn't uploaded to Photobucket, so I may be missing others.  You'll just have to imagine it!


I made this one whilst spending a lovely 3 days with my parents at my brothers' house with him, his wife, stepdaughter and my 4-year old nephew.  I added eyelets to the corners and a simple peel-off greeting.  All the designs are from issues of CrossStitcher (the UK mag), but I can't tell you which ones as I don't keep the magazines, just the patterns I like.


This one took AGES to stitch.  I didn't think I'd get it done in time.  The backstitch went on forever!  Luckily it's for my parents so I can take it round today.

I'd like to wish you all a wonderful Christmas, or, if you don't celebrate, have a lovely weekend.  Thanks for all your support over the last few awful months.

Thursday, 3 November 2016

bunny quilt

I have been collecting bunny fabrics for a few years now.  I haven't actually bought many this year as I already had so many (a noteable exception being Critter - linked to a random UK shop as I can't remember where I bought it!).  I have over 100 FQs or scraps with bunnies on:


Some I've bought, some were bought for me by Mr CA one Christmas and some were gifts from friends and quilt buddies.  I sorted them into rainbow order.


Then at October's EMMQG meeting I began sewing.  I had to figure out the dimensions I wanted as I'm not following a pattern.  I started with 2" and 3" centre squares, I just couldn't make it work with one size only, but as I only have a vague plan, I'm sure it'll be fine!


I stitched some of the greens and all of the purples into polaroid blocks.  They will be set wonkily into background squares.  I bought some navy spot fabric for this project, but now I'm wondering about Kona solids in a variety of colours... I'm sure it'll be a while before I've finished them so plenty of time to think about it!


I can't see the purple ones in this picture, I hope I didn't leave them at the guild meeting!  I only have about 5 as it's hard enough to get purple fabric, let alone purple fabric featuring bunnies!

Friday, 26 August 2016

More finishing things off

I did a post a few weeks ago about some languishing UFOs which I'd finally finished.  Well I've finished some more.

This bead embroidered pendent was made in October 2015, you can see the original post here.

When I was putting pendents on chains the other week, I tried this one on a chain, but it wasn't right.  it needed something different.  I thought I'd try a beaded rope so I got out some suitable seed beads and my copy of Seed Bead Stitching by Beth Stone.


The photo above shows the samples I made.  On the left is a spiral which just didn't look right, I can't remember what the middle one is, and the one on the right is a peyote tube.  I really like the peyote tube but it was too big for this pendent.  Instead I chose a tri-stitch from Bead Play everyday, also by Beth Stone.


I didn't take a close up of the beaded chain but it is quite delicate.  I've worn this a few times recently.


I can't find the origins of this project.  It was cross stitched a long time ago, at least 4 years I think.  All it needed was stuffing and the turning gap sewing up.  I'd neglected it so long as I'd cut the linen too close to the seam and it was fraying.


I put lavender in it and sewed it up as best I could.  It now lives in my knicker drawer so I don't suppose the messy seam matters.


Finally I have this rather strange bunny to show you.  Again, I can't find a post about him, but I think I made him before my nephew was born and he's 4 now.


I made the pattern up myself, I have no idea where I got the idea for such a weird bunny from!  The pink bits on the ears are appliqued and I embroidered a face, but I used a pale pink so it's barely visible.


All I had to do on this fella was stuff him, sew up the turning gap and sew on his tail.  There were three different pompoms with him so I selected the one below.


I wasn't sure what to do with him, I was just pleased to get him out of the UFO basket (or rather drawer, though I do have UFO baskets, and bags and piles...) so he lives with my Jellycat bunnies in the bedroom.

I've got to keep on top of this finishing off, I must have scores of UFOs... 

Sunday, 5 June 2016

Speed Craft #3 - Concrete

This is my final post about Speed Craft at Debbie Bryan.  To see the other posts, just scroll down a bit.

Table three was a very unusual one.  It was concrete art with Bethany Walker,  It's well worth clicking on that link as her work is so original, I'd certainly never seen anything like it.

We were presented with a table of bits and bobs - wools, paper, buttons, felt, threads.  We started with a plastic container, just a standard take-away container - and made a picture in the bottom.


This is one of those photos where no matter that I've rotated it, Blogger insists you view it sideways.  I'm pretty sure you can still make out that it's a bunny though!  The green bits of wool are grass and the red fluff are flower heads.


Next we poured on concrete and then left it.  We didn't collect these for about three weeks and had no idea how they would turn out at all, this is definitely a very experimental technique rather than one which gives precise results.


Here's how it turned out.  Not so well!  I think the concrete seeped underneath quite a bit.  The bunny's button tail disappeared, as did a lot of his outline (white was not a good idea for thread colour there!) and the flower stems.  I took a nail to it (I nail that you hammer in the wall, not a finger nail!).


Bit better?  I didn't want to scrape away too much concrete as I was afraid it would all just fall out!  I'm not so happy with that bit of grass that migrated and now appears to be coming out of the bunny's bum!  You can also read the name of the packaging company at the top and the see the recycling symbols at the bottom.  I tried to scrape them away but didn't have much success.  Ah well, let's call it done!

Saturday, 5 March 2016

counted beadwork

I got a little counted beadwork kit for Christmas.  It is from Ann's Orchard Needlework and is, perhaps not surprisingly, a picture of a bunny.


It is basically half cross stitch, but you slide a bead onto the thread with every stitch.  The rabbit and flowers are size 11/0 seed beads, the background is tapestry wool, also done as half cross stitch.  I think that's called tent stitch.


It took just a couple of hours, but I quite enjoyed it.  I think I have a book of counted beadwork that I picked up in a charity shop, I should perhaps dig it out as I certainly don't have a shortage of seed beads!


Wednesday, 20 January 2016

Luna Lapin

At the Knitting and Stitching show in Harrogate in 2014 I feel in love with Luna Lapin, and bought the kit.  Mum fell in love with her wool coat, and so did I, so she bought it for me!  I started making Luna back in August, and I showed you the completed bunny, without face or tail, back in December.  

Well, not only does Luna now have both face and tail, she also has clothes!


The dress kit came with the coat and I much prefer it to the t-shirt dress the Luna kit comes with, so I made this one.  I did mess the collar up a bit, but it's not really that noticeable.  There was a lot of tiny, fiddly binding with this one, the neck seam is bound as well as the hem of her dress.


I also did a pretty bad job with the buttons, they're not actually that skewed, her dress isn't on straight, but the top button is in a funny position.  That doesn't matter though as she has her coat on, even in the house!


Ta dah!  Looking back at the website where I gave you the links at the top, I've done the buttons wrong!  Ah well, never mind.  I love this coat and would wear it myself, if it weren't so small I can barely get my big toe in the armhole...  It took me hours and hours and hours to make.  I did my very best sewing and even so it's not perfect.  I love the little details like the bands and buttons on the sleeves.  I used my new machine to sew button holes for the first time and it was fine on the dress and sleeve bands... then I came to do the main buttonholes.

I had a real job!  The sleeve was getting backed up behind the foot and stopping it moving properly so they were all different lengths, and some bad planning on my behalf meant they weren't properly lined up or were wonky.  In total, I sewed a total of 20 button holes and unpicked 16!


I'm happy with that back pleat though!  I should have taken a photo of the inside - the hem is all bound, as is the neck seam. Again, fiddly, tiny binding!  Despite the faff, I really enjoyed making this and would like to make another Luna with some different clothes.  Having looked at Cool Crafting's website, I see more clothes I want but I'm not the type to change the clothes on a toy so I'll need more rabbits!

Friday, 27 November 2015

Speed Craft #5

This is my final post on the fab day that we had at speed crafting last month.  To see my previous 4 posts, scroll down and then follow the links.

Our final table of the day was perfect.  We were tired from all the frantic crafting and we got to sit down and just stitch.

We were provided with a hoop, a piece of aida for backing and then a wide selection of threads, yarns, lace, crochet lace, lace motifs and scraps of fabric.  We were unleased to stitch whatever we wanted.


I wanted to stitch bunnies.  We only had 45 minutes so it's a simple portrait of two of my buns, sitting on grass made of a piece of aqua lace, with lace flowers and a lace heart.  I love it!  It's a dinky 4" and fits in with my gallery very well.


This is the first time I've added anything to my gallery for ages.  I still have tons of embroidery hoops, if only I had the time.  

I love being a multi-crafter, but it is hard to get all those ideas out of my head, all the kits made, all the patterns followed, all the crafts tried.  It's a hard job but someone's got to do it!

Monday, 23 November 2015

Speed Craft #4

If you've missed my previous post about Speed craft, scroll down to the previous post and follow the links at the top.

Our fourth hour of crafting, after a lovely lunch, more cake and more coffee, was mono printing.  This was the messiest table of them all, messier even than the ceramics table.  It involved big bottles of paint/ink, sheets of paper and hand cut templates.


Basically, you put a big squirt of paint on a board, use a roller to roll it all over your paper, add templates and roll again in a different colour. You can then write or draw in the paint to add detail.


This was fun, but I couldn't get into it.  I couldn't seem to let myself go and just make a mess, I was too worried about the final outcome, which is stupid really.  The pictures the tutor made were brilliant, but then she was a fine artist!


Next up: Simple Stitching

Saturday, 29 August 2015

Luna Lapin

Last year at the Harrogate Knitting and Stitching Show I bought a kit to make a Luna Lapin.  You may have seen these around blogland and on Instagram.  One Saturday I had some sewing machine time so I decided to get started on her.  After sewing the head, all the steps were for hand stitching, so she came down stairs to be my sofa project.


I didn't get much done on the sofa, just a couple of legs and the head so she came on holiday with me 2 weeks ago.  I spent some lovely early evenings with my family, stitching on Luna over a cafetiere of coffee (decaff of course) or 20.  I was quite surprised to have got this far.


Looks like she's quite surprised at something too!  I still have to stitch her eyes and nose and add a tail, then it's on to the clothes.  She came with the pattern for a t-shirt dress and the Liberty fabric to make it, however here ear/feet Liberty fabric was brown, so I used the blue for that!  I do have this pattern that wonderful mum bought me to make a dress and felt coat, so I'll make her those clothes instead.  I really hope they're sewn on the machine though, I've got too much cross stitch and embroidery to do for it to be another sofa job!

Thursday, 23 April 2015

A daft little cross stitch

2015SmallsSAL

I'm joining in with the Smalls SAL again this month.  I doubt anyone remembers, but I've been stitching a series of little bunnies.  Each one was a standalone stitch found on a cover "gift" - one of those "free charts" leaflets that pass as a gift (on the front of a magazine full of free charts!), the only details I have is that it's from Cross Stitch Collection but I have no idea when.


This month I stitched Tiff (and then took a very blurry photo).  The real Tiff wouldn't really wear a dress, I mean, obviously not, she's a rabbit, but as I'm anthropomorphising her, if she were a walking, talking, clothes-wearing bunny, I doubt she'd wear a dress.


Here's all four bunnies together.  When I'd finished, I added their names underneath using an alphabet from Cross Stitch Keepsakes and Cards by Jo Verso.  It felt like it needed something more, so I added the row of carrots using a pattern found in 555 Cross Stitch Designs.  I carefully counted the threads, then counted the number of stitches in a carrot and figured out the spacing in between to have carrots all the way across.  Then I stitched the first carrot and somehow added another row.  I had to re-calculate, but it just wouldn't work out, so the final carrot is half eaten.


I put Ellis in the wrong place, Tiff and Colin don't live together, in fact, when they met, they fought.  Colin was the hardest bunny to stitch due to his colouring.  If you want to know what these bunnies really look like, there are photos in my sidebar, or search my tags for "real life bunnies".


I think Harry and Ellis would be friends if given the chance.  The sit in their runs and look at each other sometimes.  Aaah.  


Thursday, 29 January 2015

smalls sal


2015SmallsSAL

I'm joining in with Smalls SAL again this year.  The idea is that you stitch some of those little projects you have lying around.  For me this mainly means cover kits.

I'm carrying on with the set of rabbits from individual charts which came with a cross stitch magazine years ago (sorry, I've lost the details).  As they're individual charts, I count each one as a small!


This is Ellis, my white bunny.  She's very delicate and elegant looking, so I dressed her in pastel pink and yellow.  


Here she is with the boys - Harry in the middle jumping for joy and Colin on the left waving.  Just Tiff to go and I hope to get that done for February's small.  Then it's just fingers crossed that the arrow drawn in Frixxon at the top will come off!